Replacing cooling system components | 5 |
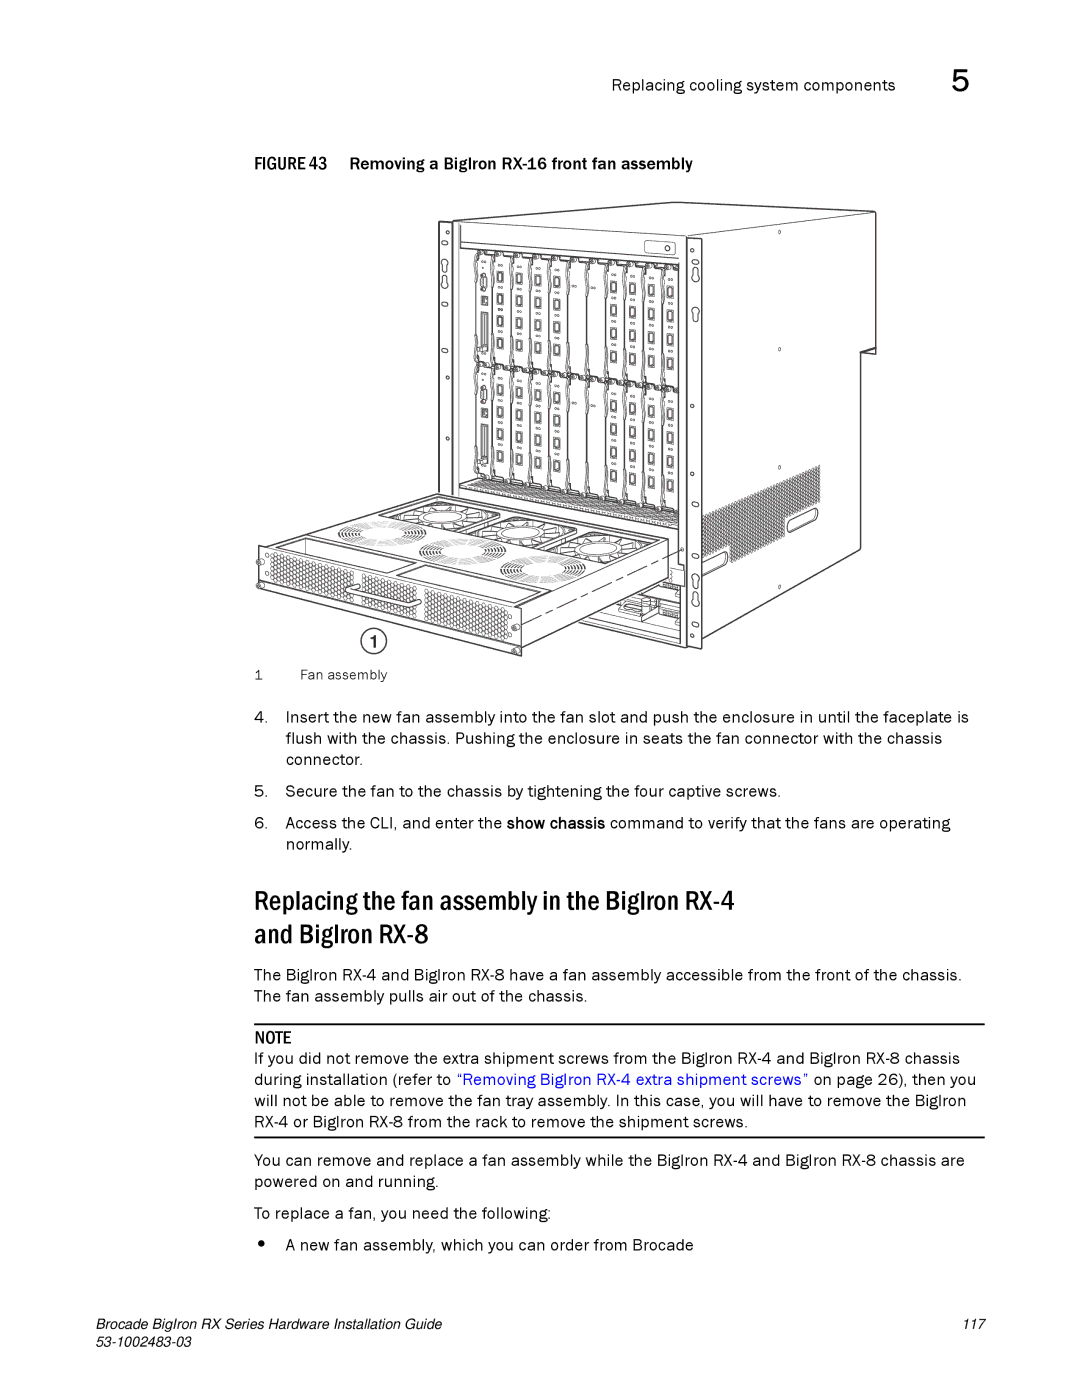
FIGURE 43 Removing a BigIron RX-16 front fan assembly
1
1 Fan assembly
4.Insert the new fan assembly into the fan slot and push the enclosure in until the faceplate is flush with the chassis. Pushing the enclosure in seats the fan connector with the chassis connector.
5.Secure the fan to the chassis by tightening the four captive screws.
6.Access the CLI, and enter the show chassis command to verify that the fans are operating normally.
Replacing the fan assembly in the BigIron
The BigIron
NOTE
If you did not remove the extra shipment screws from the BigIron
You can remove and replace a fan assembly while the BigIron
To replace a fan, you need the following:
•A new fan assembly, which you can order from Brocade
Brocade BigIron RX Series Hardware Installation Guide | 117 |
|