Installing a BigIron | 2 |
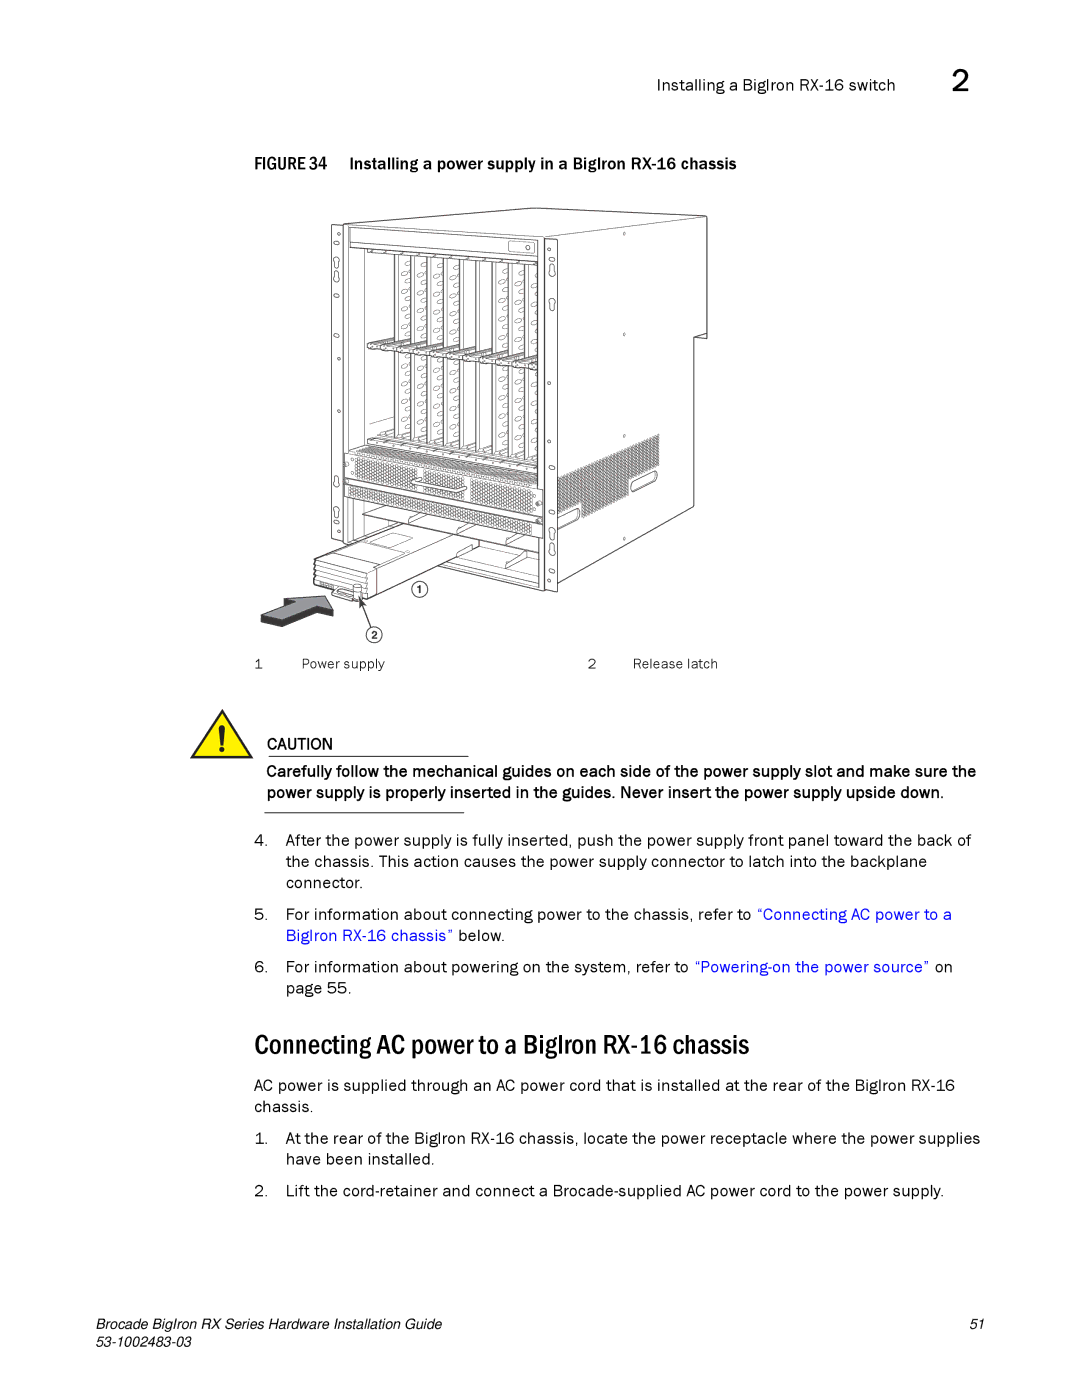
FIGURE 34 Installing a power supply in a BigIron RX-16 chassis
|
| 1 |
|
| 2 |
|
|
1 | Power supply | 2 | Release latch |
CAUTION
Carefully follow the mechanical guides on each side of the power supply slot and make sure the power supply is properly inserted in the guides. Never insert the power supply upside down.
4.After the power supply is fully inserted, push the power supply front panel toward the back of the chassis. This action causes the power supply connector to latch into the backplane connector.
5.For information about connecting power to the chassis, refer to “Connecting AC power to a BigIron
6.For information about powering on the system, refer to
Connecting AC power to a BigIron RX-16 chassis
AC power is supplied through an AC power cord that is installed at the rear of the BigIron
1.At the rear of the BigIron
2.Lift the
Brocade BigIron RX Series Hardware Installation Guide | 51 |
|