Chapter 2 Installing and Removing Power Components
How to Install or Remove Modular Configuration Power Components
Required Tools and Equipment
You need the following tools to perform this task:
•
Note You can use an offset number 1 Phillips screwdriver to tighten the AC cord clamp that was available
Steps
To install the AC cords, go to the rear of the chassis and perform the following steps:
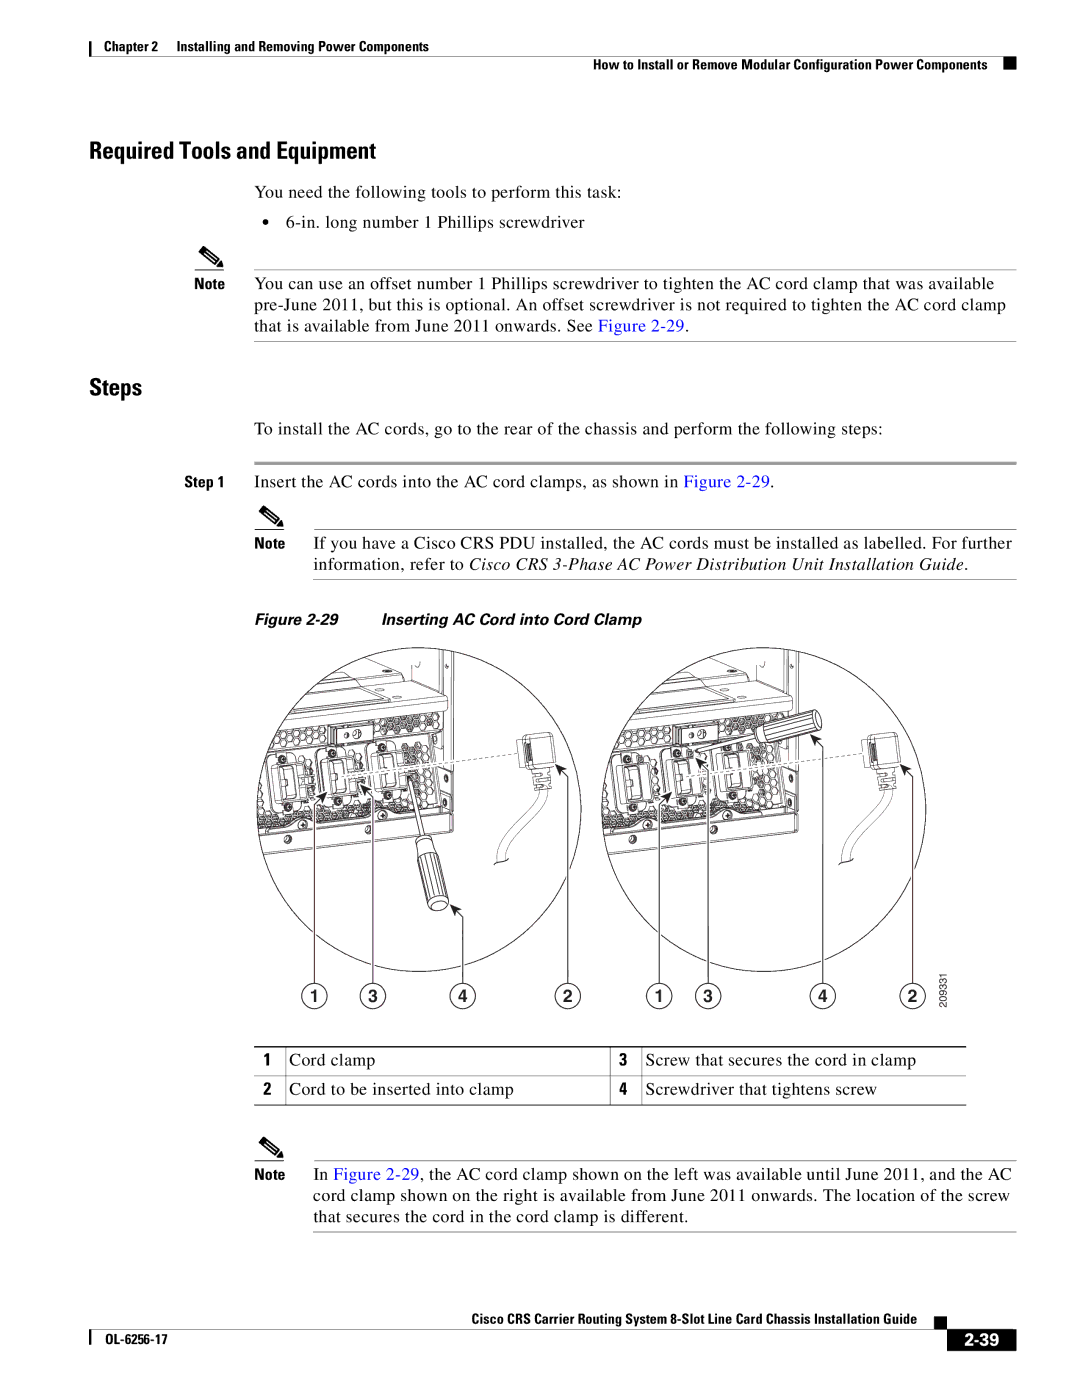
Step 1 Insert the AC cords into the AC cord clamps, as shown in Figure
Note If you have a Cisco CRS PDU installed, the AC cords must be installed as labelled. For further information, refer to Cisco CRS
Figure 2-29 Inserting AC Cord into Cord Clamp
1 | 3 | 4 | 2 | 1 | 3 | 4 |
2 | 209331 |
1 | Cord clamp | 3 | Screw that secures the cord in clamp |
|
|
|
|
2 | Cord to be inserted into clamp | 4 | Screwdriver that tightens screw |
|
|
|
|
Note In Figure
Cisco CRS Carrier Routing System
|
| ||
|
|