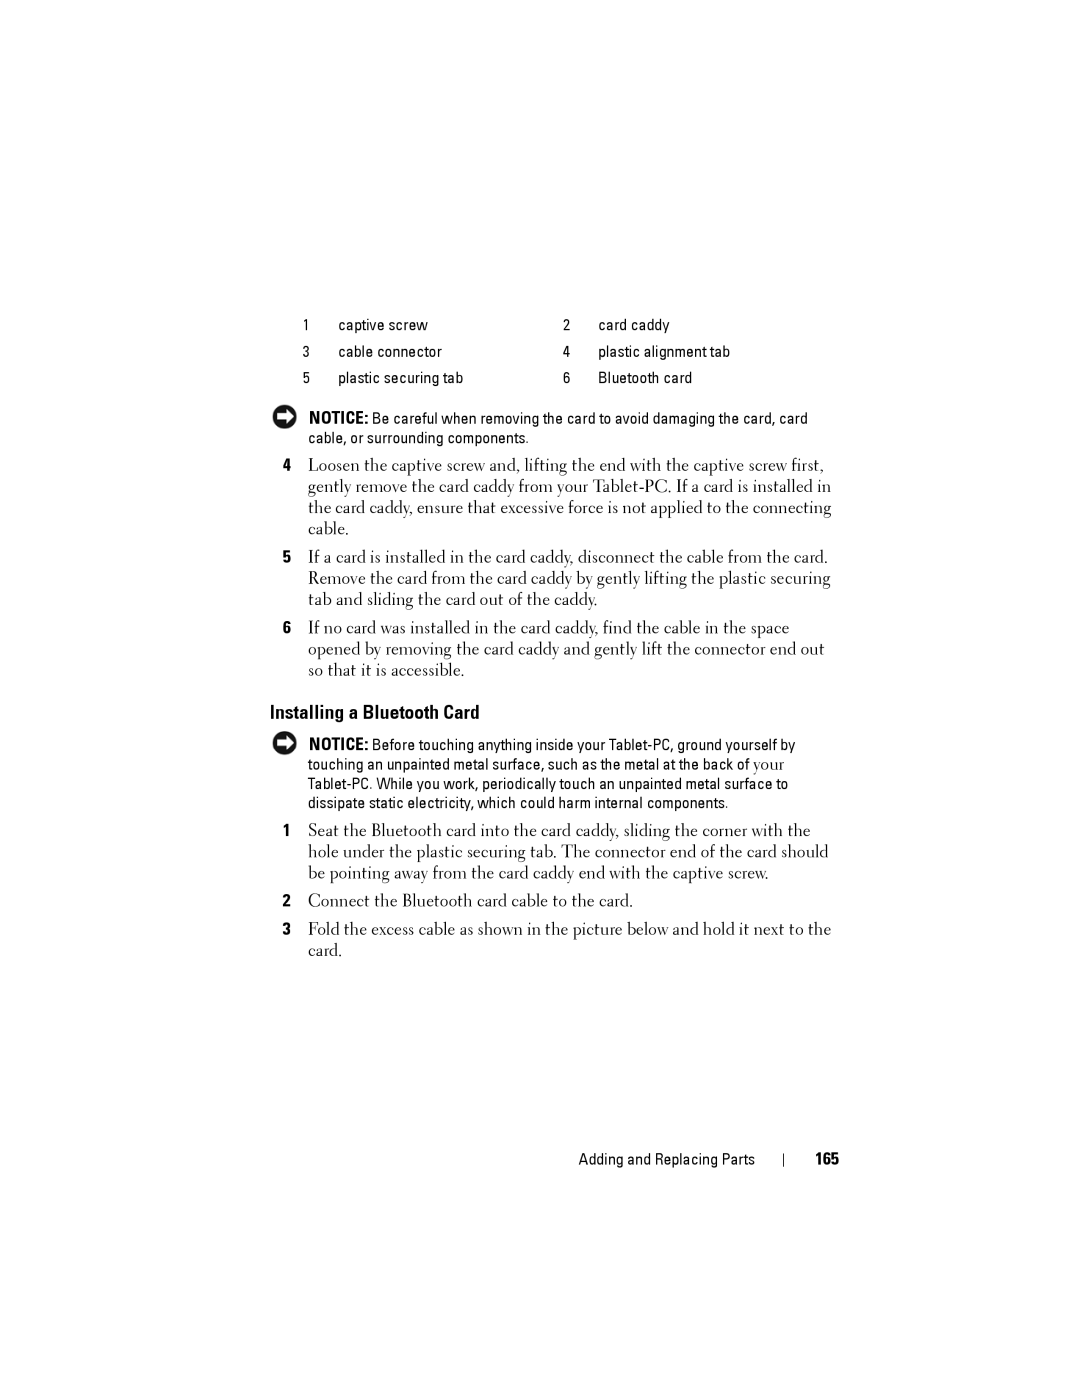
1 | captive screw | 2 | card caddy |
3 | cable connector | 4 | plastic alignment tab |
5 | plastic securing tab | 6 | Bluetooth card |
NOTICE: Be careful when removing the card to avoid damaging the card, card cable, or surrounding components.
4Loosen the captive screw and, lifting the end with the captive screw first, gently remove the card caddy from your
5If a card is installed in the card caddy, disconnect the cable from the card. Remove the card from the card caddy by gently lifting the plastic securing tab and sliding the card out of the caddy.
6If no card was installed in the card caddy, find the cable in the space opened by removing the card caddy and gently lift the connector end out so that it is accessible.
Installing a Bluetooth Card
NOTICE: Before touching anything inside your
1Seat the Bluetooth card into the card caddy, sliding the corner with the hole under the plastic securing tab. The connector end of the card should be pointing away from the card caddy end with the captive screw.
2Connect the Bluetooth card cable to the card.
3Fold the excess cable as shown in the picture below and hold it next to the card.
Adding and Replacing Parts