Using the BayStack 450 10/100/1000 Series Switch
Port Configuration
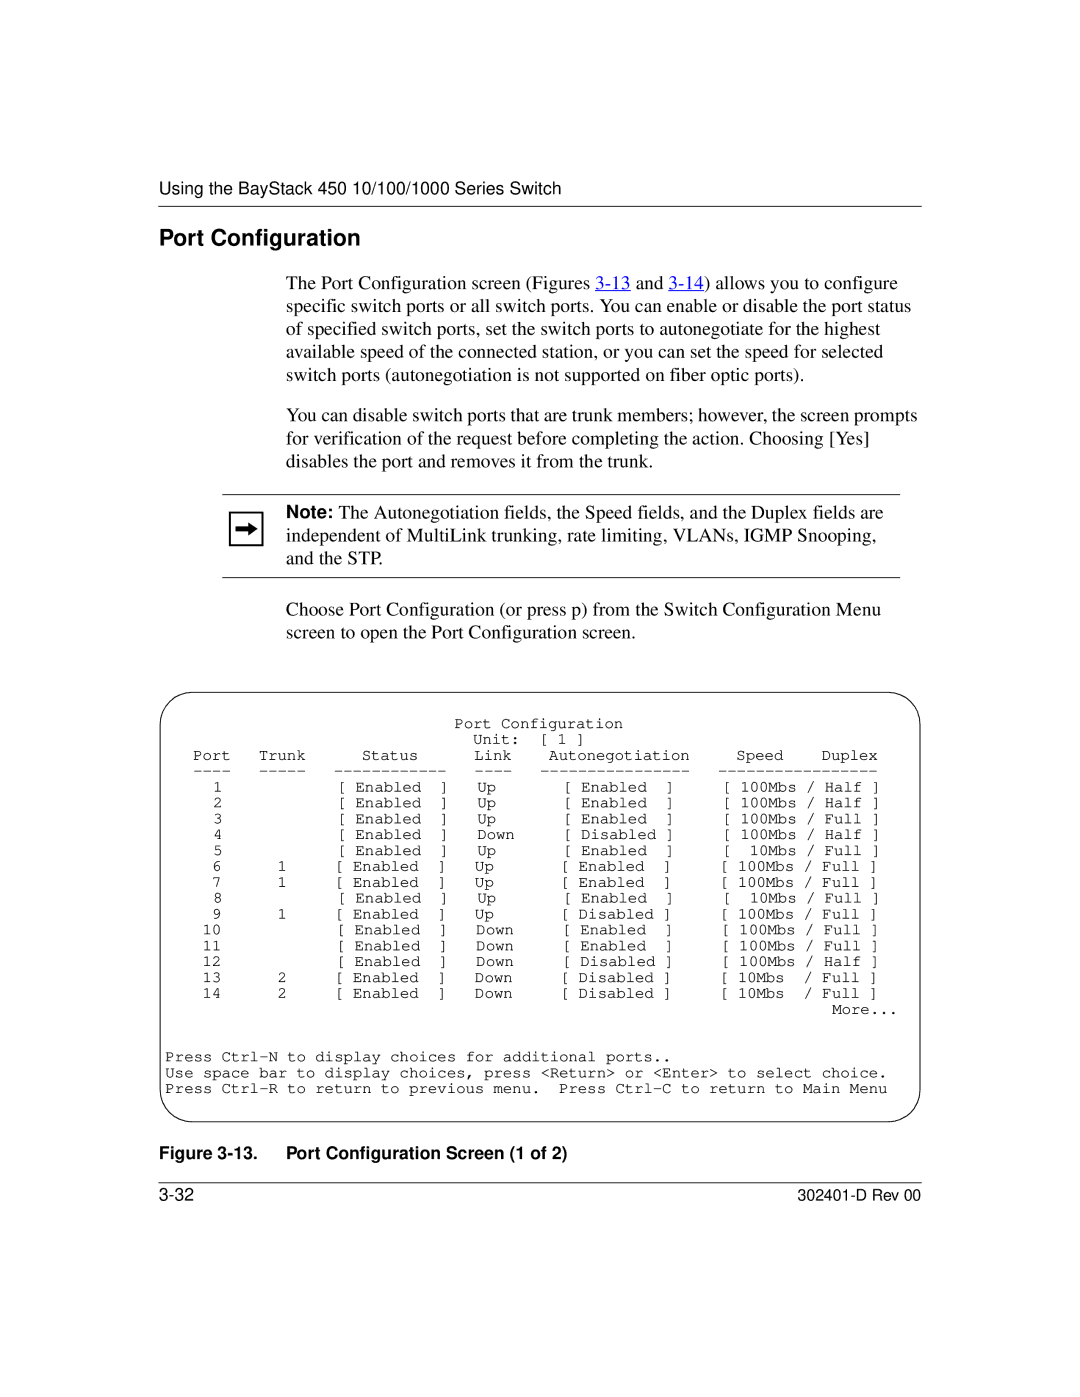
The Port Configuration screen (Figures
You can disable switch ports that are trunk members; however, the screen prompts for verification of the request before completing the action. Choosing [Yes] disables the port and removes it from the trunk.
Note: The Autonegotiation fields, the Speed fields, and the Duplex fields are independent of MultiLink trunking, rate limiting, VLANs, IGMP Snooping, and the STP.
Choose Port Configuration (or press p) from the Switch Configuration Menu screen to open the Port Configuration screen.
|
|
|
| Port Configuration |
|
|
|
| |
|
|
|
| Unit: | [ 1 ] |
|
|
|
|
Port | Trunk | Status |
| Link | Autonegotiation |
| Speed | Duplex | |
1 |
| [ Enabled | ] | Up | [ Enabled | ] | [ 100Mbs / Half ] | ||
2 |
| [ Enabled | ] | Up | [ Enabled | ] | [ 100Mbs / Half ] | ||
3 |
| [ Enabled | ] | Up | [ Enabled | ] | [ 100Mbs / Full ] | ||
4 |
| [ Enabled | ] | Down | [ Disabled ] | [ 100Mbs / Half ] | |||
5 |
| [ Enabled | ] | Up | [ Enabled | ] | [ | 10Mbs / Full ] | |
6 | 1 | [ Enabled | ] | Up | [ Enabled | ] | [ 100Mbs / Full ] | ||
7 | 1 | [ Enabled | ] | Up | [ Enabled | ] | [ 100Mbs / Full ] | ||
8 |
| [ Enabled | ] | Up | [ Enabled | ] | [ | 10Mbs / Full ] | |
9 | 1 | [ Enabled | ] | Up | [ Disabled ] | [ 100Mbs / Full ] | |||
10 |
| [ Enabled | ] | Down | [ Enabled | ] | [ 100Mbs / Full ] | ||
11 |
| [ Enabled | ] | Down | [ Enabled | ] | [ 100Mbs / Full ] | ||
12 |
| [ Enabled | ] | Down | [ Disabled ] | [ 100Mbs / Half ] | |||
13 | 2 | [ Enabled | ] | Down | [ Disabled ] | [ 10Mbs | / Full ] | ||
14 | 2 | [ Enabled | ] | Down | [ Disabled ] | [ 10Mbs | / Full ] | ||
|
|
|
|
|
|
|
|
| More... |
Press
Use space bar to display choices, press <Return> or <Enter> to select choice. Press
Figure | Port Configuration Screen (1 of 2) |
|
|