5. INSTALLATION
5.3 Recording Pen Loading
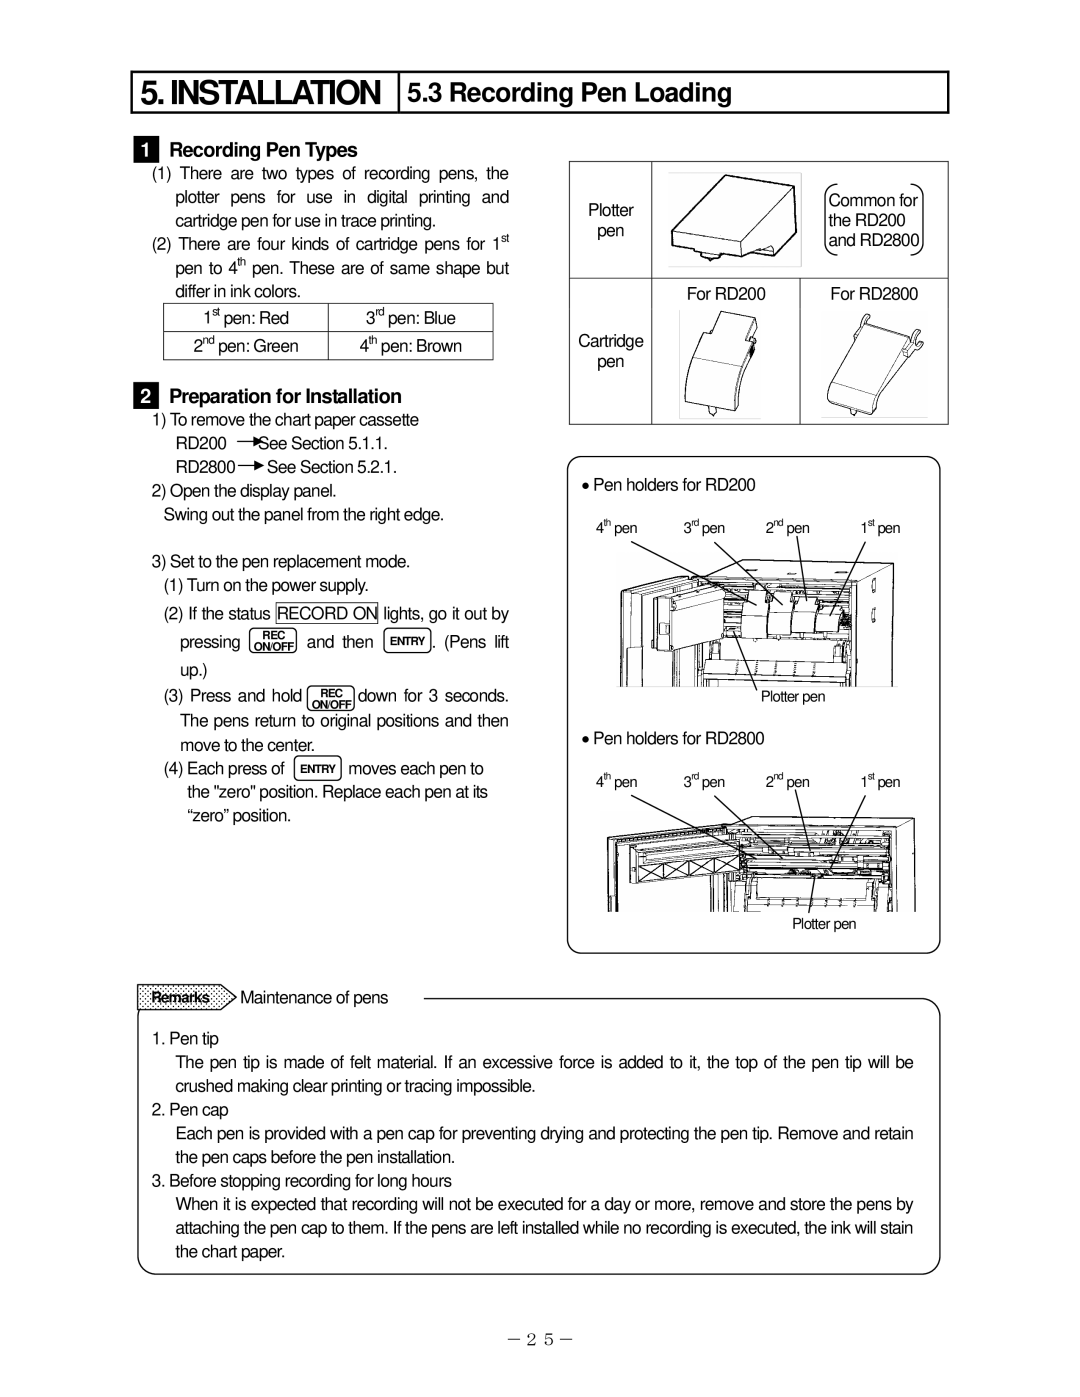
1Recording Pen Types
(1)There are two types of recording pens, the plotter pens for use in digital printing and cartridge pen for use in trace printing.
(2)There are four kinds of cartridge pens for 1st pen to 4th pen. These are of same shape but differ in ink colors.
1st pen: Red | 3rd pen: Blue |
2nd pen: Green | 4th pen: Brown |
2Preparation for Installation
1)To remove the chart paper cassette RD200 See Section 5.1.1. RD2800![]() See Section 5.2.1.
See Section 5.2.1.
2)Open the display panel.
Swing out the panel from the right edge.
3)Set to the pen replacement mode.
(1)Turn on the power supply.
(2)If the status RECORD ON lights, go it out by
pressing REC and then ENTRY . (Pens lift
ON/OFF
up.)
(3)Press and hold ON/OFFREC down for 3 seconds. The pens return to original positions and then
move to the center.
(4)Each press of ENTRY moves each pen to the "zero" position. Replace each pen at its “zero” position.
Remarks Maintenance of pens
Plotter |
|
|
|
|
| Common for | |
|
|
|
|
| |||
|
|
|
|
| the RD200 | ||
pen |
|
|
|
|
| ||
|
|
|
|
| and RD2800 | ||
|
|
|
|
|
| ||
|
|
|
|
|
|
|
|
|
|
|
|
|
|
|
|
|
|
| For RD200 |
| For RD2800 | ||
Cartridge |
|
|
|
|
|
|
|
|
|
|
|
|
|
| |
pen |
|
|
|
|
|
|
|
|
|
|
|
|
|
|
|
|
|
|
|
|
|
|
|
•Pen holders for RD200
4th pen | 3rd pen | 2nd pen | 1st pen | ||
|
|
|
|
|
|
|
|
|
|
|
|
Plotter pen
•Pen holders for RD2800
4th pen | 3rd pen | 2nd pen | 1st pen | |
|
|
|
|
|
|
|
|
|
|
Plotter pen
1. Pen tip
The pen tip is made of felt material. If an excessive force is added to it, the top of the pen tip will be crushed making clear printing or tracing impossible.
2. Pen cap
Each pen is provided with a pen cap for preventing drying and protecting the pen tip. Remove and retain the pen caps before the pen installation.
3. Before stopping recording for long hours
When it is expected that recording will not be executed for a day or more, remove and store the pens by attaching the pen cap to them. If the pens are left installed while no recording is executed, the ink will stain the chart paper.
-25-