9. PRINTING
9.4 Message Printing
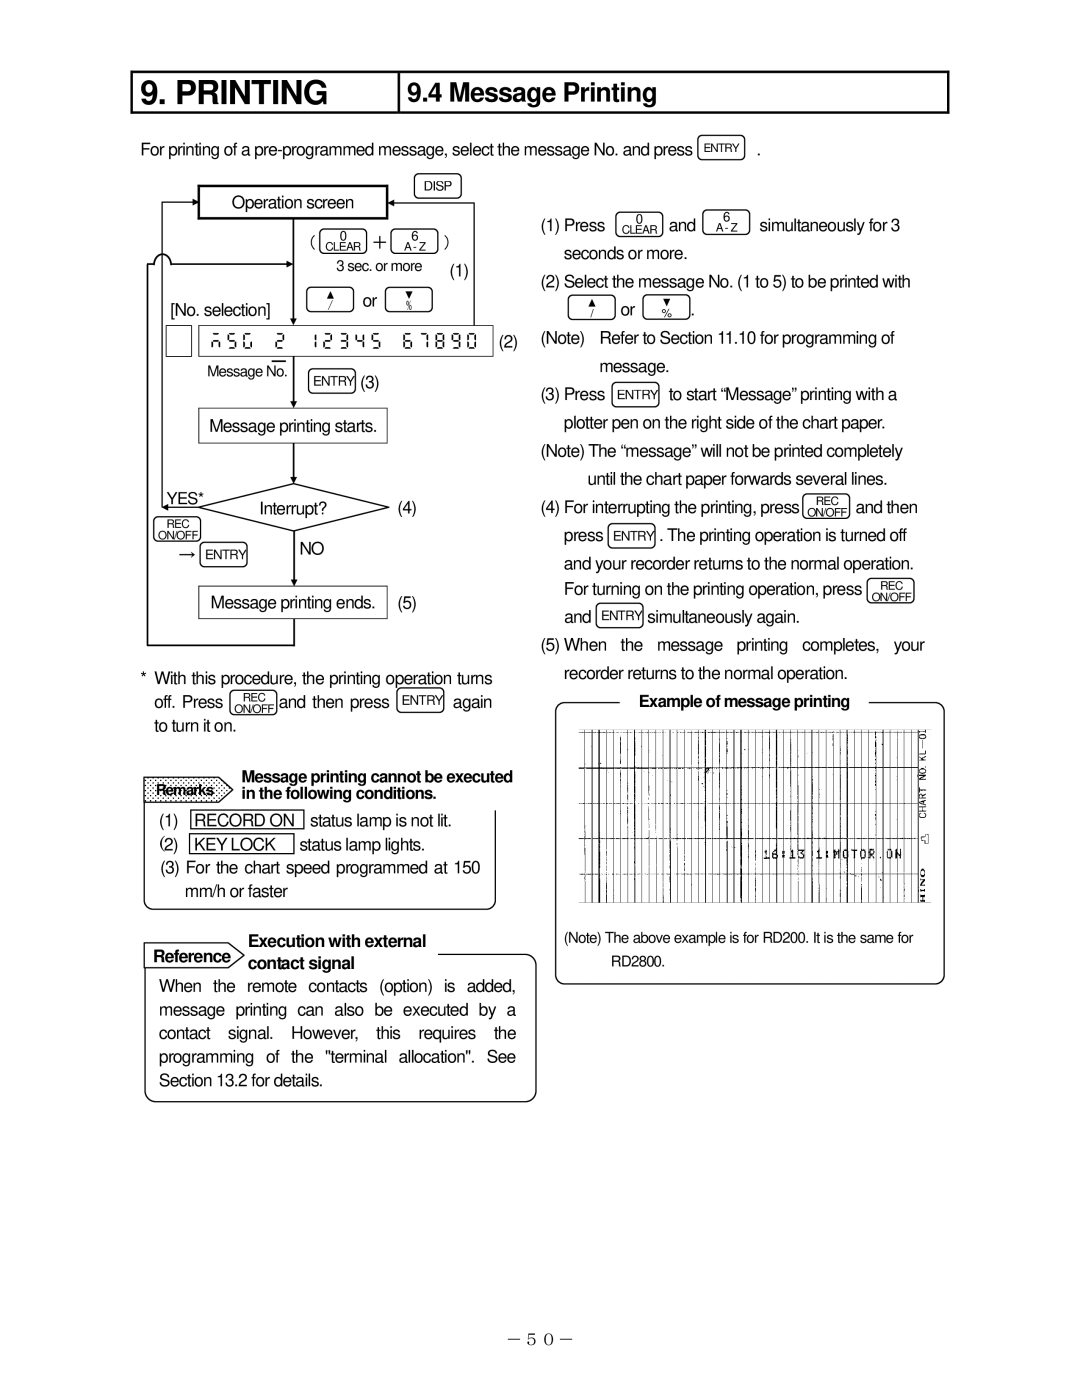
For printing of a
|
|
|
|
|
|
|
|
|
|
|
| DISP |
|
|
|
|
|
|
| |||
|
|
|
|
|
| Operation screen |
|
| (1) Press | 0 | and | 6 | simultaneously for 3 | |||||||||
|
|
|
|
|
|
|
|
|
|
|
| |||||||||||
|
|
|
|
|
|
|
|
|
|
|
| |||||||||||
|
|
|
|
|
|
|
|
|
|
|
|
|
|
|
| |||||||
|
|
|
|
|
|
|
|
|
|
|
|
|
|
|
| |||||||
|
|
|
|
|
|
|
|
| 0 | + | 6 | ) |
|
| CLEAR | A- Z | ||||||
|
|
|
|
|
|
|
|
|
|
|
|
|
|
|
|
|
| |||||
|
|
|
|
|
|
|
|
| ( CLEAR | A- Z |
| seconds or more. |
|
|
| |||||||
|
|
|
|
|
|
|
|
| 3 sec. or more | (1) |
|
|
|
|
| |||||||
|
|
|
|
|
|
|
|
|
|
| (2) Select the message No. (1 to 5) to be printed with | |||||||||||
|
|
|
|
|
|
|
|
|
| or |
|
|
|
| ||||||||
|
|
| [No. selection] | / | % |
|
|
| / |
| or | % . |
|
|
| |||||||
|
|
|
|
|
|
|
|
|
|
|
|
|
| |||||||||
|
|
|
|
|
|
|
|
|
|
|
| (Note) | Refer to Section 11.10 for programming of | |||||||||
|
|
|
|
| | (2) | ||||||||||||||||
|
|
|
|
|
|
|
|
|
|
|
|
|
|
|
| message. |
|
|
| |||
|
|
|
|
|
|
|
|
|
|
|
|
|
|
|
|
|
|
|
| |||
|
|
|
|
| Message No. |
| ENTRY (3) |
|
|
|
|
|
|
|
| |||||||
|
|
|
|
|
|
|
|
|
|
|
|
| (3) Press ENTRY to start “Message” printing with a | |||||||||
|
|
|
|
|
|
|
|
|
|
|
|
|
|
|
| |||||||
|
|
|
|
| Message printing starts. |
|
|
|
|
| plotter pen on the right side of the chart paper. | |||||||||||
|
|
|
|
|
|
|
|
|
|
|
|
|
|
|
| (Note) The “message” will not be printed completely | ||||||
|
|
|
|
|
|
|
|
|
|
|
|
|
|
|
| |||||||
|
|
| YES* |
|
|
|
|
|
|
|
|
|
| until the chart paper forwards several lines. | ||||||||
|
|
| Interrupt? |
|
| (4) |
|
|
| (4) For interrupting the printing, press ON/OFFREC and then | ||||||||||||
|
|
|
|
|
|
| ||||||||||||||||
|
|
| REC |
|
|
|
|
|
|
|
|
|
| press ENTRY . The printing operation is turned off | ||||||||
| ON/OFF |
|
|
| NO |
|
|
|
|
|
| |||||||||||
|
|
| → ENTRY |
|
|
|
|
|
| and your recorder returns to the normal operation. | ||||||||||||
|
|
|
|
|
|
|
|
|
|
|
|
|
|
|
| |||||||
|
|
|
|
|
|
|
|
|
|
|
|
|
|
|
| For turning on the printing operation, press | REC | |||||
|
|
|
|
|
|
|
|
|
|
|
|
|
|
|
| |||||||
|
|
|
|
| Message printing ends. |
| (5) |
|
|
|
|
|
|
|
|
| ON/OFF | |||||
|
|
|
|
|
|
|
|
| and | ENTRY simultaneously again. |
| |||||||||||
|
|
|
|
|
|
|
|
|
|
|
|
|
|
|
|
| ||||||
|
|
|
|
|
|
|
|
|
|
|
|
|
|
|
| (5) When the message printing completes, your | ||||||
|
|
|
|
|
|
|
|
|
|
|
|
|
|
|
| |||||||
* With this procedure, the printing operation turns | recorder returns to the normal operation. |
| ||||||||||||||||||||
| off. Press | REC |
|
|
| ENTRY again |
|
| Example of message printing |
| ||||||||||||
| ON/OFF and then press |
|
|
| ||||||||||||||||||
to turn it on.
Message printing cannot be executed Remarks in the following conditions.
(1)RECORD ON status lamp is not lit.
(2)KEY LOCK status lamp lights.
(3)For the chart speed programmed at 150 mm/h or faster
Execution with external
Reference contact signal
When the remote contacts (option) is added, message printing can also be executed by a contact signal. However, this requires the programming of the "terminal allocation". See Section 13.2 for details.
(Note) The above example is for RD200. It is the same for RD2800.
-50-