4.CONNECTIONS
4.6 Remote Contacts Terminals
These terminals are for the remote contacts (option). For the remote contacts, see Section 13.
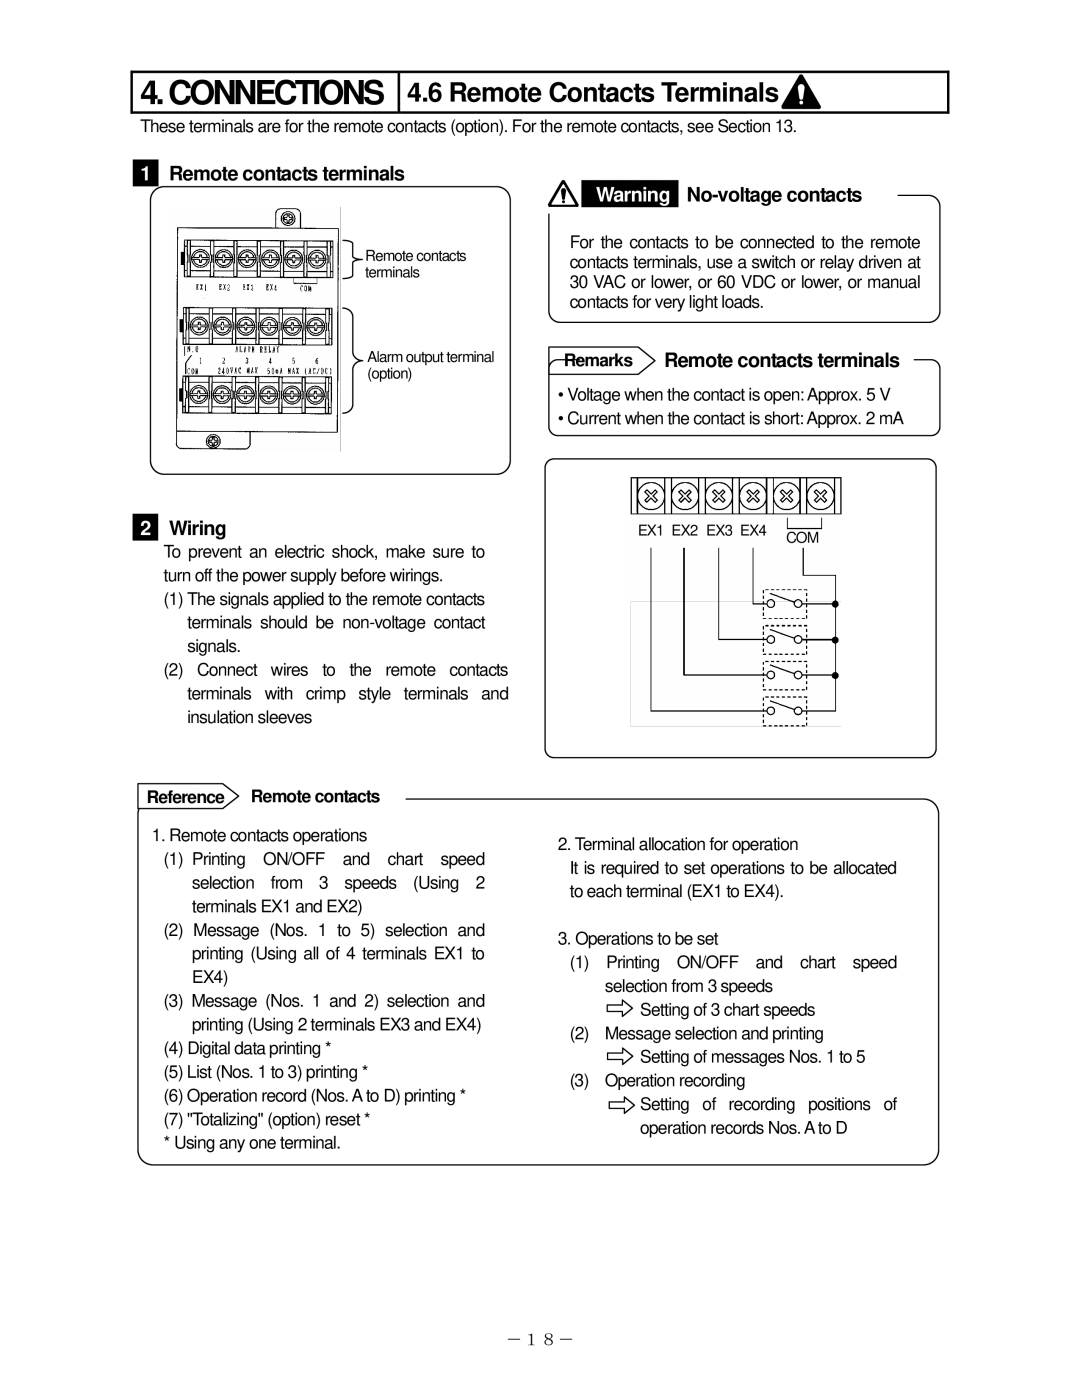
1Remote contacts terminals
Remote contacts terminals
Alarm output terminal (option)
Warning
For the contacts to be connected to the remote contacts terminals, use a switch or relay driven at 30 VAC or lower, or 60 VDC or lower, or manual contacts for very light loads.
Remarks Remote contacts terminals
•Voltage when the contact is open: Approx. 5 V
•Current when the contact is short: Approx. 2 mA
2Wiring
To prevent an electric shock, make sure to turn off the power supply before wirings.
(1)The signals applied to the remote contacts terminals should be
(2)Connect wires to the remote contacts terminals with crimp style terminals and insulation sleeves
Reference Remote contacts
1.Remote contacts operations
(1)Printing ON/OFF and chart speed selection from 3 speeds (Using 2 terminals EX1 and EX2)
(2)Message (Nos. 1 to 5) selection and printing (Using all of 4 terminals EX1 to EX4)
(3)Message (Nos. 1 and 2) selection and printing (Using 2 terminals EX3 and EX4)
(4)Digital data printing *
(5)List (Nos. 1 to 3) printing *
(6)Operation record (Nos. A to D) printing *
(7)"Totalizing" (option) reset *
* Using any one terminal.
EX1 EX2 EX3 EX4 COM
2. Terminal allocation for operation
It is required to set operations to be allocated to each terminal (EX1 to EX4).
3.Operations to be set
(1)Printing ON/OFF and chart speed selection from 3 speeds
![]() Setting of 3 chart speeds
Setting of 3 chart speeds
(2)Message selection and printing
![]() Setting of messages Nos. 1 to 5
Setting of messages Nos. 1 to 5
(3)Operation recording
![]() Setting of recording positions of operation records Nos. A to D
Setting of recording positions of operation records Nos. A to D
-18-