5. INSTALLATION
5.2 Chart Paper Loading (RD2800)
1Chart Paper Cassette Removal
1)Open the door.
Grip
2)Remove the chart paper cassette.
(1)Pull the grip of the chart paper cassette and take the chart paper cassette slightly out of the internal unit. (Pens lift up.)
(2)Pull the grip slowly to take the chart paper cassette out of the internal unit completely.
|
|
|
|
| Guide |
Chart paper cassette | Guide rail |
Caution | Be careful with the corners | |
of the rear stripper plate | ||
| ||
|
|
The sharp corners of the rear stripper plate help to feed the chart paper smoothly. Be careful not to cut your fingers when loading or replacing the chart paper.
Caution | Don’t remove the chart paper |
cassette during printing. |
Don’t remove the chart paper cassette during printing by a plotter pen. The cassette may hit 1st pen during the automatic pen
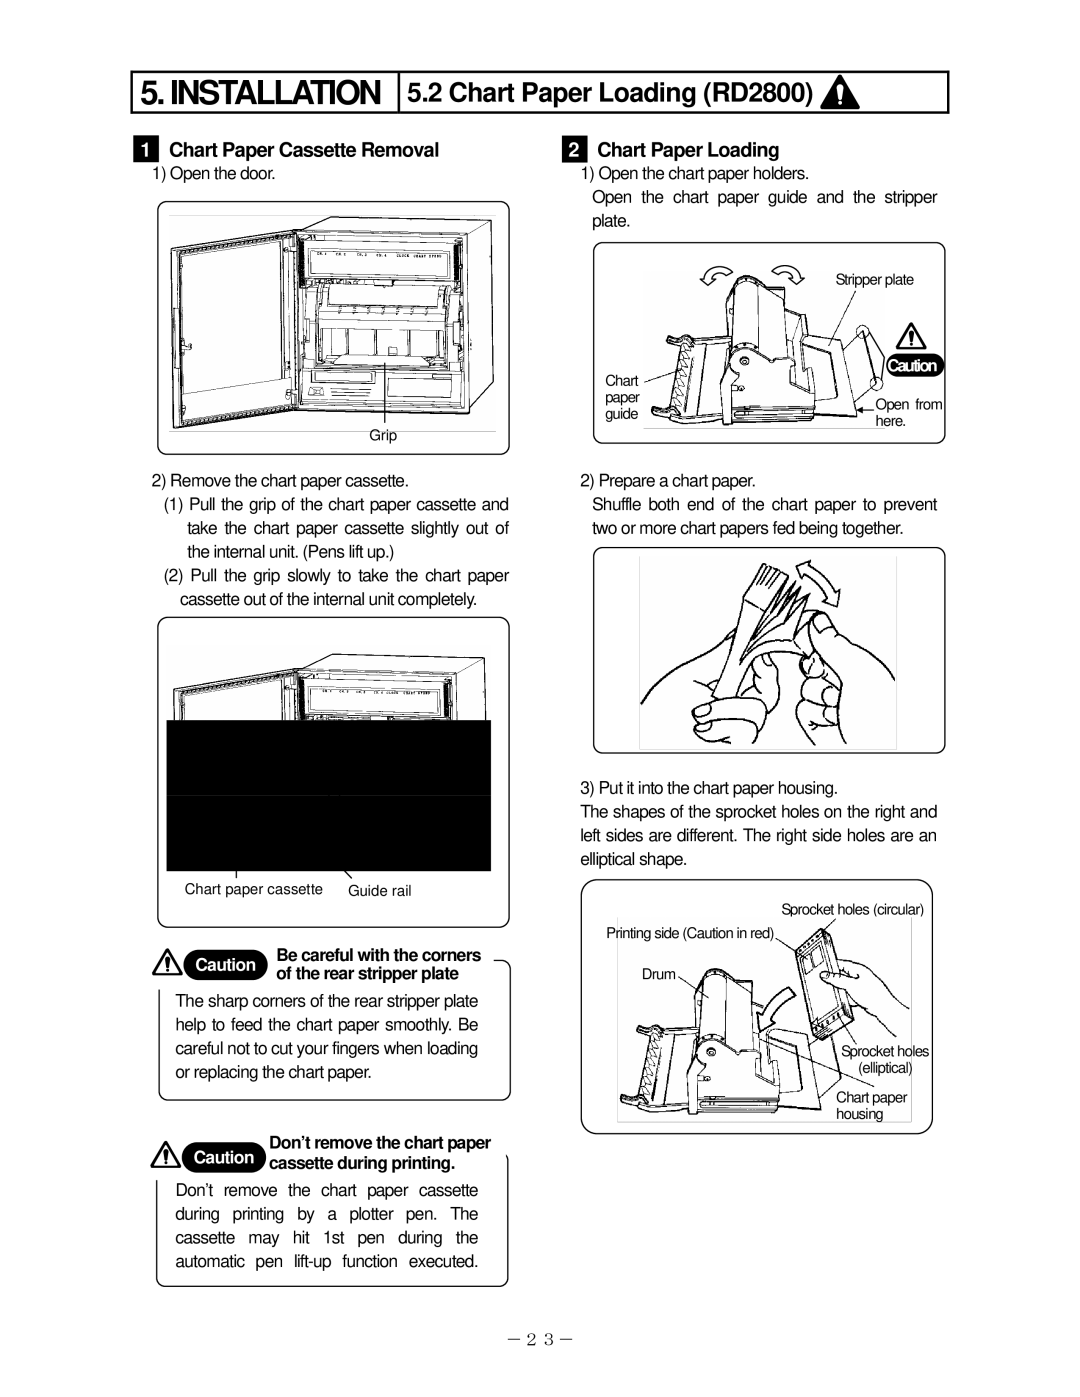
2Chart Paper Loading
1)Open the chart paper holders.
Open the chart paper guide and the stripper plate.
Stripper plate
Caution
Chart |
| |
paper | Open from | |
guide | ||
here. | ||
|
2) Prepare a chart paper.
Shuffle both end of the chart paper to prevent two or more chart papers fed being together.
3) Put it into the chart paper housing.
The shapes of the sprocket holes on the right and left sides are different. The right side holes are an elliptical shape.
Sprocket holes (circular)
Printing side (Caution in red)
Drum
Sprocket holes
(elliptical)
Chart paper housing
-23-