14. PRINTING FORMAT
14.3 Programming Zone Printing
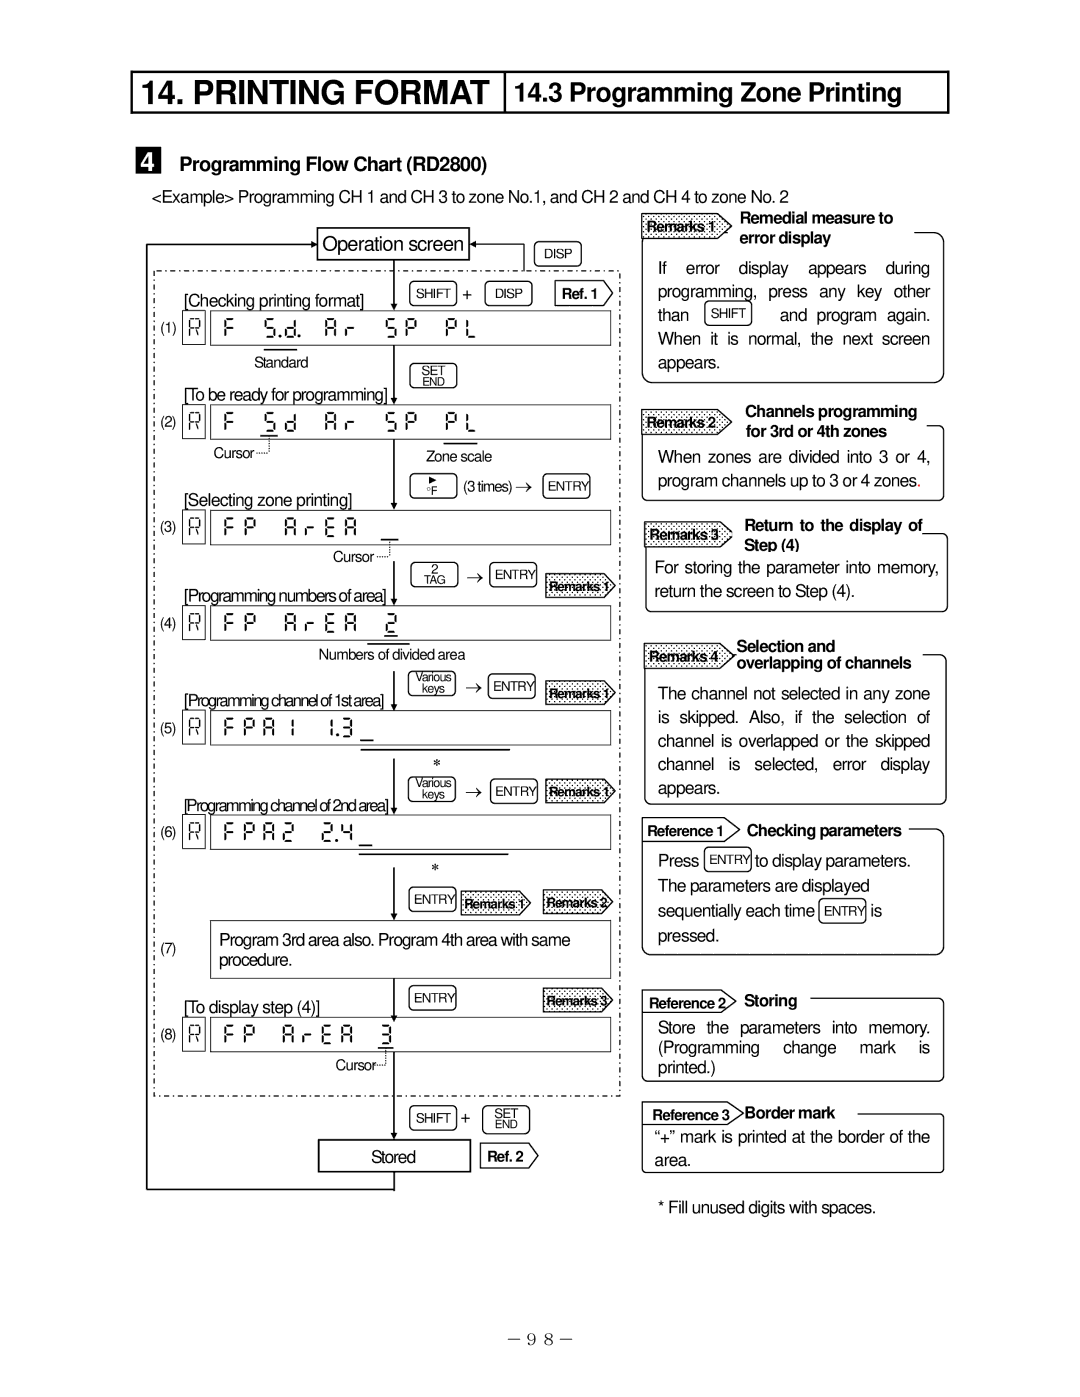
4
Programming Flow Chart (RD2800)
<Example> Programming CH 1 and CH 3 to zone No.1, and CH 2 and CH 4 to zone No. 2
Operation screen | DISP |
|
[Checking printing format] | SHIFT | + DISP | Ref. 1 |
|
|
|
(1)

Standard
SET
END
[To be ready for programming]
(2)

Cursor |
|
|
|
Zone scale | |||
| ° | (3 times) → ENTRY | |
[Selecting zone printing] | F |
|
|
|
|
| |
Remarks 1 Remedial measure to error display
If error display appears during programming, press any key other than SHIFT and program again. When it is normal, the next screen appears.
Remarks 2 | Channels programming | |
for 3rd or 4th zones | ||
|
When zones are divided into 3 or 4, program channels up to 3 or 4 zones.
(3)

Cursor
2 | → ENTRY | |
TAG | Remarks 1 | |
[Programmingnumbersofarea] | ||
|
(4)

Numbers of divided area
|
|
|
| Various | → ENTRY Remarks 1 |
[Programmingchannelof1starea] | keys | |
|
(5)

∗
|
|
|
| Various | → ENTRY Remarks 1 |
[Programmingchannelof2ndarea] | keys | |
|
|
(6)

∗
ENTRY Remarks 1 Remarks 2
(7)Program 3rd area also. Program 4th area with same procedure.
[To display step (4)] | ENTRY | Remarks 3 |
|
(8)

Cursor
SHIFT + SET
END
| Stored | Ref. 2 | |
|
|
|
|
|
|
|
|
Remarks 3 | Return to the display of | |
Step (4) | ||
|
For storing the parameter into memory, return the screen to Step (4).
Selection and Remarks 4 overlapping of channels
The channel not selected in any zone is skipped. Also, if the selection of channel is overlapped or the skipped channel is selected, error display appears.
Reference 1 Checking parameters
Press ENTRY to display parameters. The parameters are displayed sequentially each time ENTRY is pressed.
Reference 2 Storing
Store the parameters into memory. (Programming change mark is printed.)
Reference 3 Border mark
“+” mark is printed at the border of the area.
* Fill unused digits with spaces.
-98-