2. INSTALLATION
2.2 Installation to a Panel 
![]()
![]()
![]() Warning Install your recorder to a panel.
Warning Install your recorder to a panel.
Except portable types, your recorder is designed to install to a panel. Use a panel made of a steel plate of 2 mm to 6 mm in thickness.
RD200
RD2800
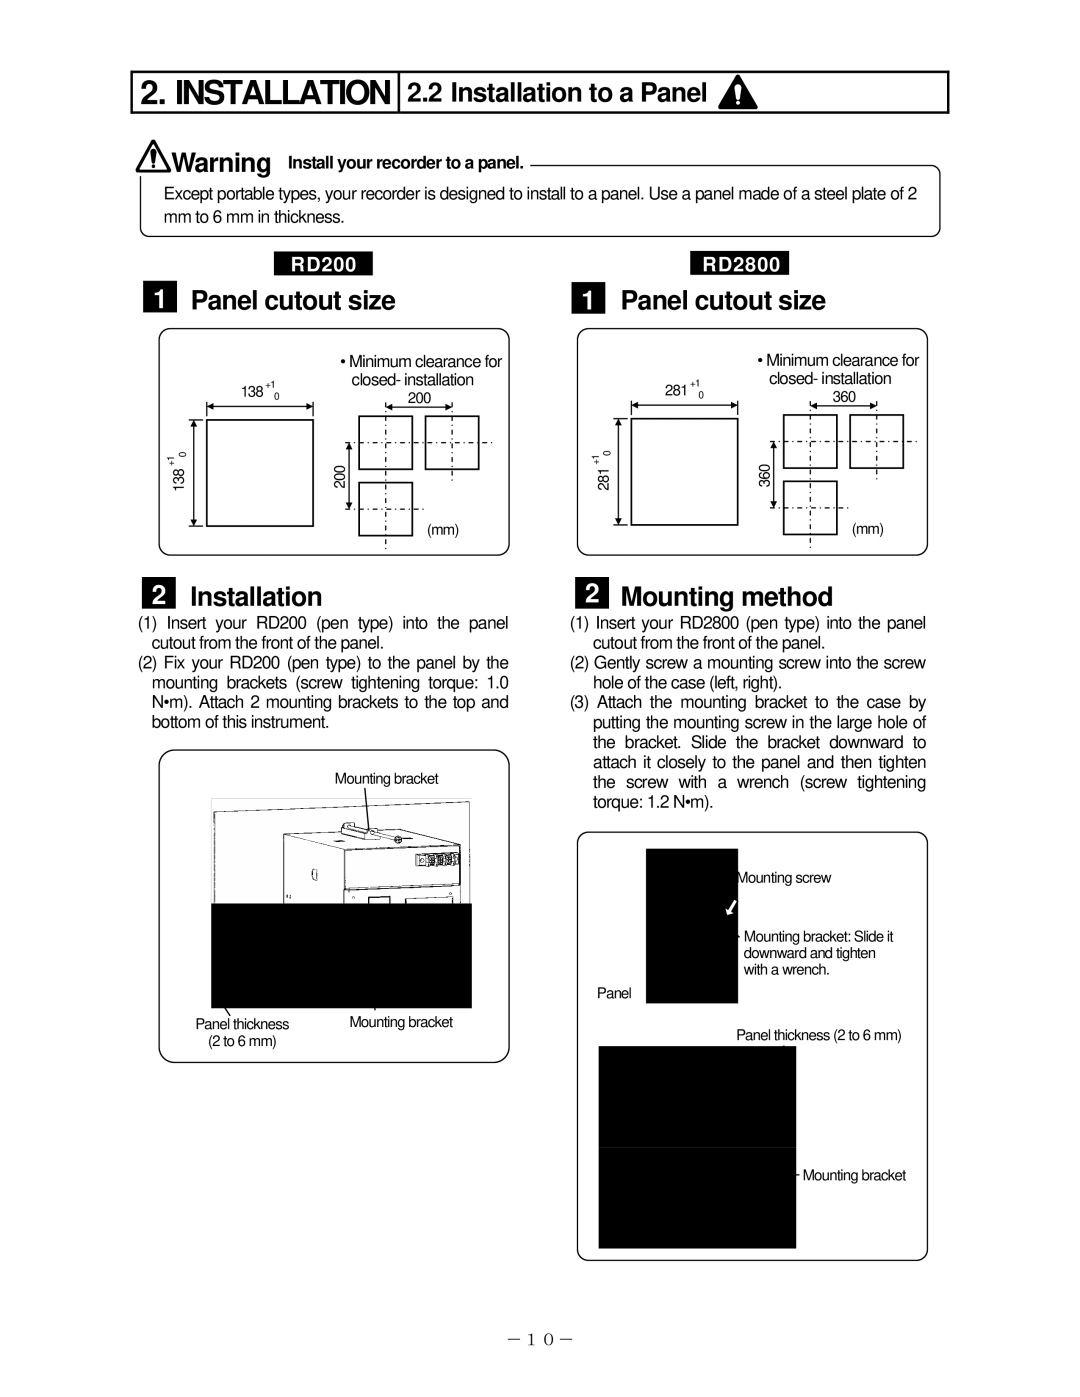
1 | Panel cutout size | 1 | Panel cutout size |
138 +10![]()
![]()
• Minimum clearance for
138+10 |
| closed- installation | ||||
| 200 | 200 | +1 0 | |||
| ||||||
|
|
|
|
| ||
|
|
|
|
| 281 | |
|
|
| ||||
|
|
|
| |||
|
|
|
|
| (mm) | |
|
|
|
|
| ||
| • Minimum clearance for | ||||
281+10 | closed- installation | ||||
| 360 |
| |||
|
| ||||
| 360 |
|
|
|
|
|
|
|
|
| |
|
|
| (mm) | ||
|
|
|
| ||
|
|
|
| ||
2 Installation
(1)Insert your RD200 (pen type) into the panel cutout from the front of the panel.
(2)Fix your RD200 (pen type) to the panel by the mounting brackets (screw tightening torque: 1.0 N•m). Attach 2 mounting brackets to the top and bottom of this instrument.
Mounting bracket
Panel thickness | Mounting bracket |
(2 to 6 mm) |
|
2Mounting method
(1)Insert your RD2800 (pen type) into the panel cutout from the front of the panel.
(2)Gently screw a mounting screw into the screw hole of the case (left, right).
(3)Attach the mounting bracket to the case by putting the mounting screw in the large hole of the bracket. Slide the bracket downward to attach it closely to the panel and then tighten the screw with a wrench (screw tightening torque: 1.2 N•m).
Mounting screw
![]() Mounting bracket: Slide it downward and tighten with a wrench.
Mounting bracket: Slide it downward and tighten with a wrench.
Panel
Panel thickness (2 to 6 mm)
Mounting bracket
-10-