2.2.3Connect to an AV Receiver
To enjoy
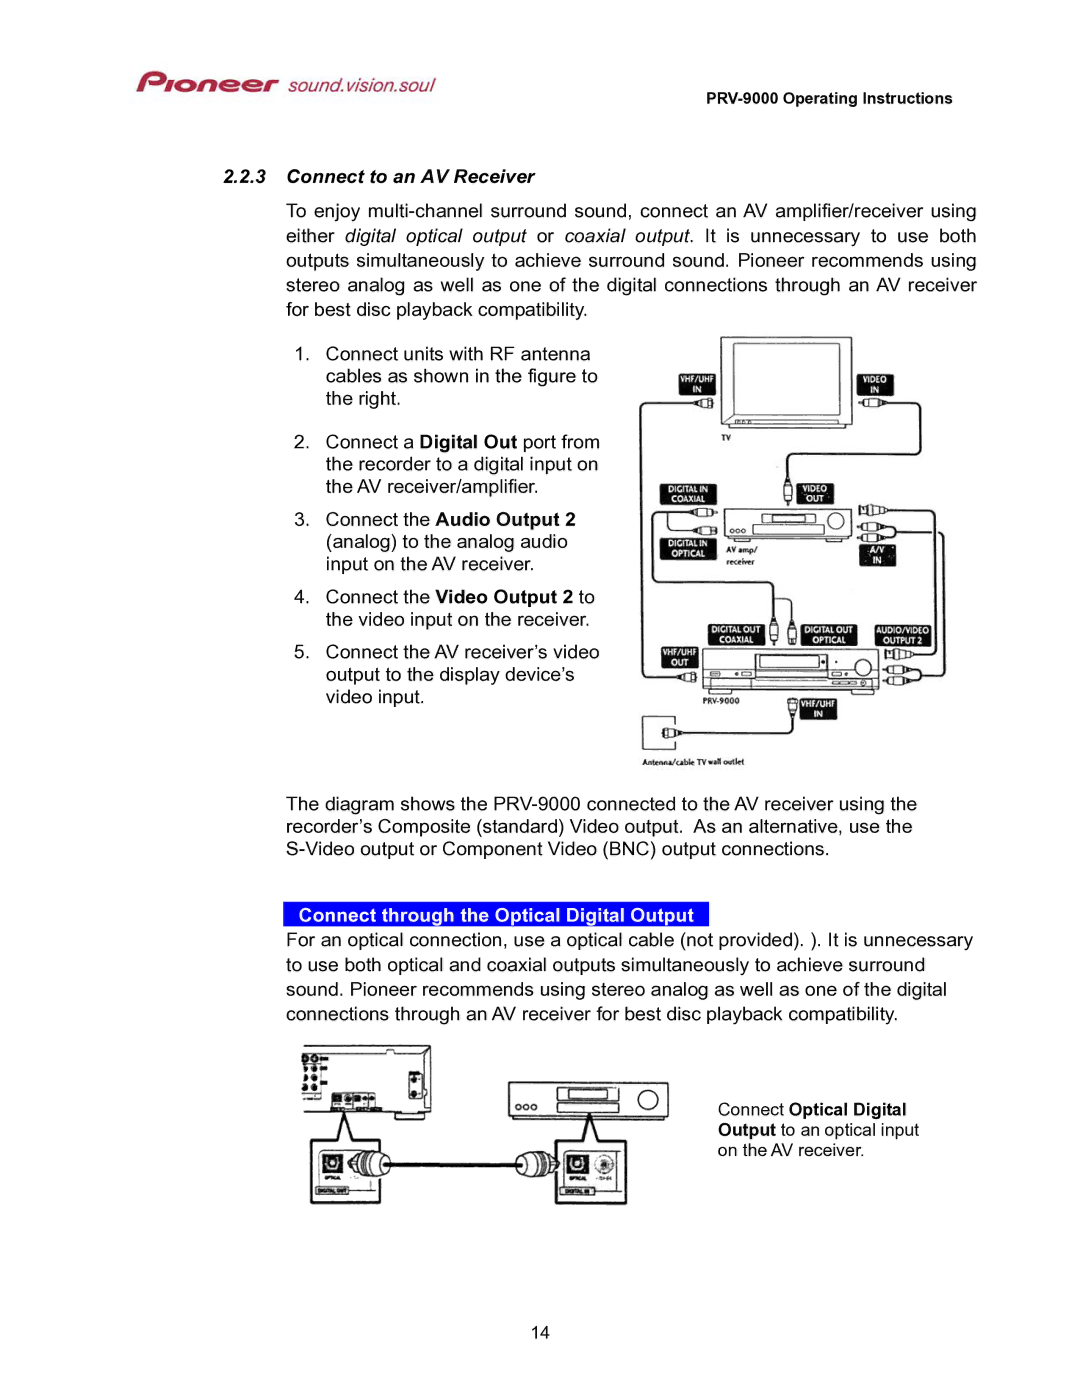
1.Connect units with RF antenna cables as shown in the figure to the right.
2.Connect a Digital Out port from the recorder to a digital input on the AV receiver/amplifier.
3.Connect the Audio Output 2 (analog) to the analog audio input on the AV receiver.
4.Connect the Video Output 2 to the video input on the receiver.
5.Connect the AV receiver’s video output to the display device’s video input.
The diagram shows the
Connect through the Optical Digital Output
For an optical connection, use a optical cable (not provided). ). It is unnecessary to use both optical and coaxial outputs simultaneously to achieve surround sound. Pioneer recommends using stereo analog as well as one of the digital connections through an AV receiver for best disc playback compatibility.
Connect Optical Digital Output to an optical input on the AV receiver.
14