2.1Basic Connections
The
Note: In the following instructions,
This recorder is equipped with
2.1.1Connect to an Antenna
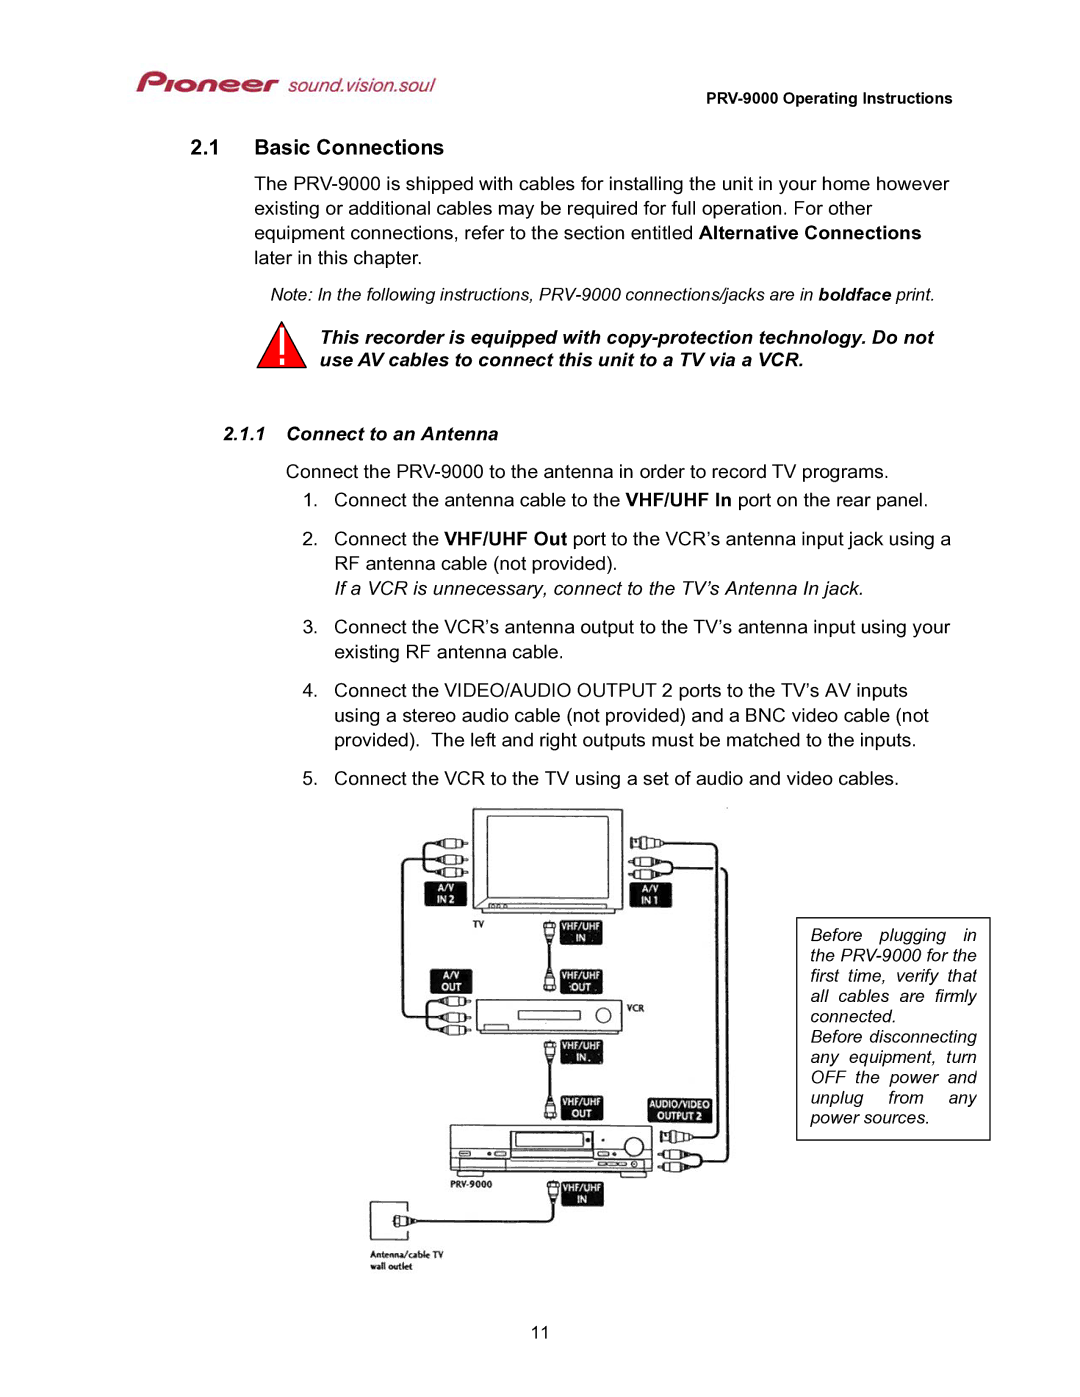
Connect the
1.Connect the antenna cable to the VHF/UHF In port on the rear panel.
2.Connect the VHF/UHF Out port to the VCR’s antenna input jack using a RF antenna cable (not provided).
If a VCR is unnecessary, connect to the TV’s Antenna In jack.
3.Connect the VCR’s antenna output to the TV’s antenna input using your existing RF antenna cable.
4.Connect the VIDEO/AUDIO OUTPUT 2 ports to the TV’s AV inputs using a stereo audio cable (not provided) and a BNC video cable (not provided). The left and right outputs must be matched to the inputs.
5.Connect the VCR to the TV using a set of audio and video cables.
Before plugging in the
Before disconnecting any equipment, turn OFF the power and unplug from any power sources.
11