3CONTROLS (REMOTE & PANEL) AND DISPLAYS
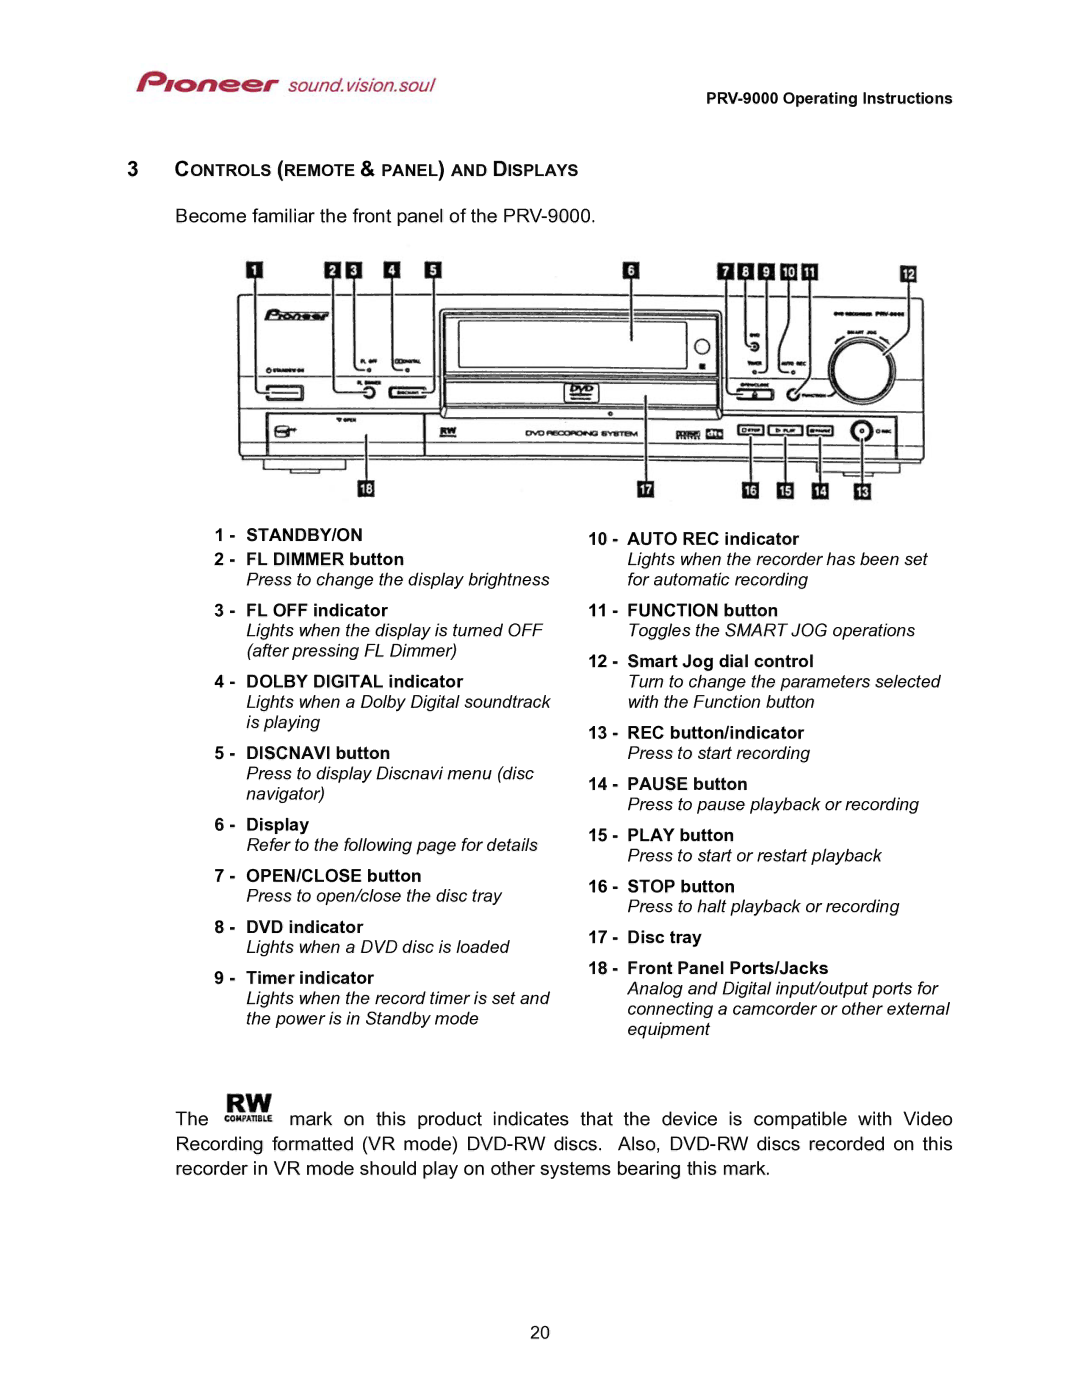
Become familiar the front panel of the PRV-9000.
1 - STANDBY/ON
2 - FL DIMMER button
Press to change the display brightness
3 - FL OFF indicator
Lights when the display is turned OFF (after pressing FL Dimmer)
4 - DOLBY DIGITAL indicator
Lights when a Dolby Digital soundtrack is playing
5 - DISCNAVI button
Press to display Discnavi menu (disc navigator)
6 - Display
Refer to the following page for details
7 - OPEN/CLOSE button
Press to open/close the disc tray
8 - DVD indicator
Lights when a DVD disc is loaded
9 - Timer indicator
Lights when the record timer is set and the power is in Standby mode
10 - AUTO REC indicator
Lights when the recorder has been set for automatic recording
11 - FUNCTION button
Toggles the SMART JOG operations
12 - Smart Jog dial control
Turn to change the parameters selected with the Function button
13 - REC button/indicator Press to start recording
14 - PAUSE button
Press to pause playback or recording
15 - PLAY button
Press to start or restart playback
16 - STOP button
Press to halt playback or recording
17 - Disc tray
18 - Front Panel Ports/Jacks
Analog and Digital input/output ports for connecting a camcorder or other external equipment
The ![]() mark on this product indicates that the device is compatible with Video Recording formatted (VR mode)
mark on this product indicates that the device is compatible with Video Recording formatted (VR mode)
20
