Adding a Campus Map to the Cisco WCS Database
Rather than forcing the Cisco WCS operator to use only a
•First, save your maps in .PNG, .JPG, .JPEG, or .GIF format. They can be any size, as Cisco WCS automatically resizes the map to fit in its working areas.
•Browse to and import the map(s) from anywhere in your file system.
•Select the Monitor Tab.
•Click Maps to have Cisco WCS display the Maps page.
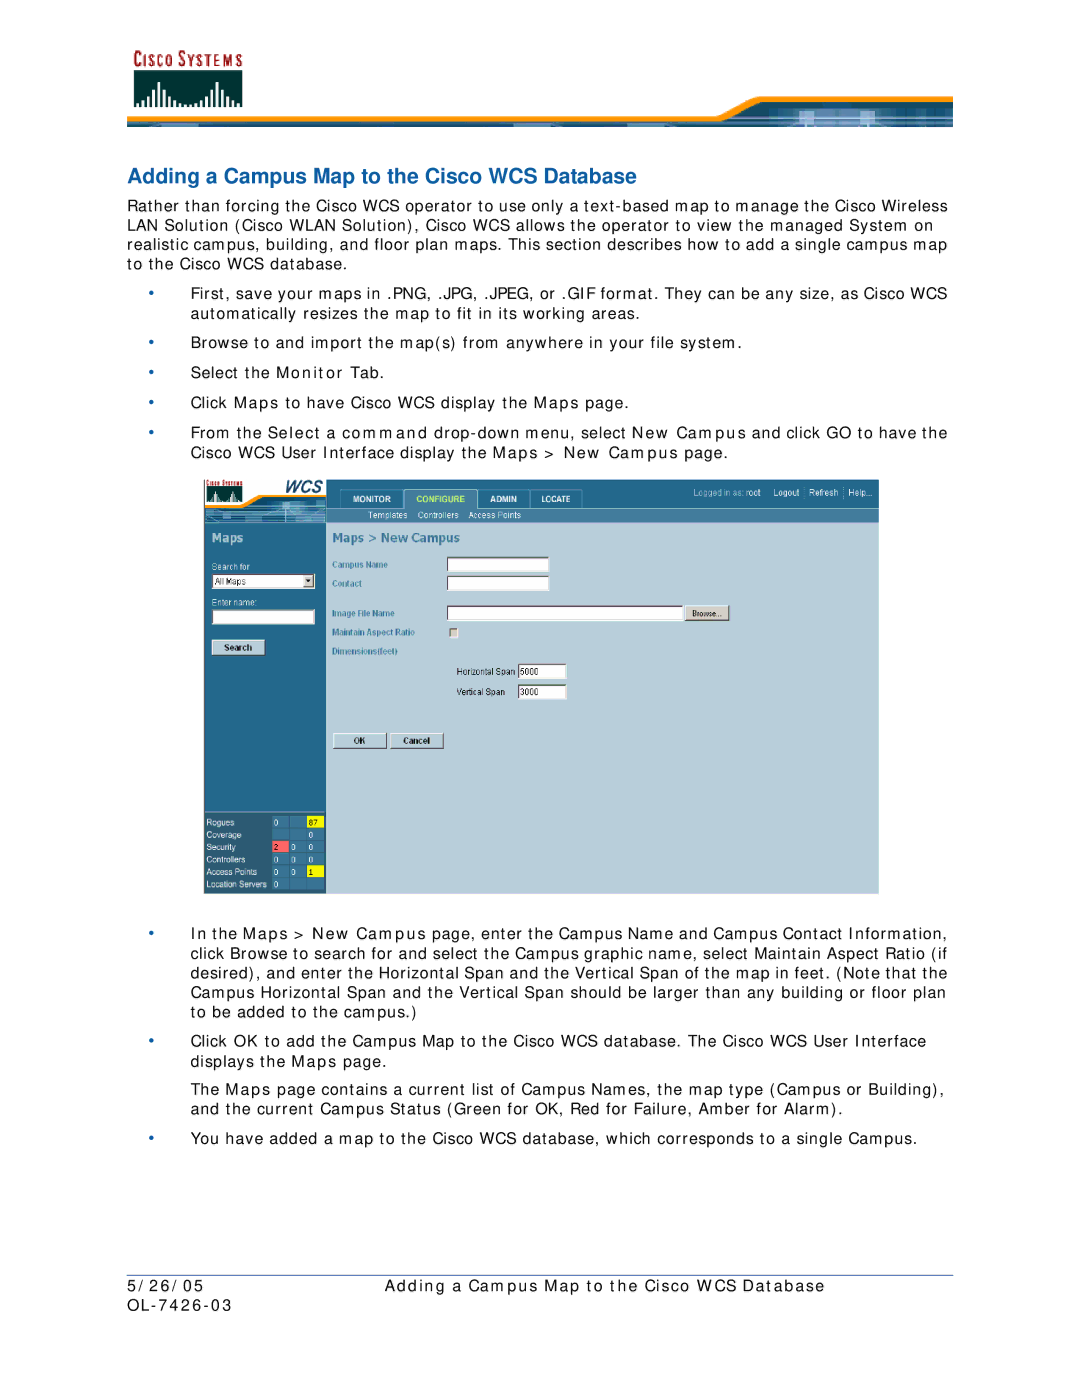
•From the Select a command
•In the Maps > New Campus page, enter the Campus Name and Campus Contact Information, click Browse to search for and select the Campus graphic name, select Maintain Aspect Ratio (if desired), and enter the Horizontal Span and the Vertical Span of the map in feet. (Note that the Campus Horizontal Span and the Vertical Span should be larger than any building or floor plan to be added to the campus.)
•Click OK to add the Campus Map to the Cisco WCS database. The Cisco WCS User Interface displays the Maps page.
The Maps page contains a current list of Campus Names, the map type (Campus or Building), and the current Campus Status (Green for OK, Red for Failure, Amber for Alarm).
•You have added a map to the Cisco WCS database, which corresponds to a single Campus.
5/26/05 | Adding a Campus Map to the Cisco WCS Database |
|