Line 6 GearBox 3.7 – GearBox
GearBox with PODxt
One fundamental difference between PODxt versus TonePort & GuitarPort devices is that PODxt units have their own onboard DSP processing and Memory. You can think of GearBox as a computer “user interface” for what is running on your PODxt device. Because of this hardware architecture, you’ll see a few differences here for GearBox controls with PODxt as compared to TonePort or GuitarPort devices. It also means that the processing horsepower used to apply all those juicy amp, cab and effects models to your Tone don’t need to run on your computer’s processor, which should give you a bit more reserve processing power for other things, like recording software and more complex sessions.
When using PODxt, PODxt Pro or PODxt Live hardware with GearBox, the GearBox interface offers a fixed set of Tone options. The Instrument input is “fixed” as the GearBox input source, and the input signal is routed to the Record Send
GearBox Controls and Operation - PODxt
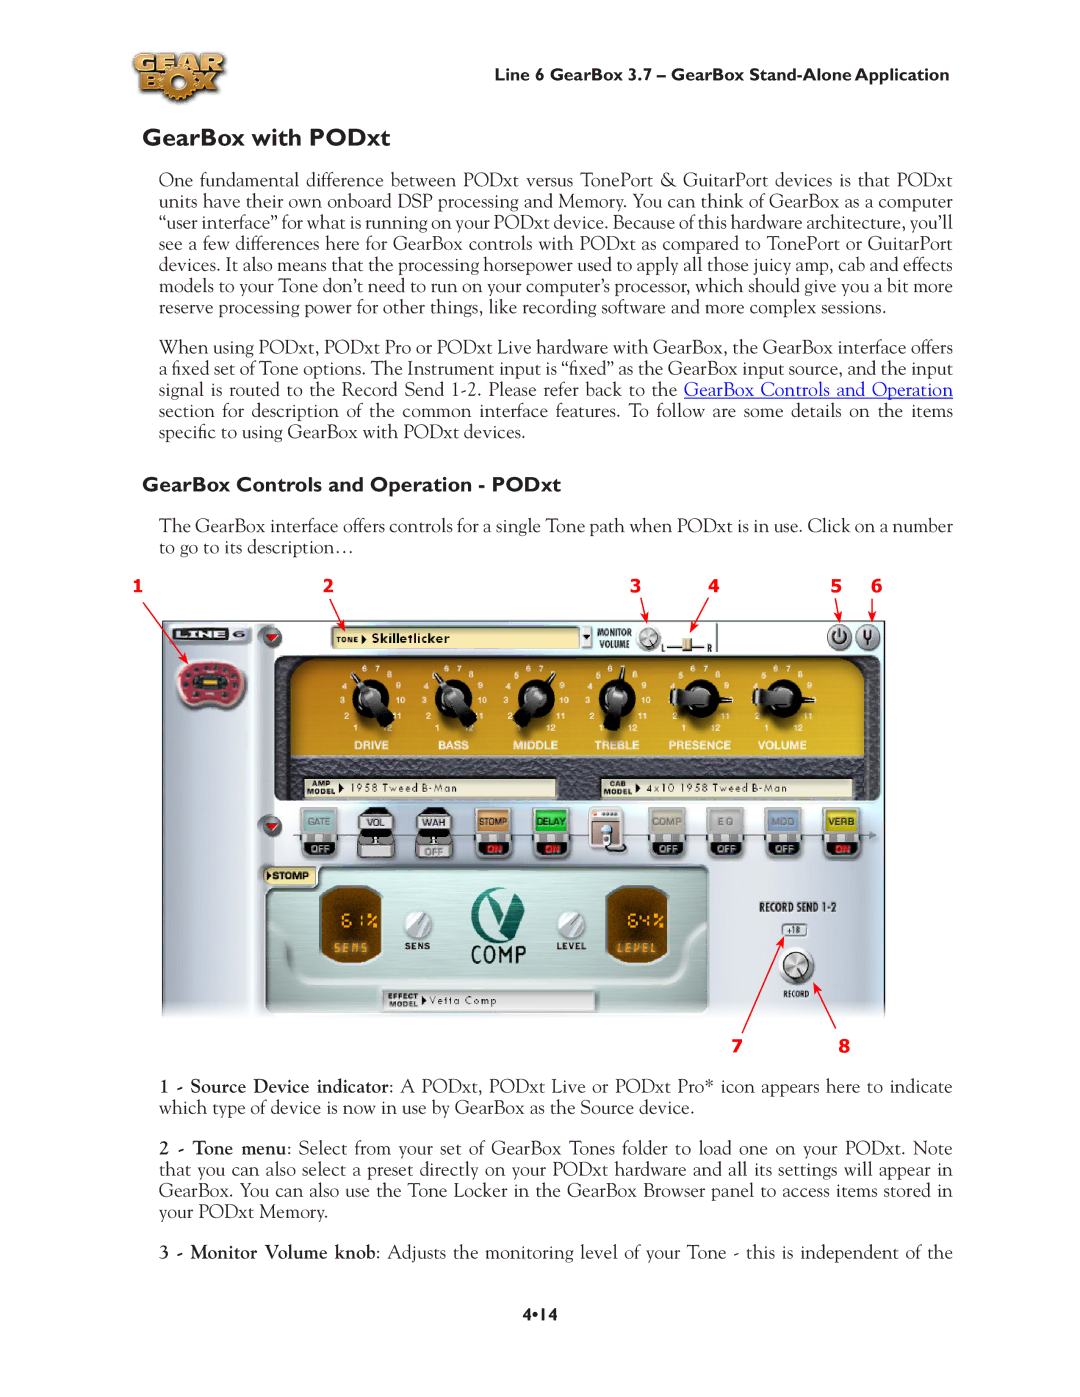
The GearBox interface offers controls for a single Tone path when PODxt is in use. Click on a number to go to its description…
1 | 2 | 3 | 4 | 5 | 6 |
7 8
1 - Source Device indicator: A PODxt, PODxt Live or PODxt Pro* icon appears here to indicate which type of device is now in use by GearBox as the Source device.
2 - Tone menu: Select from your set of GearBox Tones folder to load one on your PODxt. Note that you can also select a preset directly on your PODxt hardware and all its settings will appear in GearBox. You can also use the Tone Locker in the GearBox Browser panel to access items stored in your PODxt Memory.
3 - Monitor Volume knob: Adjusts the monitoring level of your Tone - this is independent of the
4•14