Line 6 GearBox 3.7 – GearBox with POD X3
buffer” as it’s sometimes referred to in Line 6 documentation). The key to syncing the data shown in this window with the actual data stored within your POD X3 device’s
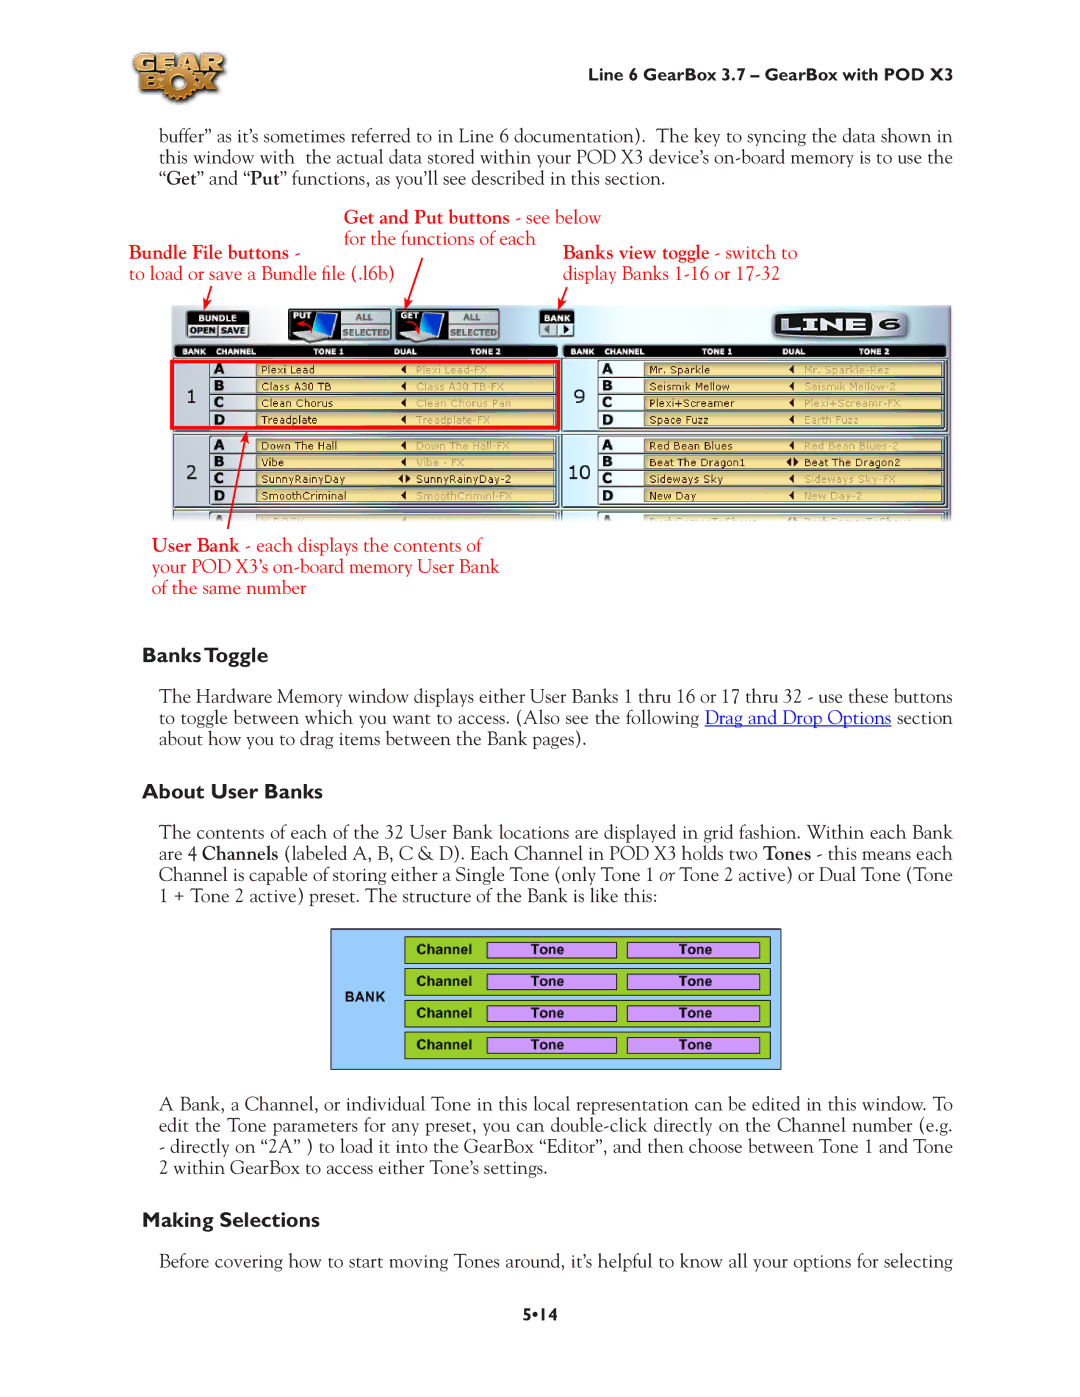
Bundle File buttons -
Get and Put buttons - see below for the functions of each
to load or save a Bundle file (.l6b)
User Bank - each displays the contents of your POD X3’s
Banks Toggle
The Hardware Memory window displays either User Banks 1 thru 16 or 17 thru 32 - use these buttons to toggle between which you want to access. (Also see the following Drag and Drop Options section about how you to drag items between the Bank pages).
About User Banks
The contents of each of the 32 User Bank locations are displayed in grid fashion. Within each Bank are 4 Channels (labeled A, B, C & D). Each Channel in POD X3 holds two Tones - this means each Channel is capable of storing either a Single Tone (only Tone 1 or Tone 2 active) or Dual Tone (Tone
1 + Tone 2 active) preset. The structure of the Bank is like this:
A Bank, a Channel, or individual Tone in this local representation can be edited in this window. To edit the Tone parameters for any preset, you can
-directly on “2A” ) to load it into the GearBox “Editor”, and then choose between Tone 1 and Tone
2 within GearBox to access either Tone’s settings.
Making Selections
Before covering how to start moving Tones around, it’s helpful to know all your options for selecting
5•14