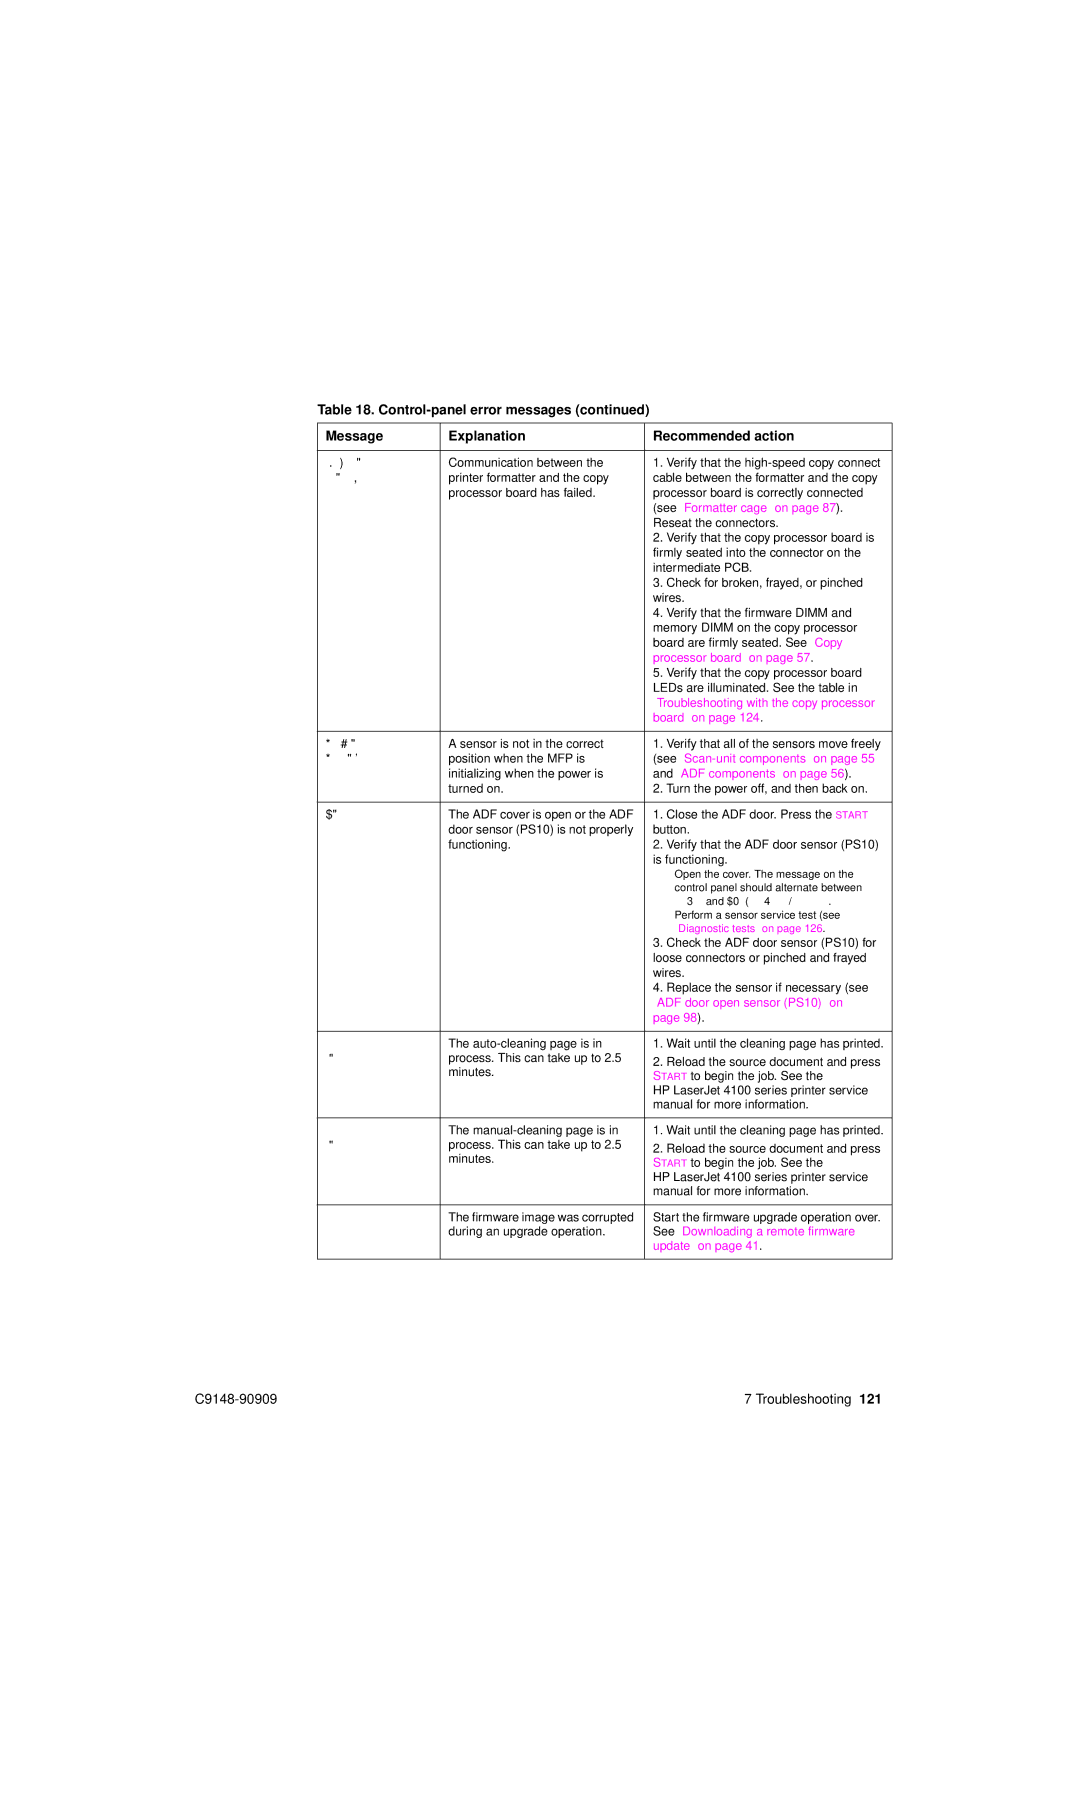
Table 18.
Message | Explanation | Recommended action | |
|
|
|
|
Check Cables And | Communication between the | 1. | Verify that the |
Cycle Power | printer formatter and the copy | cable between the formatter and the copy | |
| processor board has failed. | processor board is correctly connected | |
|
| (see “Formatter cage” on page 87). | |
|
| Reseat the connectors. | |
|
| 2. | Verify that the copy processor board is |
|
| firmly seated into the connector on the | |
|
| intermediate PCB. | |
|
| 3. | Check for broken, frayed, or pinched |
|
| wires. | |
|
| 4. | Verify that the firmware DIMM and |
|
| memory DIMM on the copy processor | |
|
| board are firmly seated. See “Copy | |
|
| processor board” on page 57. | |
|
| 5. | Verify that the copy processor board |
|
| LEDs are illuminated. See the table in | |
|
| “Troubleshooting with the copy processor | |
|
| board” on page 124. | |
|
|
| |
Incomplete | A sensor is not in the correct | 1. Verify that all of the sensors move freely | |
Initialization | position when the MFP is | (see | |
Error | initializing when the power is | and “ADF components” on page 56). | |
| turned on. | 2. | Turn the power off, and then back on. |
|
|
|
|
Flatbed Cover | The ADF cover is open or the ADF | 1. | Close the ADF door. Press the START |
Open | door sensor (PS10) is not properly | button. | |
| functioning. | 2. | Verify that the ADF door sensor (PS10) |
|
| is functioning. | |
|
| ● Open the cover. The message on the | |
|
|
| control panel should alternate between |
|
|
| READY and FLATBED COVER OPEN. |
|
| ● Perform a sensor service test (see | |
|
|
| “Diagnostic tests” on page 126. |
|
| 3. | Check the ADF door sensor (PS10) for |
|
| loose connectors or pinched and frayed | |
|
| wires. | |
|
| 4. | Replace the sensor if necessary (see |
|
| “ADF door open sensor (PS10)” on | |
|
| page 98). | |
|
|
|
|
Processing Auto | The | 1. | Wait until the cleaning page has printed. |
Cleaning Page | process. This can take up to 2.5 | 2. | Reload the source document and press |
| minutes. | ||
| START to begin the job. See the | ||
|
| ||
|
| HP LaserJet 4100 series printer service | |
|
| manual for more information. | |
|
|
|
|
Processing | The | 1. | Wait until the cleaning page has printed. |
Cleaning Page | process. This can take up to 2.5 | 2. | Reload the source document and press |
| minutes. | ||
| START to begin the job. See the | ||
|
| ||
|
| HP LaserJet 4100 series printer service | |
|
| manual for more information. | |
|
|
| |
Resend Upgrade | The firmware image was corrupted | Start the firmware upgrade operation over. | |
| during an upgrade operation. | See “Downloading a remote firmware | |
|
| update” on page 41. | |
|
|
|
|
7 Troubleshooting 121 |