| Performing manual calibration |
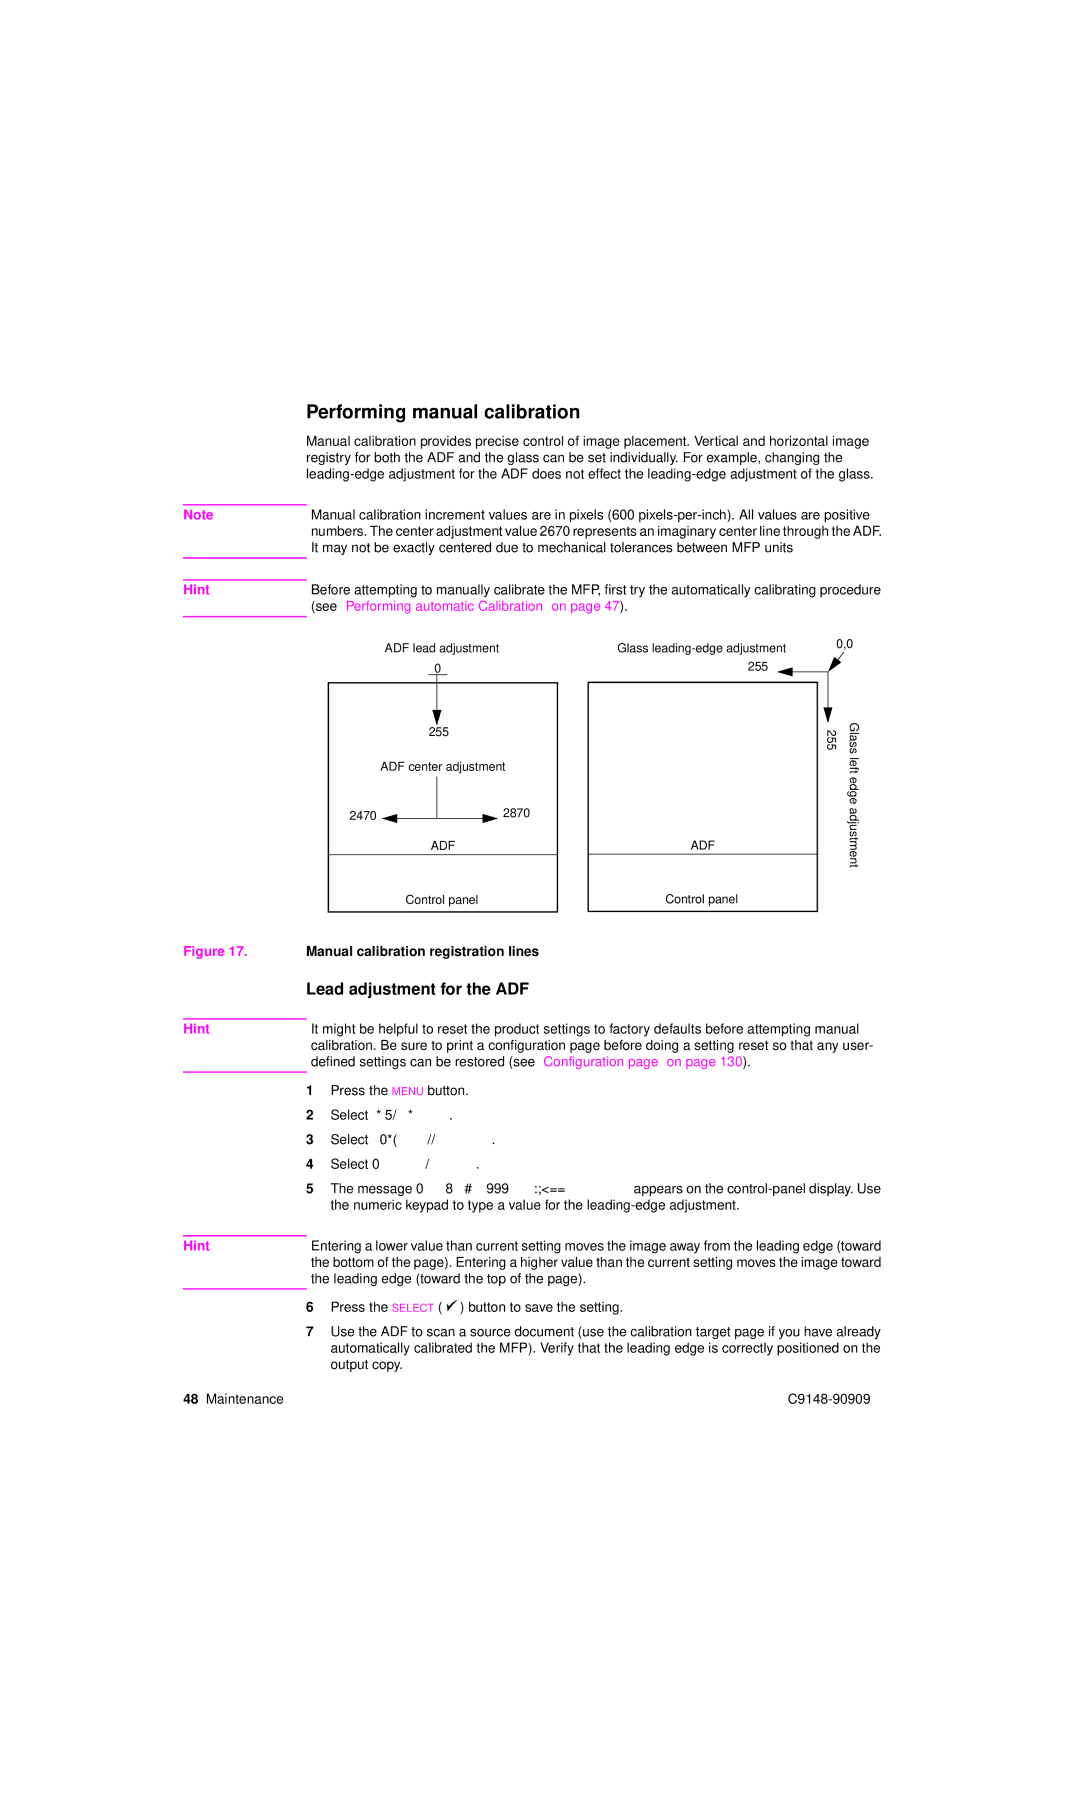
| Manual calibration provides precise control of image placement. Vertical and horizontal image |
| registry for both the ADF and the glass can be set individually. For example, changing the |
| |
|
|
Note | Manual calibration increment values are in pixels (600 |
| numbers. The center adjustment value 2670 represents an imaginary center line through the ADF. |
| It may not be exactly centered due to mechanical tolerances between MFP units |
|
|
|
|
Hint | Before attempting to manually calibrate the MFP, first try the automatically calibrating procedure |
| (see “Performing automatic Calibration” on page 47). |
|
|
ADF lead adjustment 0
255
ADF center adjustment
2470 ![]()
![]() 2870
2870
ADF
Glass
255
ADF
0,0
255 | Glass |
| left edge adjustment |
Control panel
Control panel
Figure 17. Manual calibration registration lines
Lead adjustment for the ADF
HintIt might be helpful to reset the product settings to factory defaults before attempting manual calibration. Be sure to print a configuration page before doing a setting reset so that any user- defined settings can be restored (see “Configuration page” on page 130).
1Press the MENU button.
2Select DIAGNOSTICS.
3Select CALIBRATE SCANNER.
4Select LEAD ADJUSTMENT.
5The message Lead Adjustment ### Range
Hint | Entering a lower value than current setting moves the image away from the leading edge (toward |
| the bottom of the page). Entering a higher value than the current setting moves the image toward |
| the leading edge (toward the top of the page). |
|
|
6Press the SELECT ( ![]() ) button to save the setting.
) button to save the setting.
7Use the ADF to scan a source document (use the calibration target page if you have already automatically calibrated the MFP). Verify that the leading edge is correctly positioned on the output copy.
48 Maintenance |