Using the control panel
Layout and operation
1 | 2 | 3 | 4 | 5 | 6 |
7 8![]()
![]()
|
|
| 9 |
|
|
| 10 |
|
|
| 11 |
|
| 13 | 12 |
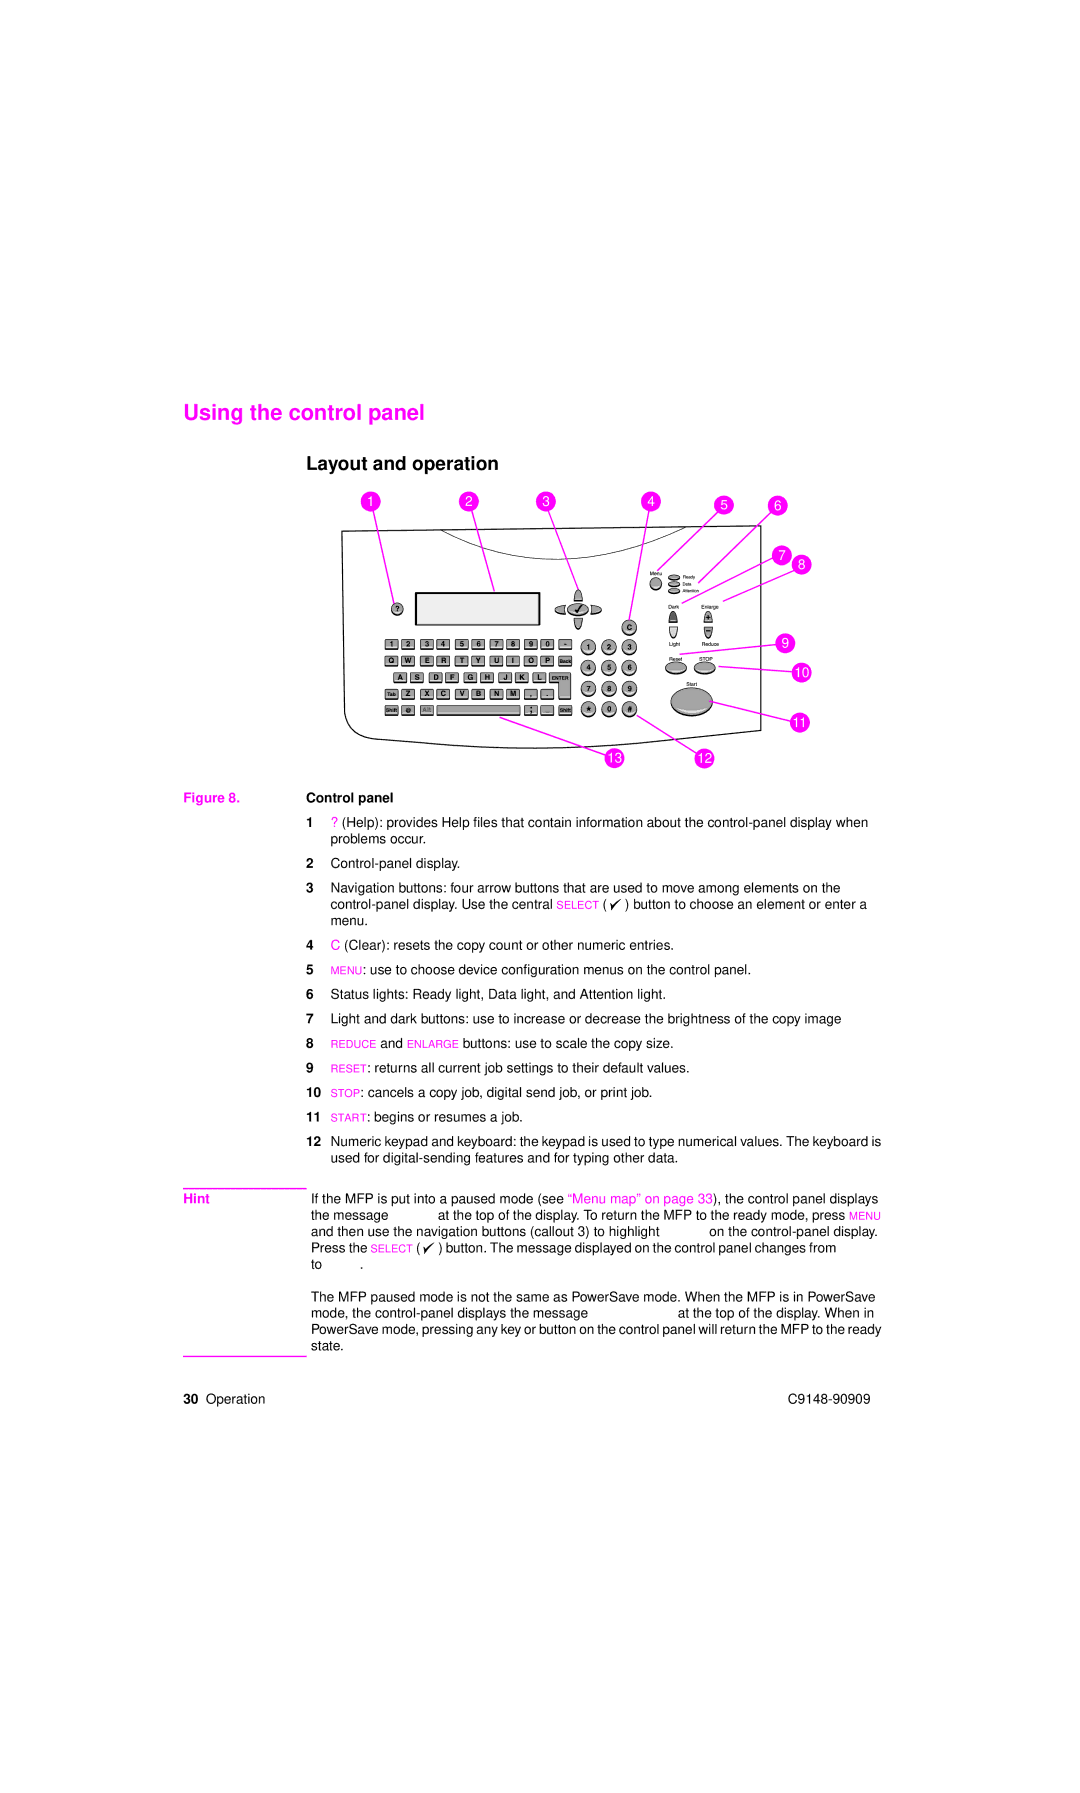
Figure 8. | Control panel |
| |
| 1 | ? (Help): provides Help files that contain information about the | |
|
| problems occur. |
|
| 2 |
| |
| 3 | Navigation buttons: four arrow buttons that are used to move among elements on the | |
|
| ) button to choose an element or enter a | |
|
| menu. |
|
| 4 | C (Clear): resets the copy count or other numeric entries. | |
| 5 | MENU: use to choose device configuration menus on the control panel. | |
| 6 | Status lights: Ready light, Data light, and Attention light. | |
| 7 | Light and dark buttons: use to increase or decrease the brightness of the copy image | |
| 8 | REDUCE and ENLARGE buttons: use to scale the copy size. | |
| 9 | RESET: returns all current job settings to their default values. | |
| 10 | STOP: cancels a copy job, digital send job, or print job. | |
| 11 | START: begins or resumes a job. |
|
| 12 | Numeric keypad and keyboard: the keypad is used to type numerical values. The keyboard is | |
|
| used for | |
Hint | If the MFP is put into a paused mode (see “Menu map” on page 33), the control panel displays | ||
| the message Paused at the top of the display. To return the MFP to the ready mode, press MENU | ||
| and then use the navigation buttons (callout 3) to highlight RESUME on the | ||
| Press the SELECT ( ) button. The message displayed on the control panel changes from Paused | ||
| to Ready. |
| |
The MFP paused mode is not the same as PowerSave mode. When the MFP is in PowerSave mode, the
30 Operation |