Part V | Composer |
Composer
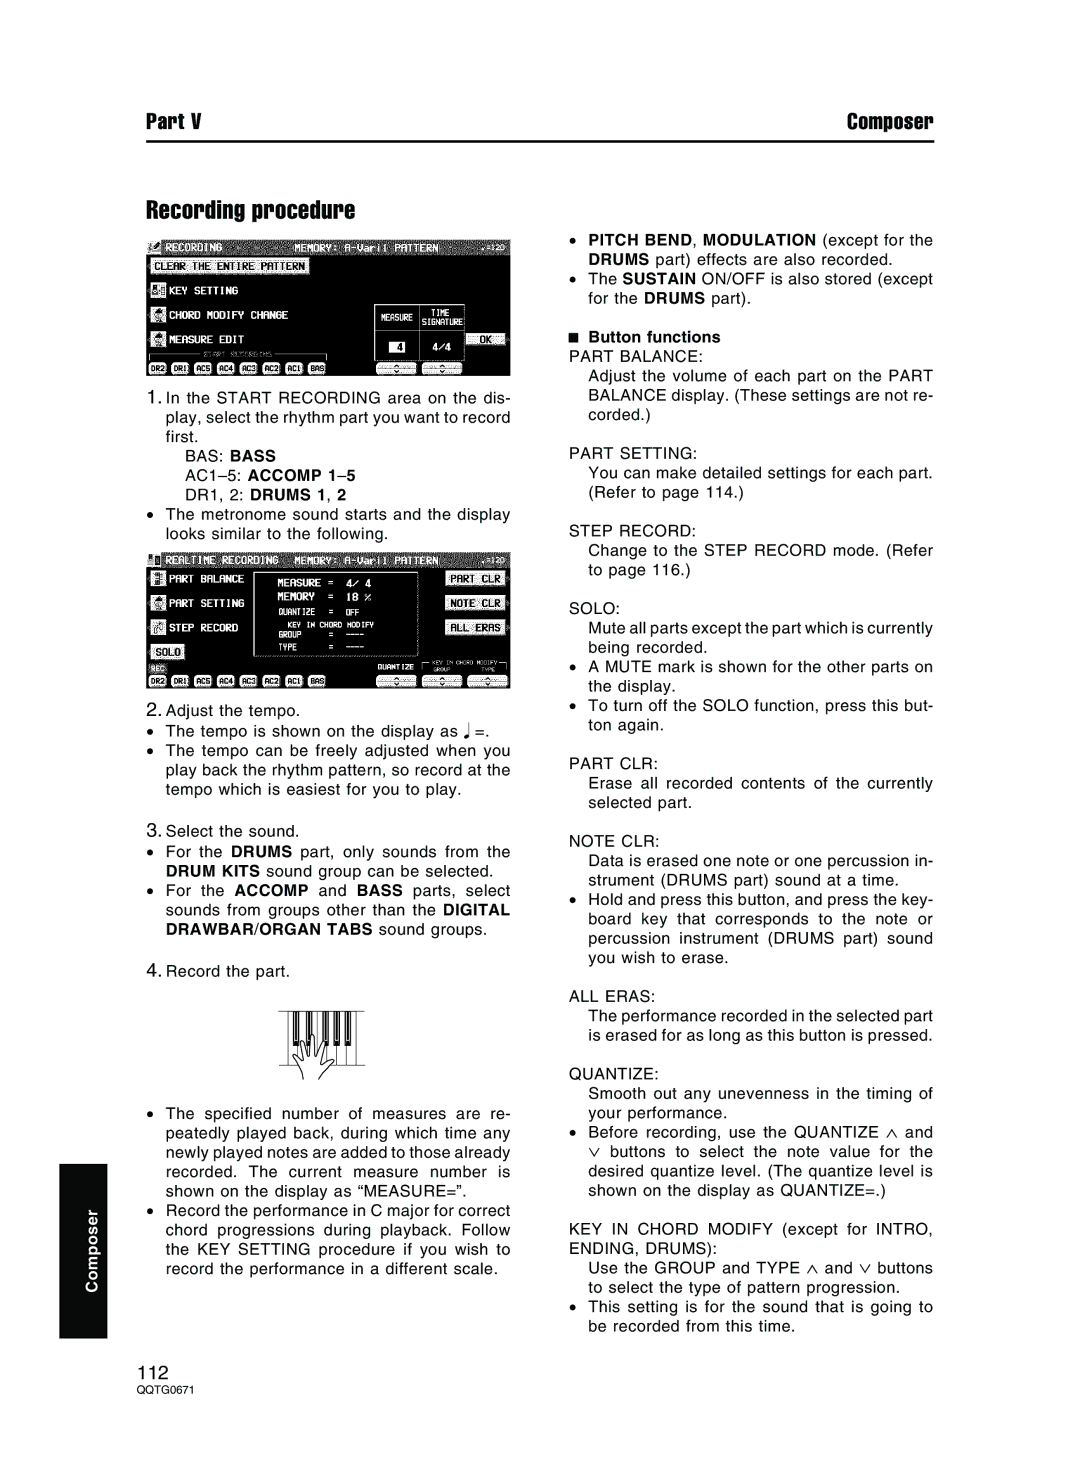
Recording procedure
1.In the START RECORDING area on the dis- play, select the rhythm part you want to record first.
BAS: BASS
AC1– 5: ACCOMP 1– 5
DR1, 2: DRUMS 1, 2
•The metronome sound starts and the display looks similar to the following.
2.Adjust the tempo.
• The tempo is shown on the display as =.
•The tempo can be freely adjusted when you play back the rhythm pattern, so record at the tempo which is easiest for you to play.
3.Select the sound.
•For the DRUMS part, only sounds from the DRUM KITS sound group can be selected.
•For the ACCOMP and BASS parts, select sounds from groups other than the DIGITAL DRAWBAR/ORGAN TABS sound groups.
4.Record the part.
•The specified number of measures are re- peatedly played back, during which time any newly played notes are added to those already recorded. The current measure number is shown on the display as “MEASURE=”.
•Record the performance in C major for correct chord progressions during playback. Follow the KEY SETTING procedure if you wish to record the performance in a different scale.
•PITCH BEND, MODULATION (except for the DRUMS part) effects are also recorded.
•The SUSTAIN ON/OFF is also stored (except for the DRUMS part).
Button functions
PART BALANCE:
Adjust the volume of each part on the PART BALANCE display. (These settings are not re- corded.)
PART SETTING:
You can make detailed settings for each part. (Refer to page 114.)
STEP RECORD:
Change to the STEP RECORD mode. (Refer to page 116.)
SOLO:
Mute all parts except the part which is currently being recorded.
•A MUTE mark is shown for the other parts on the display.
•To turn off the SOLO function, press this but- ton again.
PART CLR:
Erase all recorded contents of the currently selected part.
NOTE CLR:
Data is erased one note or one percussion in- strument (DRUMS part) sound at a time.
•Hold and press this button, and press the key- board key that corresponds to the note or percussion instrument (DRUMS part) sound you wish to erase.
ALL ERAS:
The performance recorded in the selected part is erased for as long as this button is pressed.
QUANTIZE:
Smooth out any unevenness in the timing of your performance.
•Before recording, use the QUANTIZE ∧ and ∨ buttons to select the note value for the desired quantize level. (The quantize level is shown on the display as QUANTIZE=.)
KEY IN CHORD MODIFY (except for INTRO, ENDING, DRUMS):
Use the GROUP and TYPE ∧ and ∨ buttons to select the type of pattern progression.
•This setting is for the sound that is going to be recorded from this time.
112