Part V | Composer |
Step Record
Use STEP RECORD to store the notes
Recording procedure
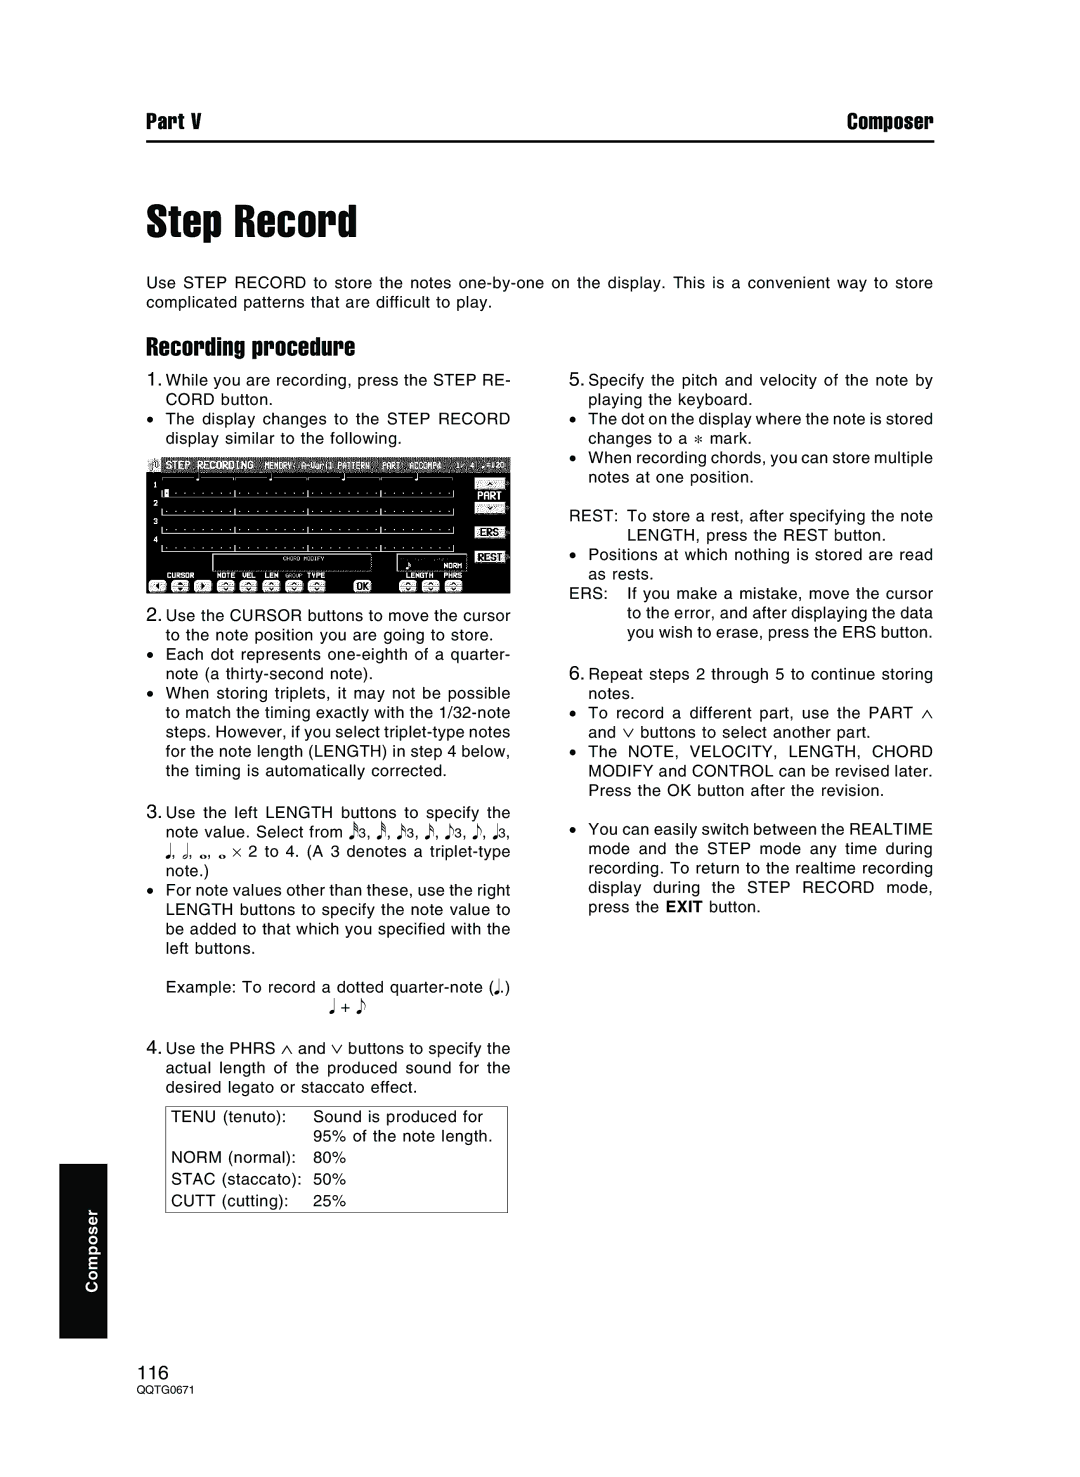
1.While you are recording, press the STEP RE- CORD button.
•The display changes to the STEP RECORD display similar to the following.
2.Use the CURSOR buttons to move the cursor to the note position you are going to store.
•Each dot represents
•When storing triplets, it may not be possible to match the timing exactly with the
3.Use the left LENGTH buttons to specify the
note value. Select from 3, , 3, , 3, , 3,
, , , ⋅ 2 to 4. (A 3 denotes a
•For note values other than these, use the right LENGTH buttons to specify the note value to be added to that which you specified with the left buttons.
Example: To record a dotted
+
4.Use the PHRS ∧ and ∨ buttons to specify the actual length of the produced sound for the desired legato or staccato effect.
TENU (tenuto): Sound is produced for 95% of the note length.
NORM (normal): 80%
STAC (staccato): 50%
CUTT (cutting): 25%
Composer
5.Specify the pitch and velocity of the note by playing the keyboard.
•The dot on the display where the note is stored changes to a * mark.
•When recording chords, you can store multiple notes at one position.
REST: To store a rest, after specifying the note LENGTH, press the REST button.
•Positions at which nothing is stored are read as rests.
ERS: If you make a mistake, move the cursor to the error, and after displaying the data you wish to erase, press the ERS button.
6. Repeat steps 2 through 5 to continue storing notes.
•To record a different part, use the PART and ∨ buttons to select another part.
•The NOTE, VELOCITY, LENGTH, CHORD MODIFY and CONTROL can be revised later. Press the OK button after the revision.
•You can easily switch between the REALTIME mode and the STEP mode any time during recording. To return to the realtime recording
display during the STEP RECORD mode,
press the EXIT button.∧