Chapter 8 Managing Drives and Disks
Working with Tape Drives
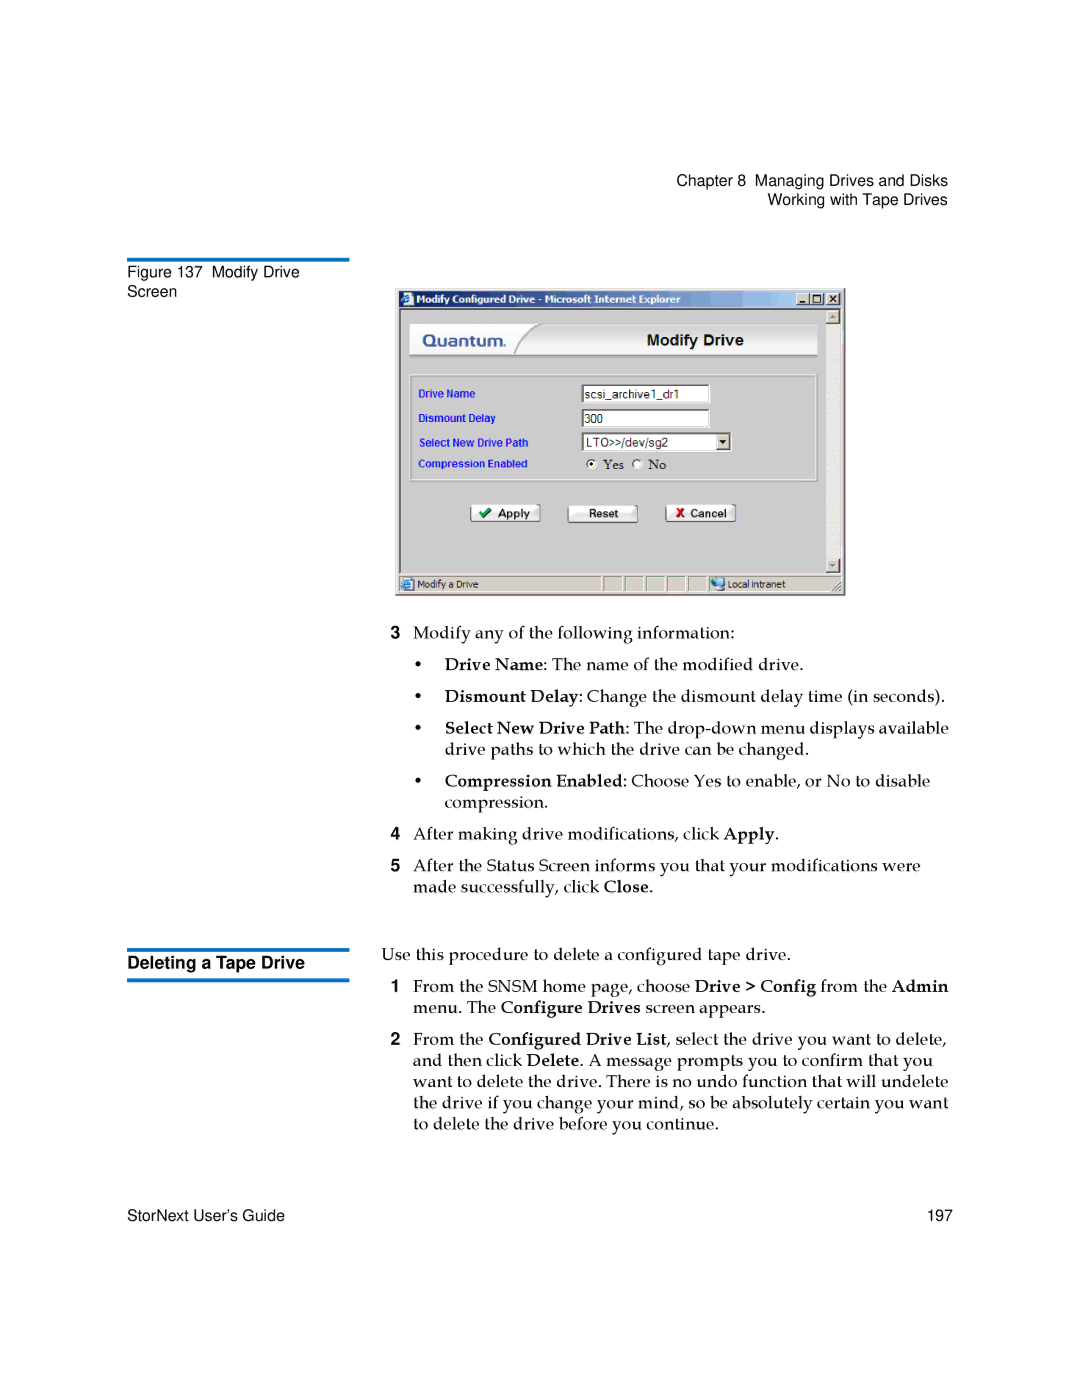
Figure 137 Modify Drive
Screen
| 3 | Modify any of the following information: | |
|
| • Drive Name: The name of the modified drive. | |
|
| • Dismount Delay: Change the dismount delay time (in seconds). | |
|
| • Select New Drive Path: The | |
|
| drive paths to which the drive can be changed. | |
|
| • Compression Enabled: Choose Yes to enable, or No to disable | |
|
| compression. | |
| 4 | After making drive modifications, click Apply. | |
| 5 | After the Status Screen informs you that your modifications were | |
|
| made successfully, click Close. | |
| Use this procedure to delete a configured tape drive. | ||
Deleting a Tape Drive | |||
1 | From the SNSM home page, choose Drive > Config from the Admin | ||
| |||
| |||
|
| menu. The Configure Drives screen appears. | |
| 2 | From the Configured Drive List, select the drive you want to delete, | |
|
| and then click Delete. A message prompts you to confirm that you | |
|
| want to delete the drive. There is no undo function that will undelete | |
|
| the drive if you change your mind, so be absolutely certain you want | |
|
| to delete the drive before you continue. | |
StorNext User’s Guide | 197 |