Sending Scan File by
HPress [Exit].
![]()
![]() Note
Note
r A searched
Checking selected destinations
A Use the destination field at the
4 top of the screen to check which destinations are select- ed.
![]()
![]() Note
Note
rWhen multiple destinations are selected, the selected des- tinations are displayed in the
order they were selected by pressing [UPrev.] or [TNext].
rPressing the {Check Modes} key on the control panel lets you check the list of selected destinations.
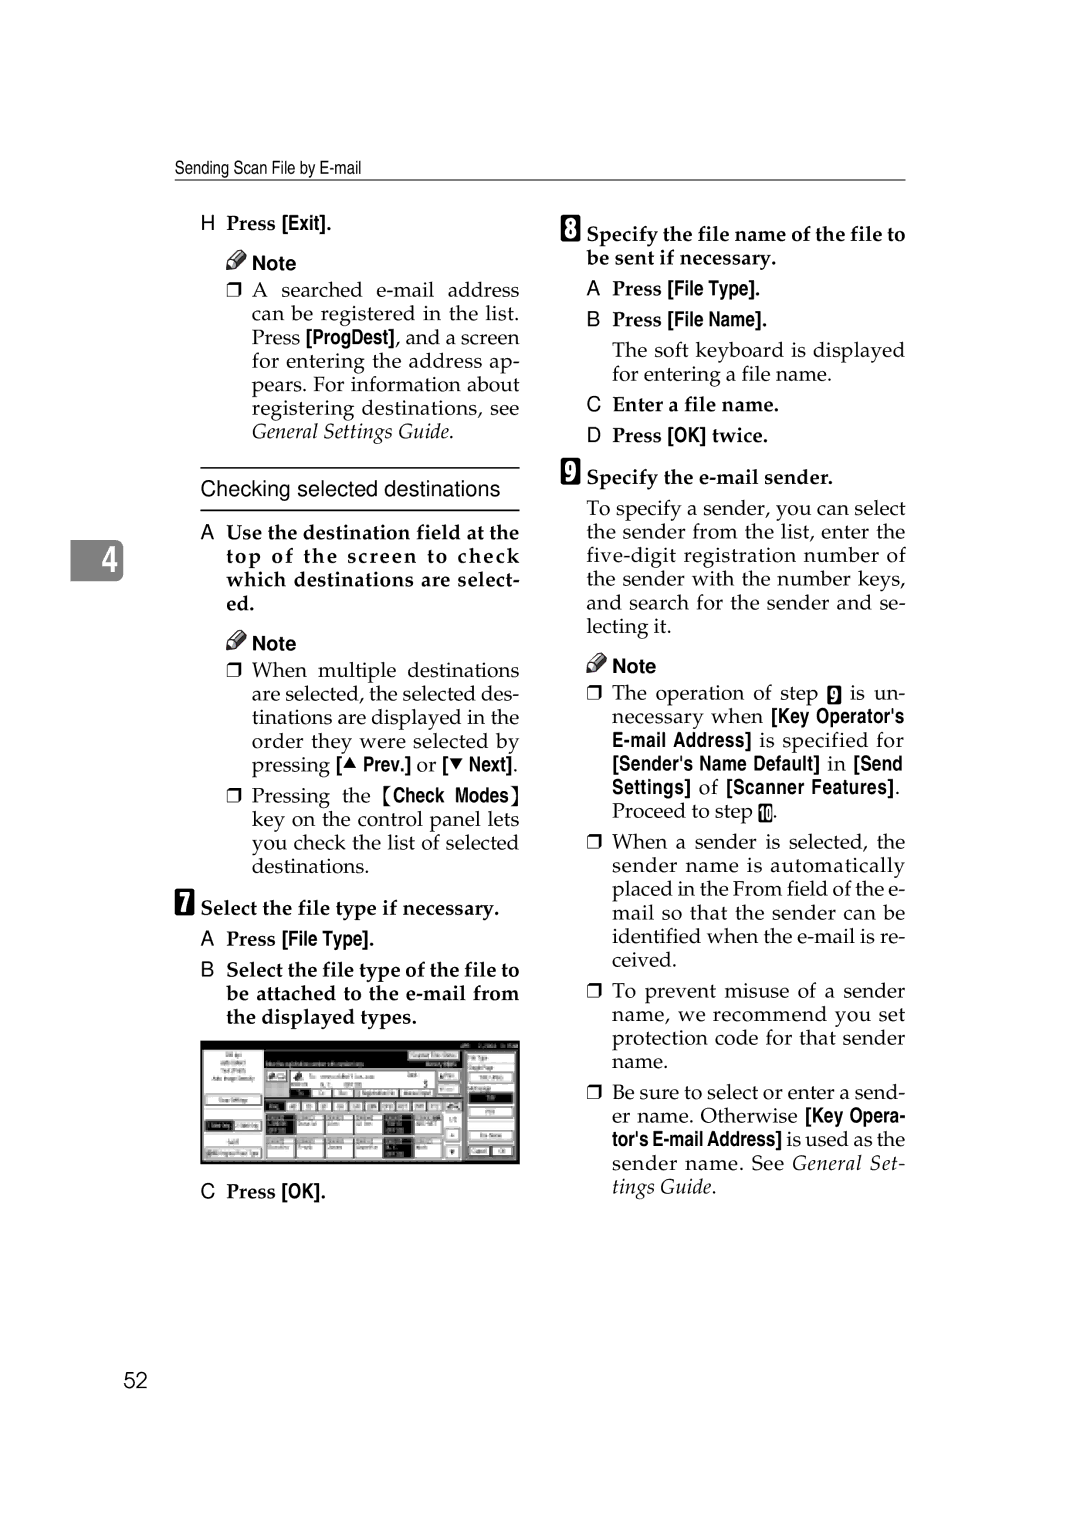
G Select the file type if necessary.
APress [File Type].
BSelect the file type of the file to be attached to the
CPress [OK].
H Specify the file name of the file to be sent if necessary.
APress [File Type].
BPress [File Name].
The soft keyboard is displayed for entering a file name.
CEnter a file name.
DPress [OK] twice.
I Specify the e-mail sender.
To specify a sender, you can select the sender from the list, enter the
![]()
![]() Note
Note
rThe operation of step I is un- necessary when [Key Operator's
[Sender's Name Default] in [Send Settings] of [Scanner Features]. Proceed to step J.
rWhen a sender is selected, the sender name is automatically placed in the From field of the e- mail so that the sender can be identified when the
rTo prevent misuse of a sender name, we recommend you set protection code for that sender name.
rBe sure to select or enter a send- er name. Otherwise [Key Opera- tor's
52