64Cyclades® ACS 5000 Installation/Administration/User Guide
3.In the User field, enter the username.
4.In the Outlets field, enter the group name, IPDU number and outlets that the user can control.
5.Click OK.
Outlet entry conventions
In the most basic case, only the IPDU’s ID and the outlets named in brackets following the ID are needed to specify which outlets will be accessible by the user. It is sometimes desirable to have more control over outlet groups,
Table 6.6: Conventions Used in Specifying Outlets for User Accessibility
Symbol | Type | Signifies | Example | |
$ | Prefix | Group | $Cyclades_PDU would specify the Cyclades_PDU outlets group, and | |
that the user specified has permission to control that group of outlets. | ||||
|
|
| ||
|
|
| !ttyS2 would specify serial port 2 on the console server would be the | |
!ttyS | Prefix | Serial port | only one the user would have permissions to use for IPDU management, | |
|
|
| regardless of the IPDU or outlets specified. | |
|
| Order of | ||
A through Z | Suffix | IPDU in | would be used to control the second IPDU in the chain (B), followed by | |
|
| the outlet or range of outlets on that IPDU with user permissions. |
NOTE:
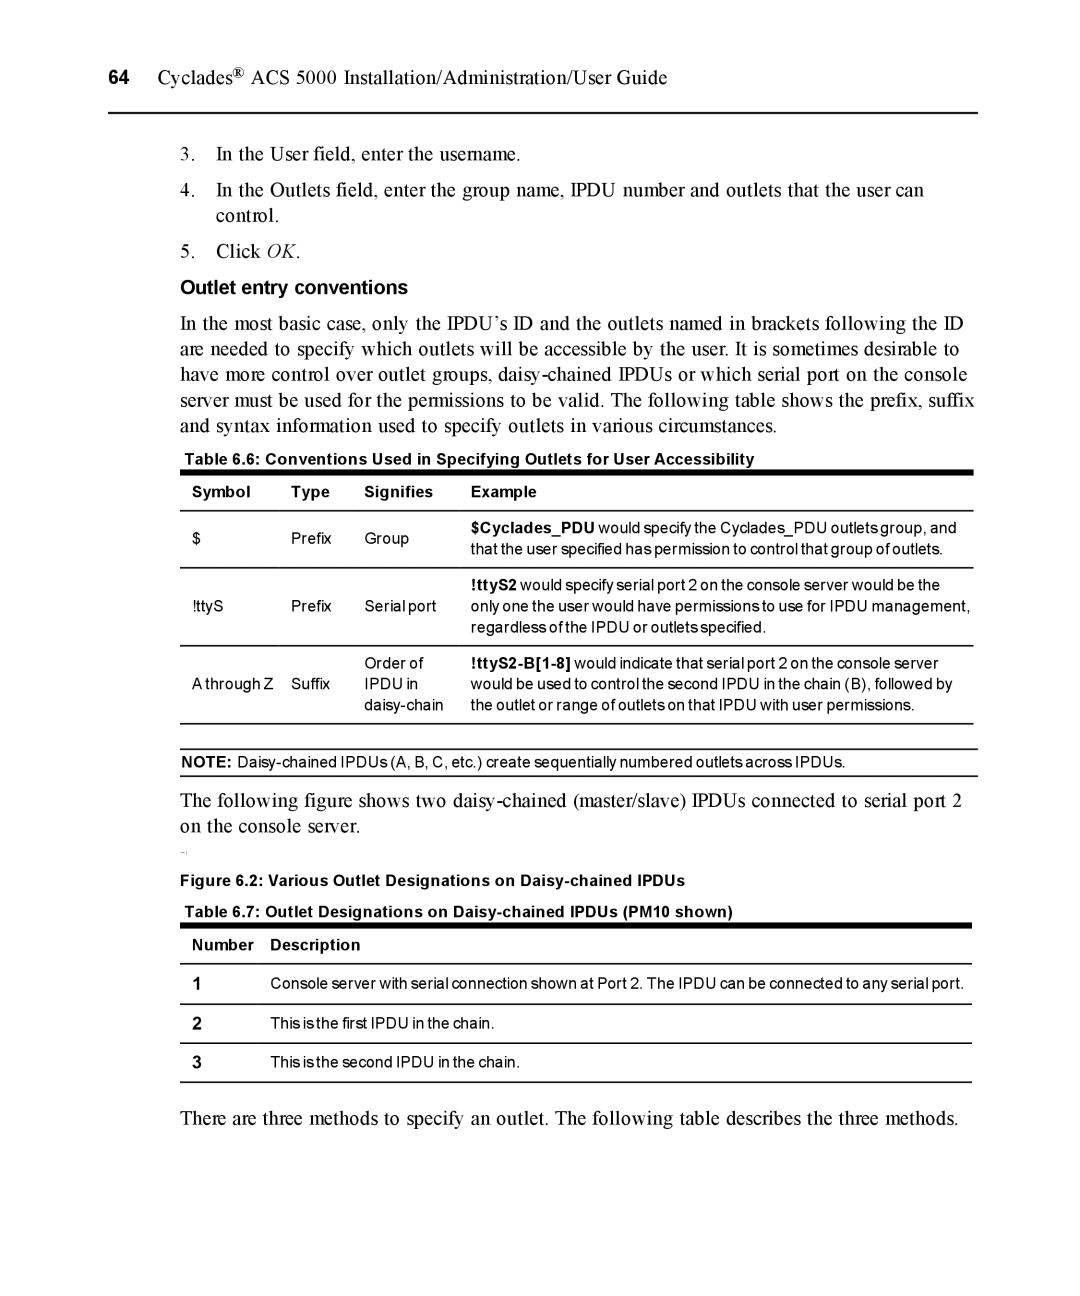
The following figure shows two
Figure 6.2: Various Outlet Designations on Daisy-chained IPDUs
Table 6.7: Outlet Designations on Daisy-chained IPDUs (PM10 shown)
Number Description
1Console server with serial connection shown at Port 2. The IPDU can be connected to any serial port.
2This is the first IPDU in the chain.
3This is the second IPDU in the chain.
There are three methods to specify an outlet. The following table describes the three methods.