Removal and Replacement Procedures Drives
9.4Removing a 3.5-Inch Drive From a 5.25-Inch Drive Adapter
A
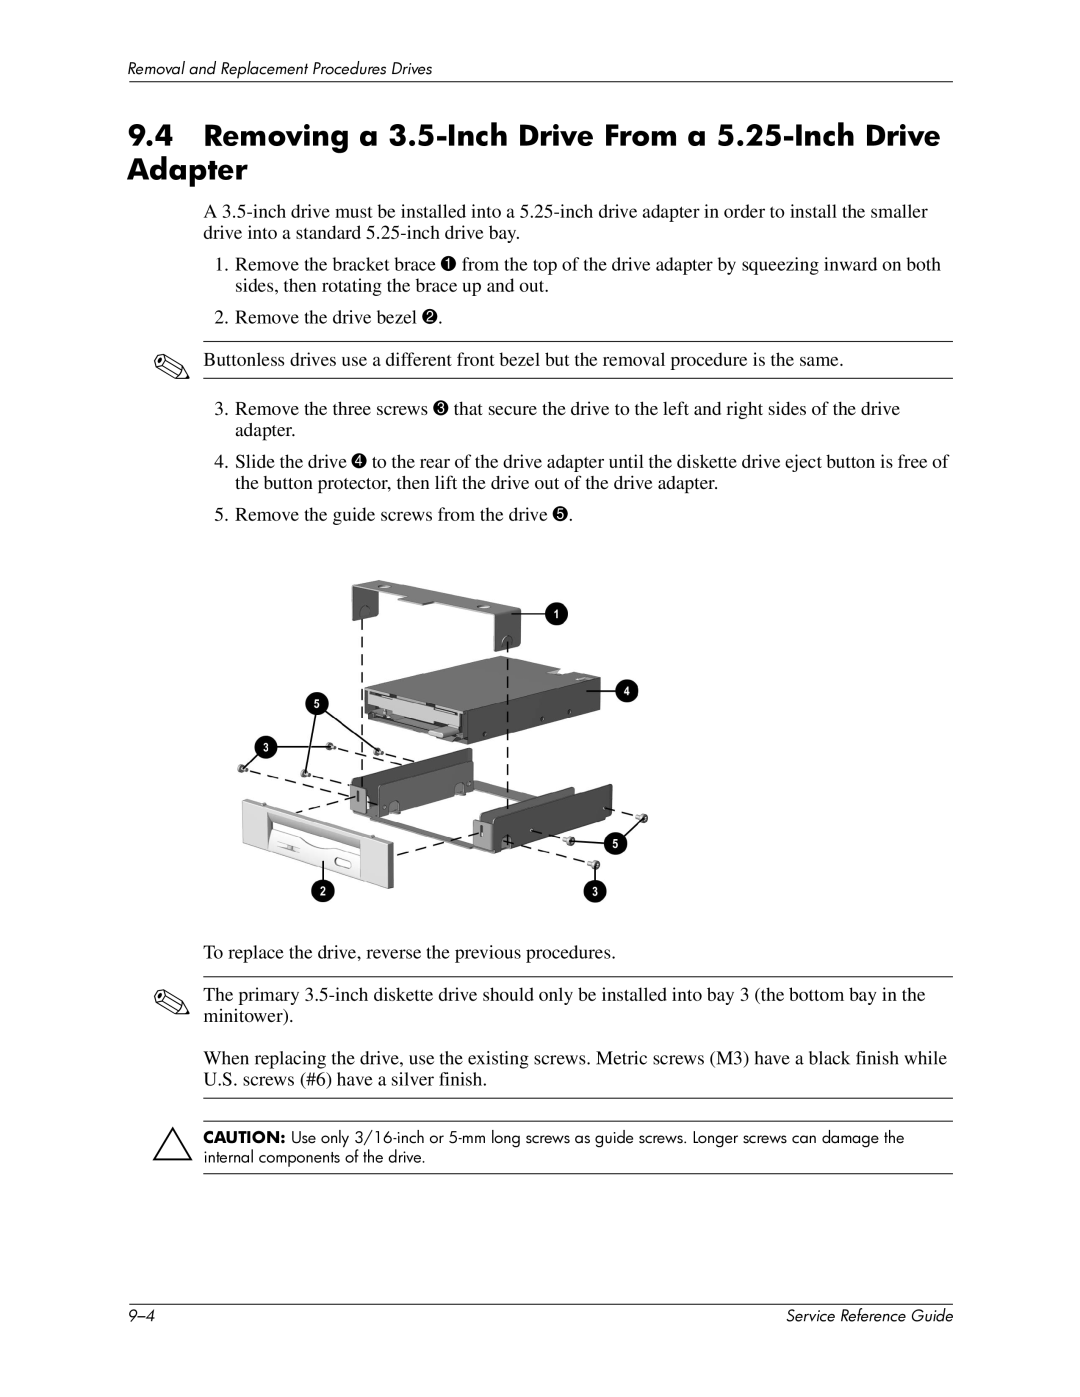
1.Remove the bracket brace 1 from the top of the drive adapter by squeezing inward on both sides, then rotating the brace up and out.
2.Remove the drive bezel 2.
✎Buttonless drives use a different front bezel but the removal procedure is the same.
3.Remove the three screws 3 that secure the drive to the left and right sides of the drive adapter.
4.Slide the drive 4 to the rear of the drive adapter until the diskette drive eject button is free of the button protector, then lift the drive out of the drive adapter.
5.Remove the guide screws from the drive 5.
To replace the drive, reverse the previous procedures.
✎The primary
When replacing the drive, use the existing screws. Metric screws (M3) have a black finish while U.S. screws (#6) have a silver finish.
ÄCAUTION: Use only
| Service Reference Guide |