Removal and Replacement Procedures Main Power and Cooling
13.3.2 Front Chassis Fan
To remove the front chassis fan of the hp workstation xw6000 system use the following procedure:
1.Prepare the computer for disassembly.
2.Remove the access panel.
3.Remove expansion boards if necessary.
4.Disconnect the fan power cable from the system board.
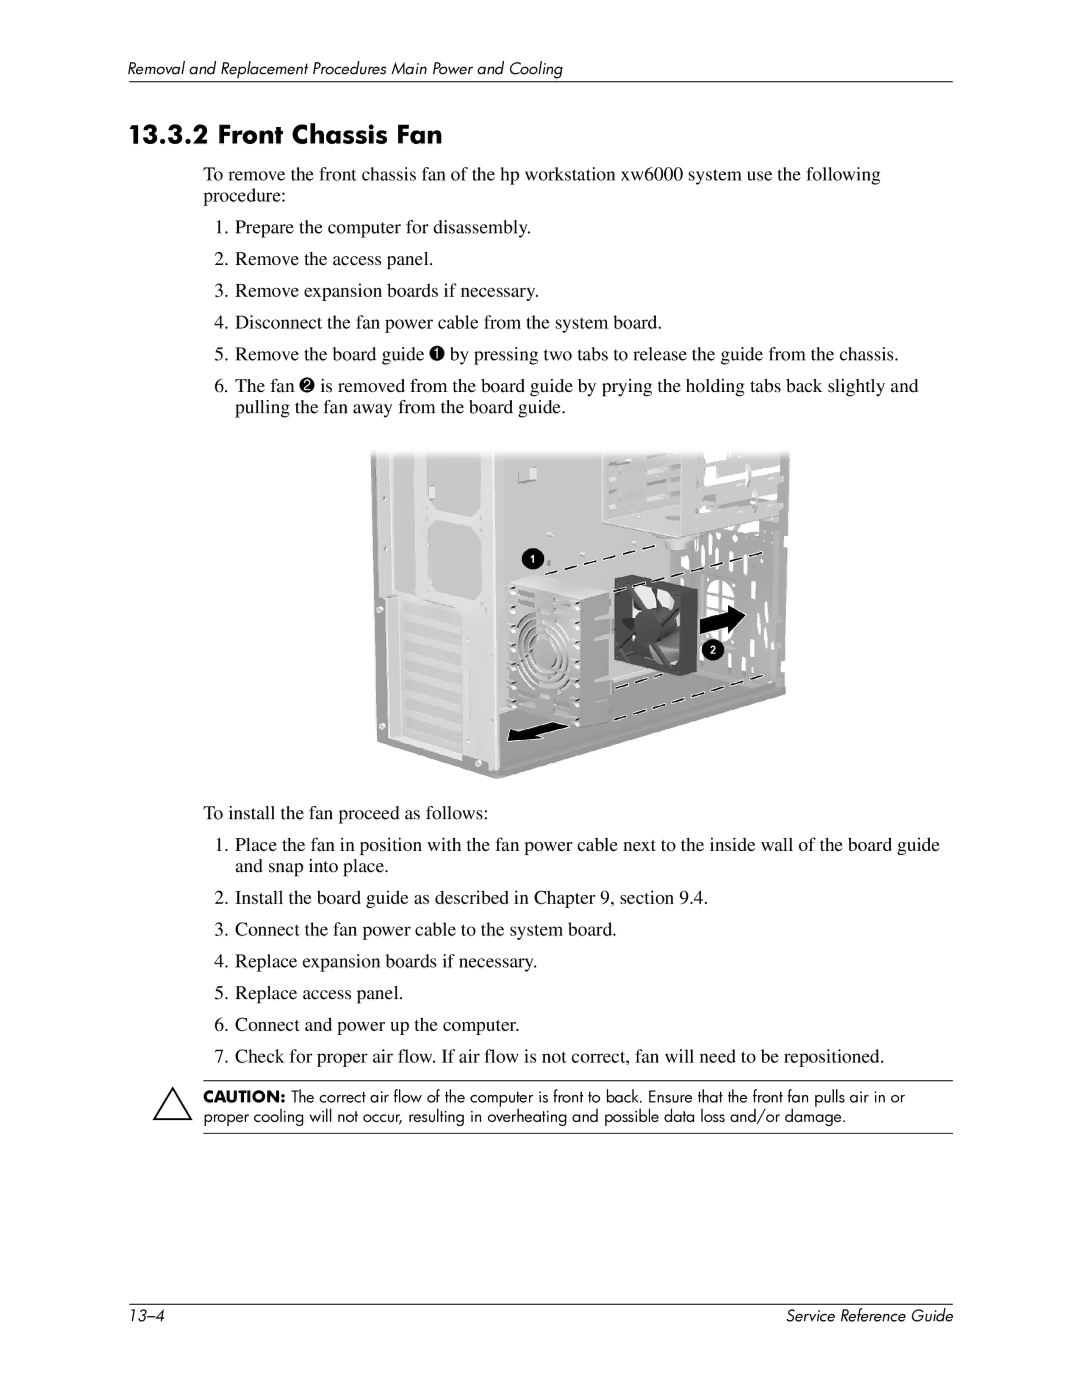
5.Remove the board guide 1 by pressing two tabs to release the guide from the chassis.
6.The fan 2 is removed from the board guide by prying the holding tabs back slightly and pulling the fan away from the board guide.
To install the fan proceed as follows:
1.Place the fan in position with the fan power cable next to the inside wall of the board guide and snap into place.
2.Install the board guide as described in Chapter 9, section 9.4.
3.Connect the fan power cable to the system board.
4.Replace expansion boards if necessary.
5.Replace access panel.
6.Connect and power up the computer.
7.Check for proper air flow. If air flow is not correct, fan will need to be repositioned.
ÄCAUTION: The correct air flow of the computer is front to back. Ensure that the front fan pulls air in or proper cooling will not occur, resulting in overheating and possible data loss and/or damage.
| Service Reference Guide |