INSIDE THE NETMGR.INI FILE
Tip: If you are going to design your own graphic bitmap for a device, remember to design three kinds of graphic images
•the device at normal operating condition
•the device when it is “down” or not operating
•the device in the “not monitored” mode
1.Identify the directory where your graphic bitmap file(s) are located by editing the first line in the [bitmap] section. This parameter identifies the directory where the bitmaps are found. It follows the following syntax: path=directory
2.Enumerate the graphic bitmaps to include using the following format:
Device_ID=bitmap1,bitmap2,bitmap3
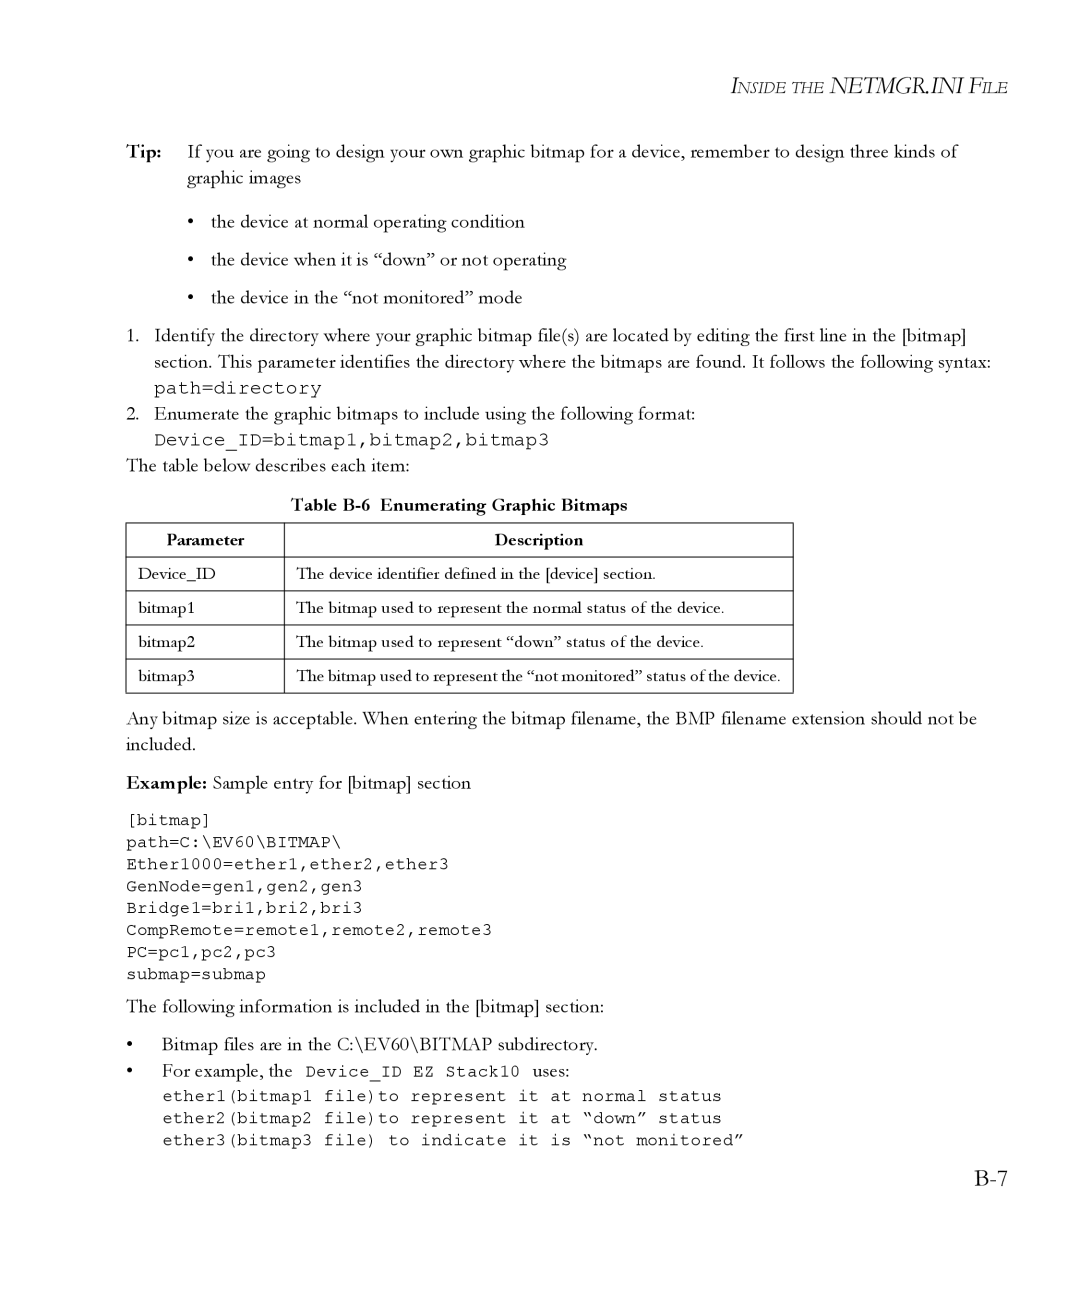
The table below describes each item:
| Table |
|
|
Parameter | Description |
|
|
Device_ID | The device identifier defined in the [device] section. |
|
|
bitmap1 | The bitmap used to represent the normal status of the device. |
|
|
bitmap2 | The bitmap used to represent “down” status of the device. |
|
|
bitmap3 | The bitmap used to represent the “not monitored” status of the device. |
|
|
Any bitmap size is acceptable. When entering the bitmap filename, the BMP filename extension should not be included.
Example: Sample entry for [bitmap] section
[bitmap]
path=C:\EV60\BITMAP\
Ether1000=ether1,ether2,ether3
GenNode=gen1,gen2,gen3
Bridge1=bri1,bri2,bri3
CompRemote=remote1,remote2,remote3
PC=pc1,pc2,pc3
submap=submap
The following information is included in the [bitmap] section:
•Bitmap files are in the C:\EV60\BITMAP subdirectory.
•For example, the Device_ID EZ Stack10 uses: ether1(bitmap1 file)to represent it at normal status ether2(bitmap2 file)to represent it at “down” status ether3(bitmap3 file) to indicate it is “not monitored”