USING RMON
Adding or Editing an Entry in the Control Table
Click on the Add (Edit) button in the History Control Table to add (edit) an index entry as shown on the preceding page. Each interface equates to a physical media on the device being monitored. This information can be found under MIB2 (see
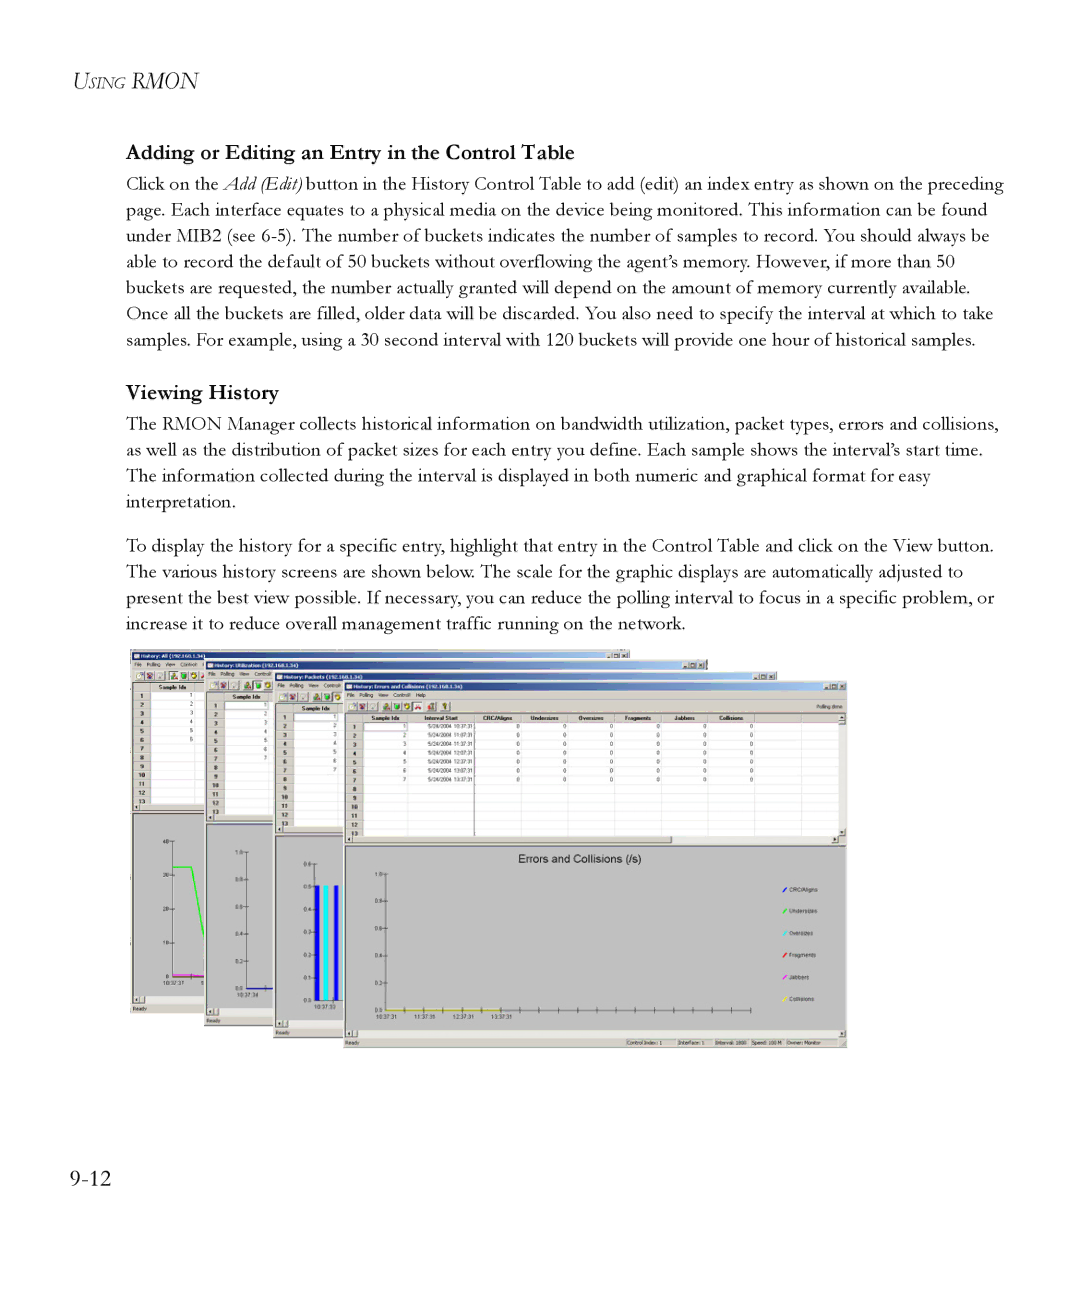
Viewing History
The RMON Manager collects historical information on bandwidth utilization, packet types, errors and collisions, as well as the distribution of packet sizes for each entry you define. Each sample shows the interval’s start time. The information collected during the interval is displayed in both numeric and graphical format for easy interpretation.
To display the history for a specific entry, highlight that entry in the Control Table and click on the View button. The various history screens are shown below. The scale for the graphic displays are automatically adjusted to present the best view possible. If necessary, you can reduce the polling interval to focus in a specific problem, or increase it to reduce overall management traffic running on the network.