The Cross Point Attenuation slider appears. Move the slider or use the selector box to set the gain/attenuation level in dB. The range is from
Note: Your changes are automatically saved when you close the slider.
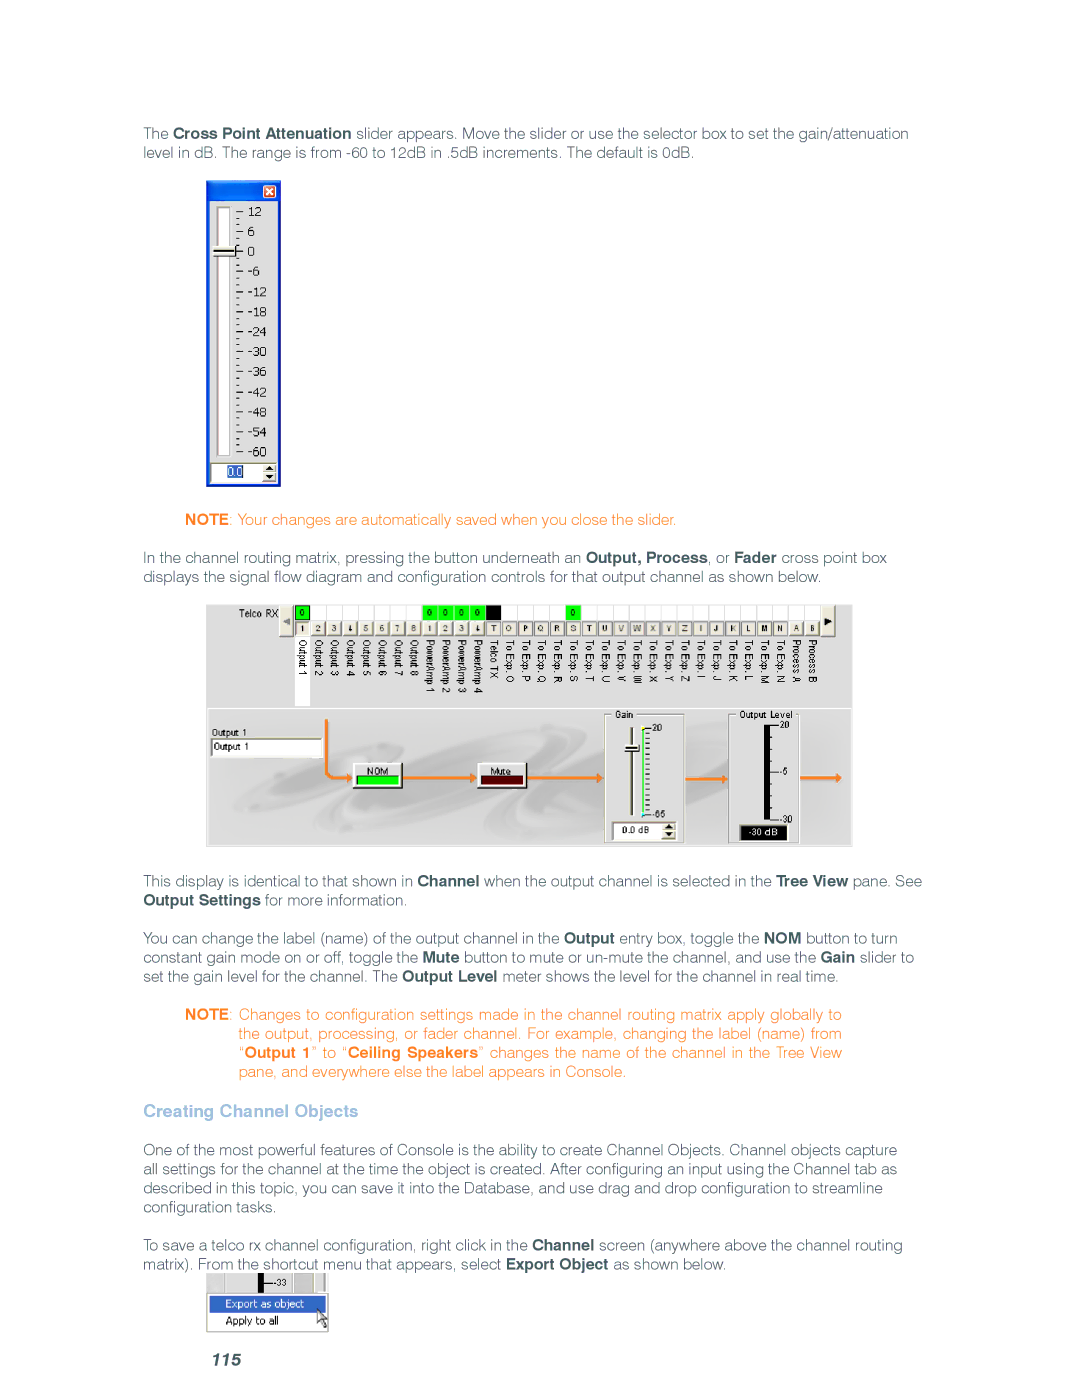
In the channel routing matrix, pressing the button underneath an Output, Process, or Fader cross point box displays the signal flow diagram and configuration controls for that output channel as shown below.
This display is identical to that shown in Channel when the output channel is selected in the Tree View pane. See Output Settings for more information.
You can change the label (name) of the output channel in the Output entry box, toggle the NOM button to turn constant gain mode on or off, toggle the Mute button to mute or
Note: Changes to configuration settings made in the channel routing matrix apply globally to the output, processing, or fader channel. For example, changing the label (name) from “Output 1” to “Ceiling Speakers” changes the name of the channel in the Tree View pane, and everywhere else the label appears in Console.
Creating Channel Objects
One of the most powerful features of Console is the ability to create Channel Objects. Channel objects capture all settings for the channel at the time the object is created. After configuring an input using the Channel tab as described in this topic, you can save it into the Database, and use drag and drop configuration to streamline configuration tasks.
To save a telco rx channel configuration, right click in the Channel screen (anywhere above the channel routing matrix). From the shortcut menu that appears, select Export Object as shown below.