Note: Changes to configuration settings made in the channel routing matrix apply globally to that channel. For example, changing the label (name) from “Input 1” to “Ceiling Mic” changes the name of the channel in the Tree View pane, and everywhere else the label appears in Console.
Creating Channel Objects
One of the most powerful features of Console is the ability to create Channel Objects. Channel objects capture all settings for the channel at the time the object is created. After configuring an input using the Channel tab as described in this topic, you can save it into the Database, and use drag and drop configuration to streamline configuration tasks.
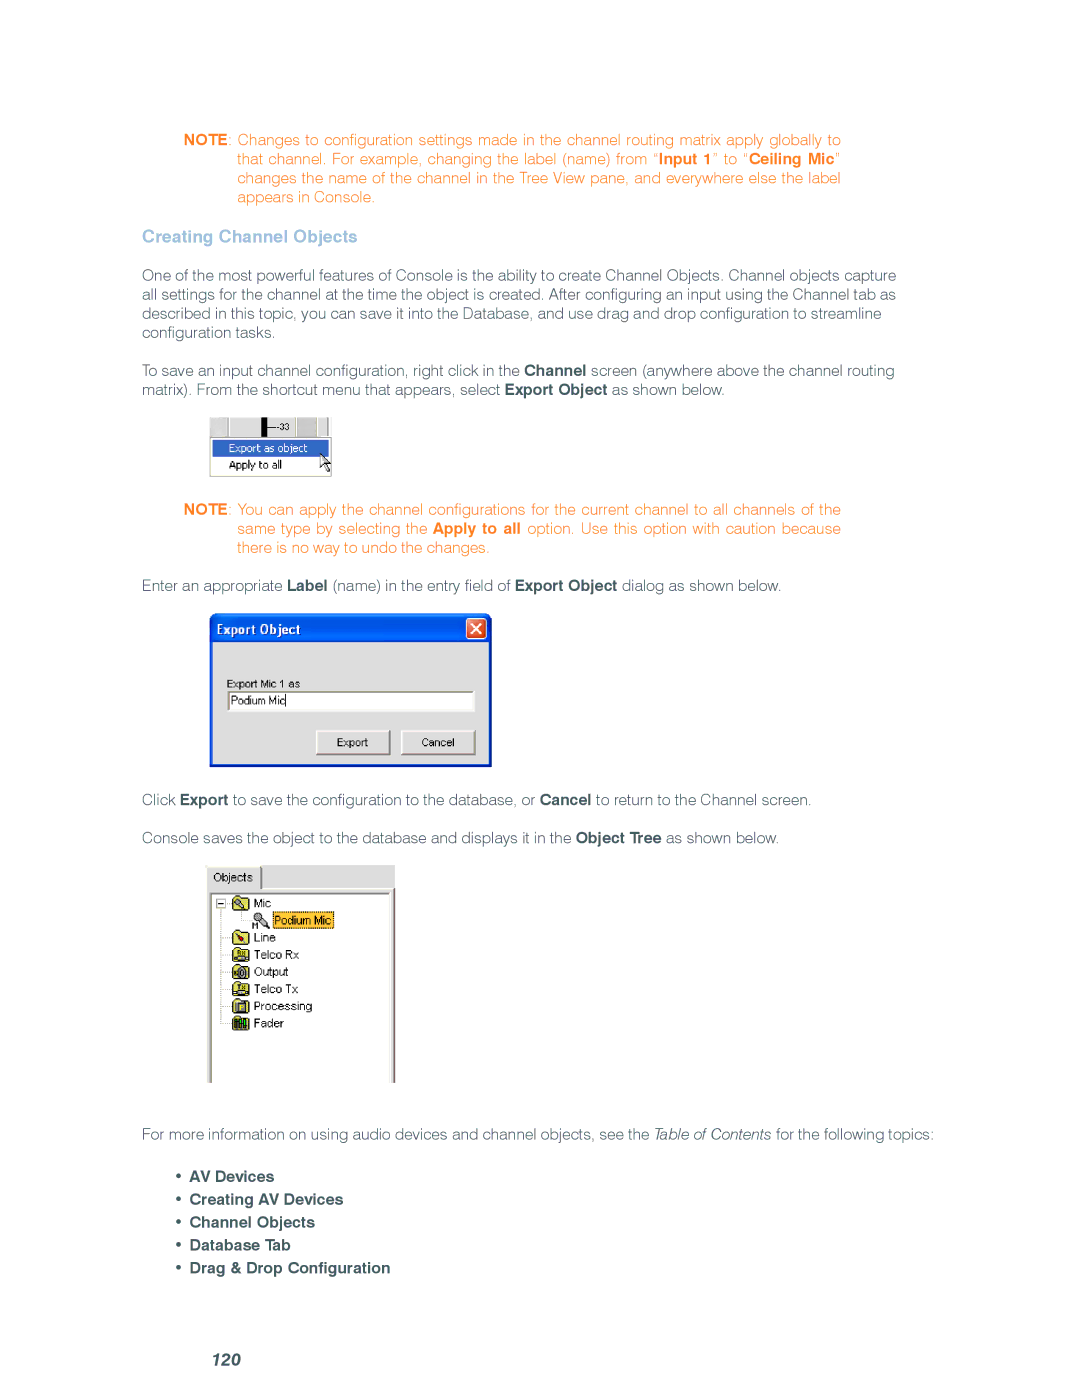
To save an input channel configuration, right click in the Channel screen (anywhere above the channel routing matrix). From the shortcut menu that appears, select Export Object as shown below.
NOTE: You can apply the channel configurations for the current channel to all channels of the same type by selecting the Apply to all option. Use this option with caution because there is no way to undo the changes.
Enter an appropriate Label (name) in the entry field of Export Object dialog as shown below.
Click Export to save the configuration to the database, or Cancel to return to the Channel screen.
Console saves the object to the database and displays it in the Object Tree as shown below.
For more information on using audio devices and channel objects, see the Table of Contents for the following topics:
•AV Devices
•Creating AV Devices
•Channel Objects
•Database Tab
•Drag & Drop Configuration
