Installing a Hard Drive
Caution: Before performing the procedures written in this chapter, except for when
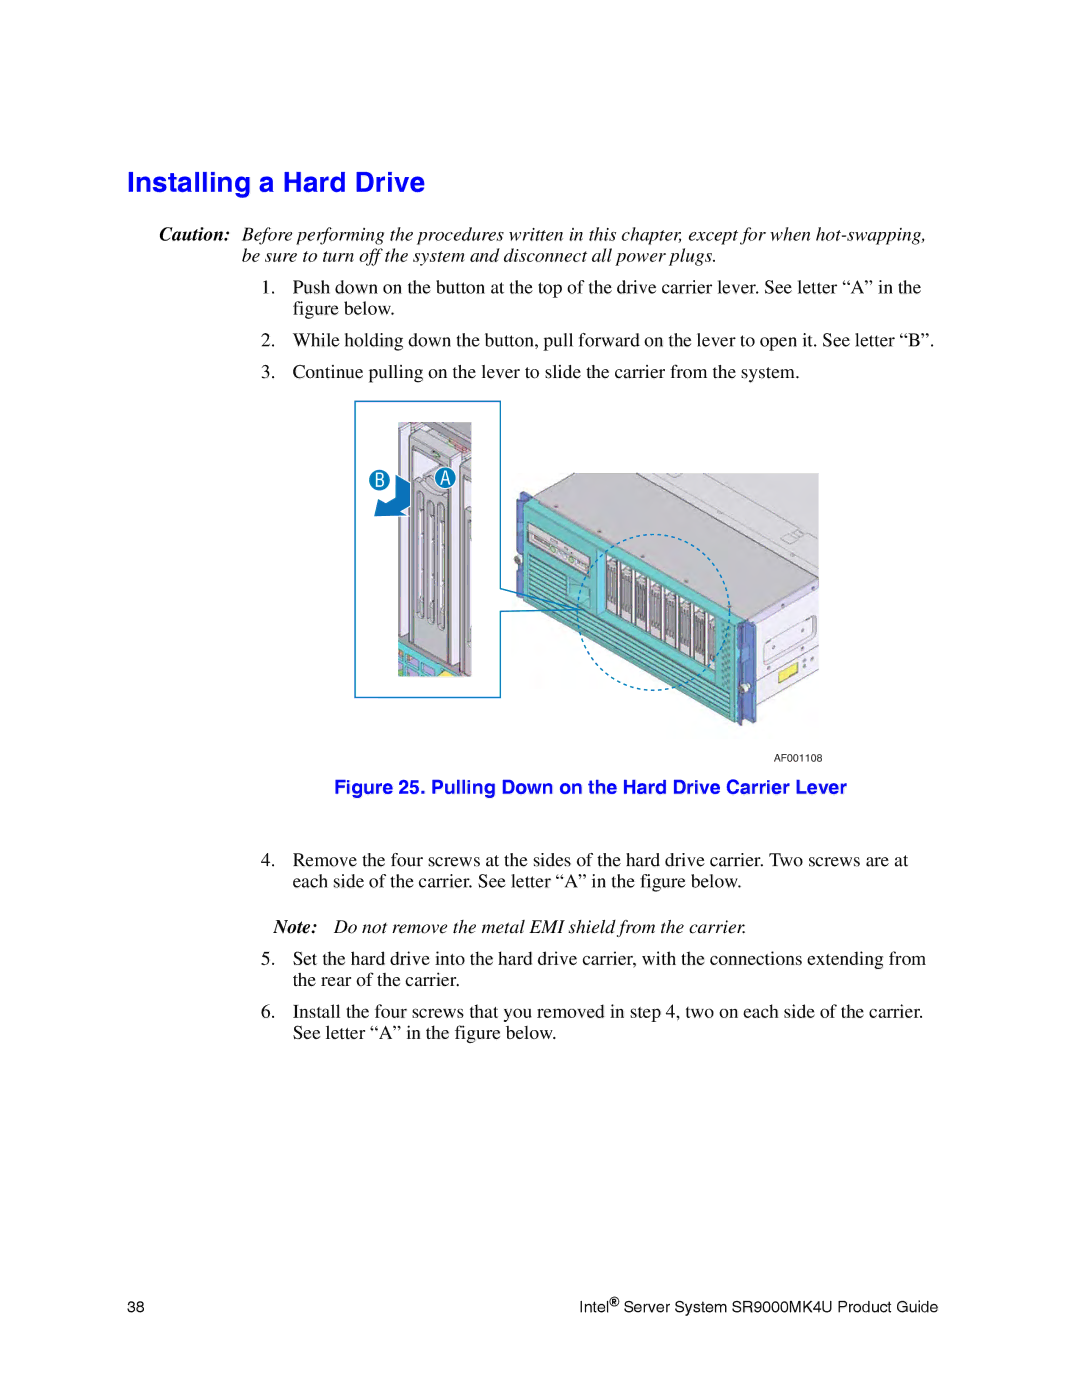
1.Push down on the button at the top of the drive carrier lever. See letter “A” in the figure below.
2.While holding down the button, pull forward on the lever to open it. See letter “B”.
3.Continue pulling on the lever to slide the carrier from the system.
B A
AF001108
Figure 25. Pulling Down on the Hard Drive Carrier Lever
4.Remove the four screws at the sides of the hard drive carrier. Two screws are at each side of the carrier. See letter “A” in the figure below.
Note: Do not remove the metal EMI shield from the carrier.
5.Set the hard drive into the hard drive carrier, with the connections extending from the rear of the carrier.
6.Install the four screws that you removed in step 4, two on each side of the carrier. See letter “A” in the figure below.
38 | Intel® Server System SR9000MK4U Product Guide |
