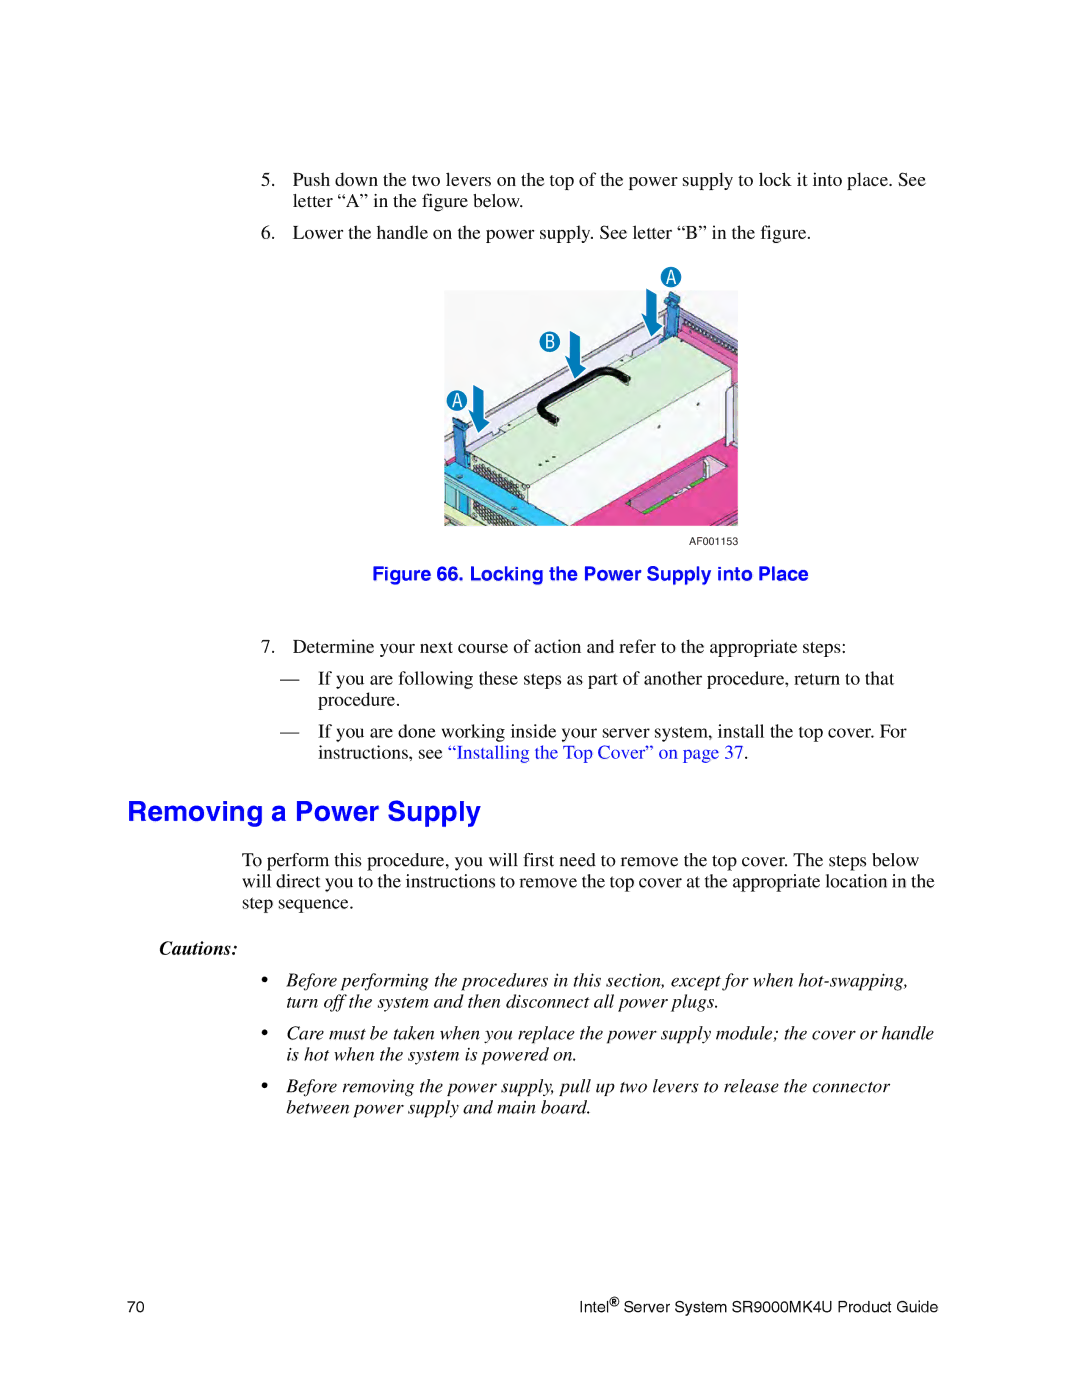
5.Push down the two levers on the top of the power supply to lock it into place. See letter “A” in the figure below.
6.Lower the handle on the power supply. See letter “B” in the figure.
A
B
A
AF001153
Figure 66. Locking the Power Supply into Place
7.Determine your next course of action and refer to the appropriate steps:
—If you are following these steps as part of another procedure, return to that procedure.
—If you are done working inside your server system, install the top cover. For instructions, see “Installing the Top Cover” on page 37.
Removing a Power Supply
To perform this procedure, you will first need to remove the top cover. The steps below will direct you to the instructions to remove the top cover at the appropriate location in the step sequence.
Cautions:
•Before performing the procedures in this section, except for when
•Care must be taken when you replace the power supply module; the cover or handle is hot when the system is powered on.
•Before removing the power supply, pull up two levers to release the connector between power supply and main board.
70 | Intel® Server System SR9000MK4U Product Guide |
