Hot-Plugging a PCI Card
To perform this procedure, you will first need to remove the top cover. The steps below will direct you to the instructions to remove the top cover at the appropriate location in the step sequence.
Caution: Use caution when installing the
1.Remove the top cover. For instructions, see “Removing the Top Cover” on page 36.
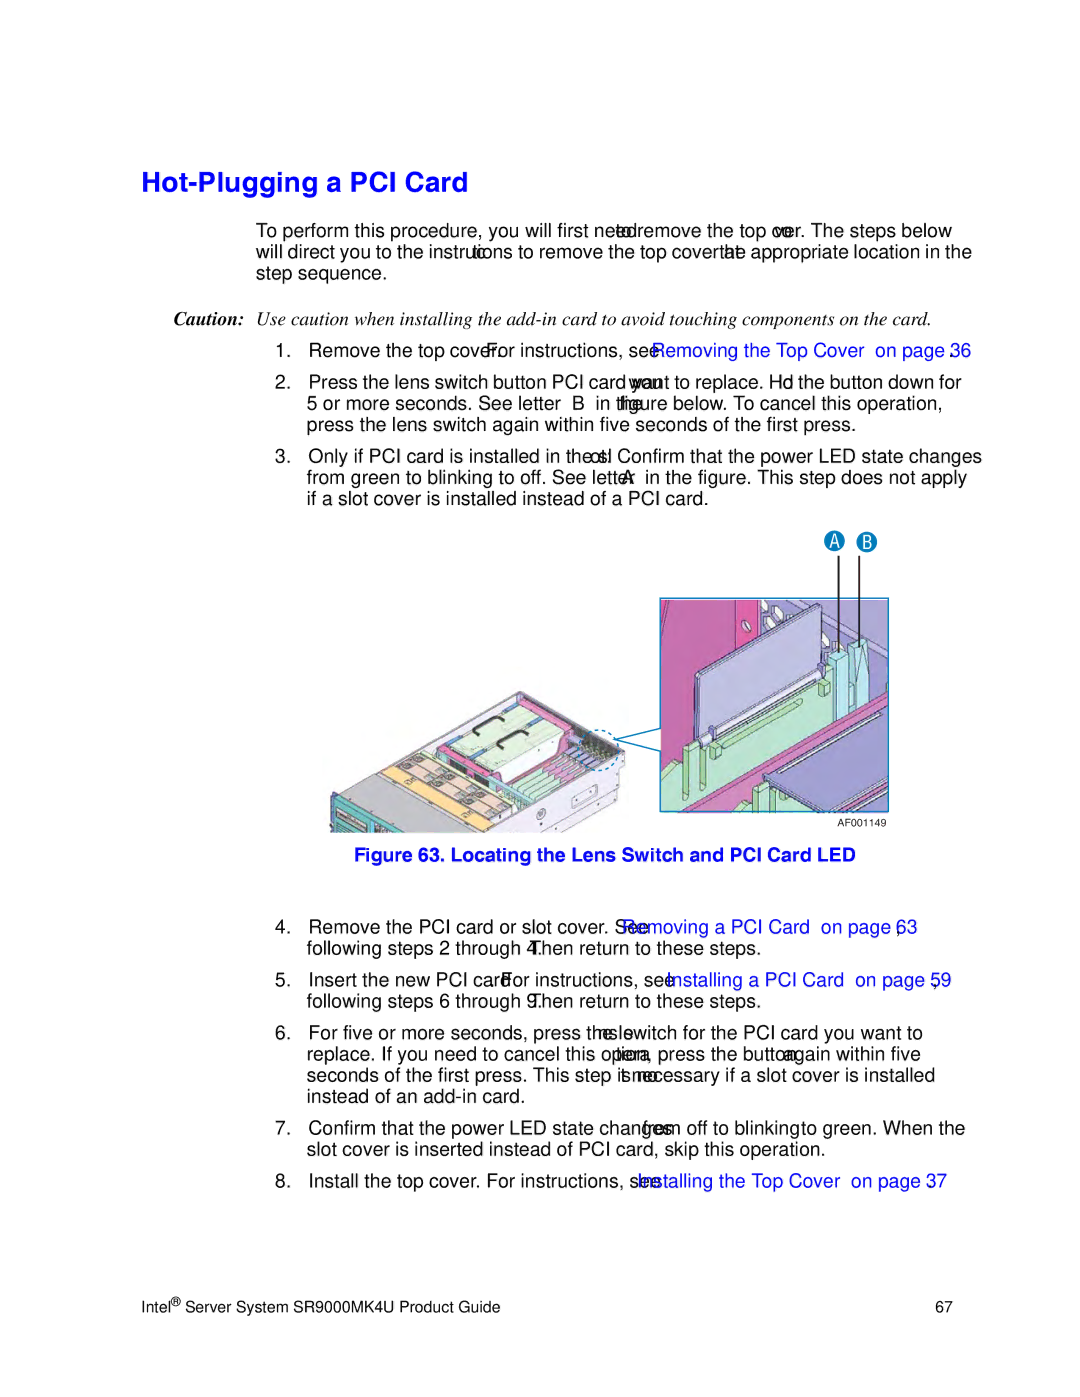
2.Press the lens switch button PCI card you want to replace. Hold the button down for 5 or more seconds. See letter “B” in the figure below. To cancel this operation, press the lens switch again within five seconds of the first press.
3.Only if PCI card is installed in the slot: Confirm that the power LED state changes from green to blinking to off. See letter “A” in the figure. This step does not apply if a slot cover is installed instead of a PCI card.
A B
AF001149
Figure 63. Locating the Lens Switch and PCI Card LED
4.Remove the PCI card or slot cover. See “Removing a PCI Card” on page 63, following steps 2 through 4. Then return to these steps.
5.Insert the new PCI card. For instructions, see “Installing a PCI Card” on page 59, following steps 6 through 9. Then return to these steps.
6.For five or more seconds, press the lens switch for the PCI card you want to replace. If you need to cancel this operation, press the button again within five seconds of the first press. This step is not necessary if a slot cover is installed instead of an
7.Confirm that the power LED state changes from off to blinking to green. When the slot cover is inserted instead of PCI card, skip this operation.
8.Install the top cover. For instructions, see “Installing the Top Cover” on page 37.
Intel® Server System SR9000MK4U Product Guide | 67 |