POLICY MANAGER
Creating a Policy
3 |
CREATING A POLICY
There are three steps to creating a policy:
Step 1 - Defining users – Add the users, and groups of users, that you want to filter.
Step 2 - Defining actions – Define what should be done with a message that triggers a filter.
Step 3 - Defining the rules – Create filters to find messages of a specific type. You can filter virus/spam messages by adding one or more types of filter to the policy.
Note: RiskFilter supports
STEP 1 - DEFINING USERS
RiskFilter enables you to apply different filtering solutions to messages from specific address groups, according to different routing paths. There are three ways to add an
•Add the address/es manually
•Import the address/es from a file
•Import the address/es from an LDAP connection
See Address Group on page 69 for more details on how to add addresses.
STEP 2 - DEFINING THE ACTION
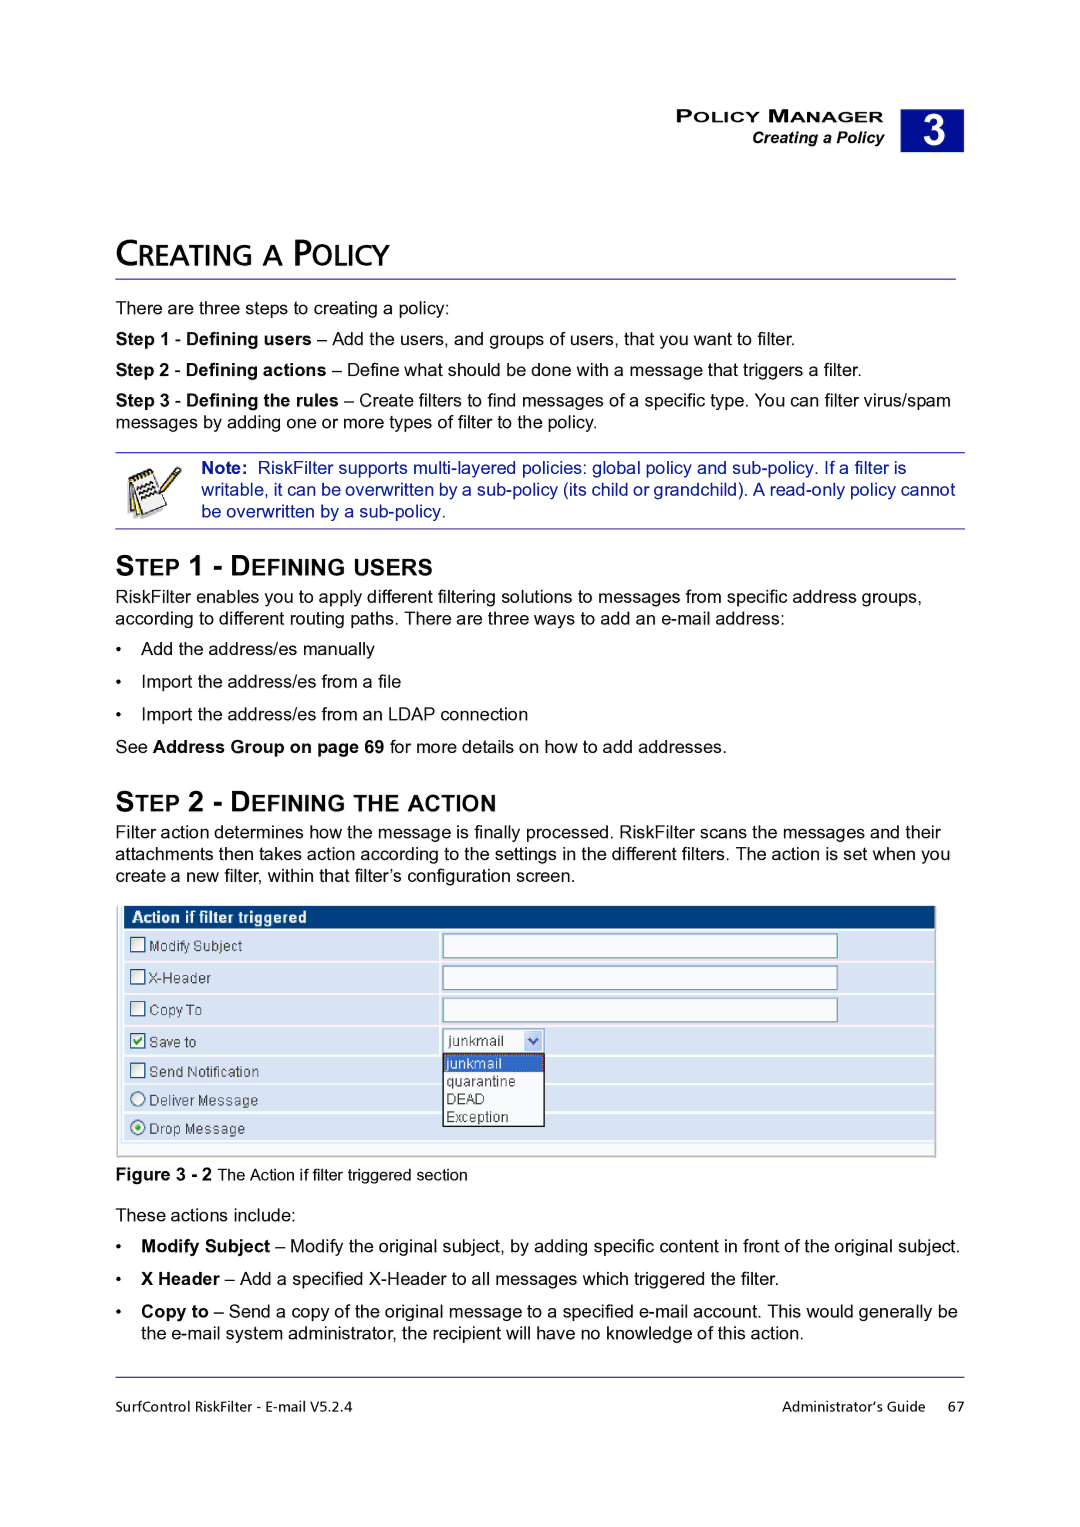
Filter action determines how the message is finally processed. RiskFilter scans the messages and their attachments then takes action according to the settings in the different filters. The action is set when you create a new filter, within that filter’s configuration screen.
Figure 3 - 2 The Action if filter triggered section
These actions include:
•Modify Subject – Modify the original subject, by adding specific content in front of the original subject.
•X Header – Add a specified
•Copy to – Send a copy of the original message to a specified
SurfControl RiskFilter - | Administrator’s Guide 67 |
