Section 5: Printer Configuration
LCD DISPLAY |
| DEFINITION | |
|
| ||
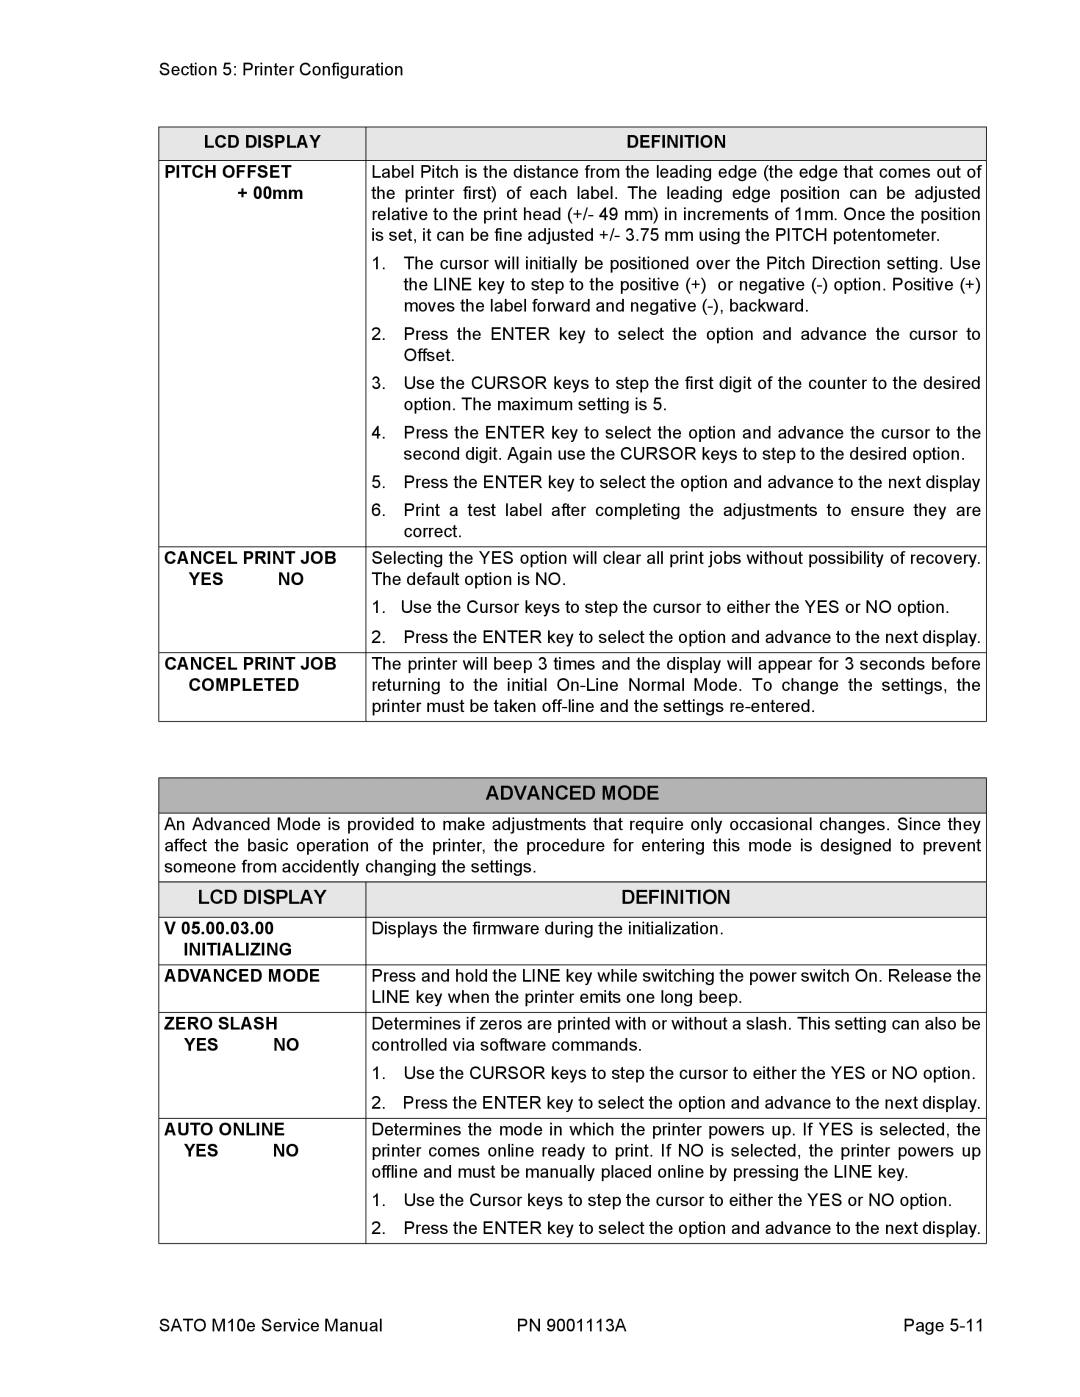
PITCH OFFSET | Label Pitch is the distance from the leading edge (the edge that comes out of | ||
| + 00mm | the printer first) of each label. The leading edge position can be adjusted | |
|
| relative to the print head (+/- 49 mm) in increments of 1mm. Once the position | |
|
| is set, it can be fine adjusted +/- 3.75 mm using the PITCH potentometer. | |
|
| 1. | The cursor will initially be positioned over the Pitch Direction setting. Use |
|
|
| the LINE key to step to the positive (+) or negative |
|
|
| moves the label forward and negative |
|
| 2. | Press the ENTER key to select the option and advance the cursor to |
|
|
| Offset. |
|
| 3. | Use the CURSOR keys to step the first digit of the counter to the desired |
|
|
| option. The maximum setting is 5. |
|
| 4. | Press the ENTER key to select the option and advance the cursor to the |
|
|
| second digit. Again use the CURSOR keys to step to the desired option. |
|
| 5. | Press the ENTER key to select the option and advance to the next display |
|
| 6. | Print a test label after completing the adjustments to ensure they are |
|
|
| correct. |
|
| ||
CANCEL PRINT JOB | Selecting the YES option will clear all print jobs without possibility of recovery. | ||
YES | NO | The default option is NO. | |
|
| 1. | Use the Cursor keys to step the cursor to either the YES or NO option. |
|
| 2. | Press the ENTER key to select the option and advance to the next display. |
|
| ||
CANCEL PRINT JOB | The printer will beep 3 times and the display will appear for 3 seconds before | ||
COMPLETED | returning to the initial | ||
|
| printer must be taken | |
ADVANCED MODE
An Advanced Mode is provided to make adjustments that require only occasional changes. Since they affect the basic operation of the printer, the procedure for entering this mode is designed to prevent someone from accidently changing the settings.
LCD DISPLAY |
| DEFINITION | |
|
| ||
V 05.00.03.00 | Displays the firmware during the initialization. | ||
INITIALIZING |
|
| |
ADVANCED MODE | Press and hold the LINE key while switching the power switch On. Release the | ||
|
| LINE key when the printer emits one long beep. | |
ZERO SLASH | Determines if zeros are printed with or without a slash. This setting can also be | ||
YES | NO | controlled via software commands. | |
|
| 1. | Use the CURSOR keys to step the cursor to either the YES or NO option. |
|
| 2. | Press the ENTER key to select the option and advance to the next display. |
|
| ||
AUTO ONLINE | Determines the mode in which the printer powers up. If YES is selected, the | ||
YES | NO | printer comes online ready to print. If NO is selected, the printer powers up | |
|
| offline and must be manually placed online by pressing the LINE key. | |
|
| 1. | Use the Cursor keys to step the cursor to either the YES or NO option. |
|
| 2. | Press the ENTER key to select the option and advance to the next display. |
|
|
|
|
SATO M10e Service Manual | PN 9001113A | Page |
