Section 7: Replacement Procedures
4
![]()
![]()
![]() 3
3
5
3 4
![]() 1
1
2
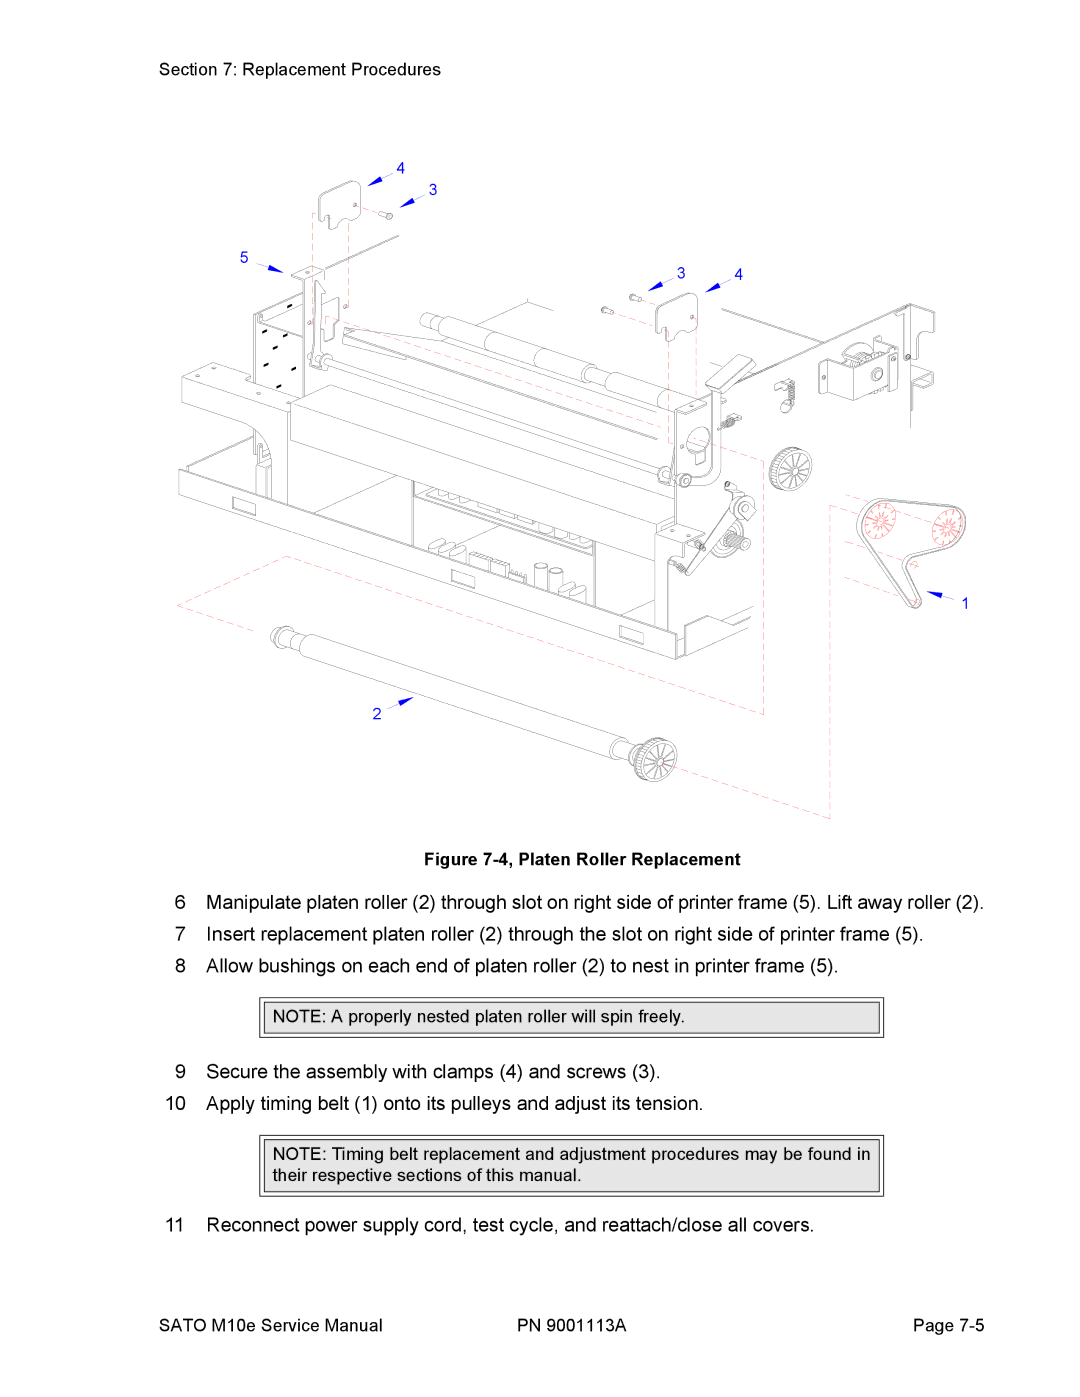
Figure 7-4, Platen Roller Replacement
6Manipulate platen roller (2) through slot on right side of printer frame (5). Lift away roller (2).
7Insert replacement platen roller (2) through the slot on right side of printer frame (5).
8Allow bushings on each end of platen roller (2) to nest in printer frame (5).
![]()
![]() NOTE: A properly nested platen roller will spin freely.
NOTE: A properly nested platen roller will spin freely.
9Secure the assembly with clamps (4) and screws (3).
10Apply timing belt (1) onto its pulleys and adjust its tension.
NOTE: Timing belt replacement and adjustment procedures may be found in their respective sections of this manual.
11 Reconnect power supply cord, test cycle, and reattach/close all covers.
SATO M10e Service Manual | PN 9001113A | Page |