Section 7: Replacement Procedures
3Remove media from printer if applicable.
4Remove the optional cutter assembly or
NOTE: If the optional cutter assembly is installed, instructions for its removal may be found in the Replacement section of this manual. The
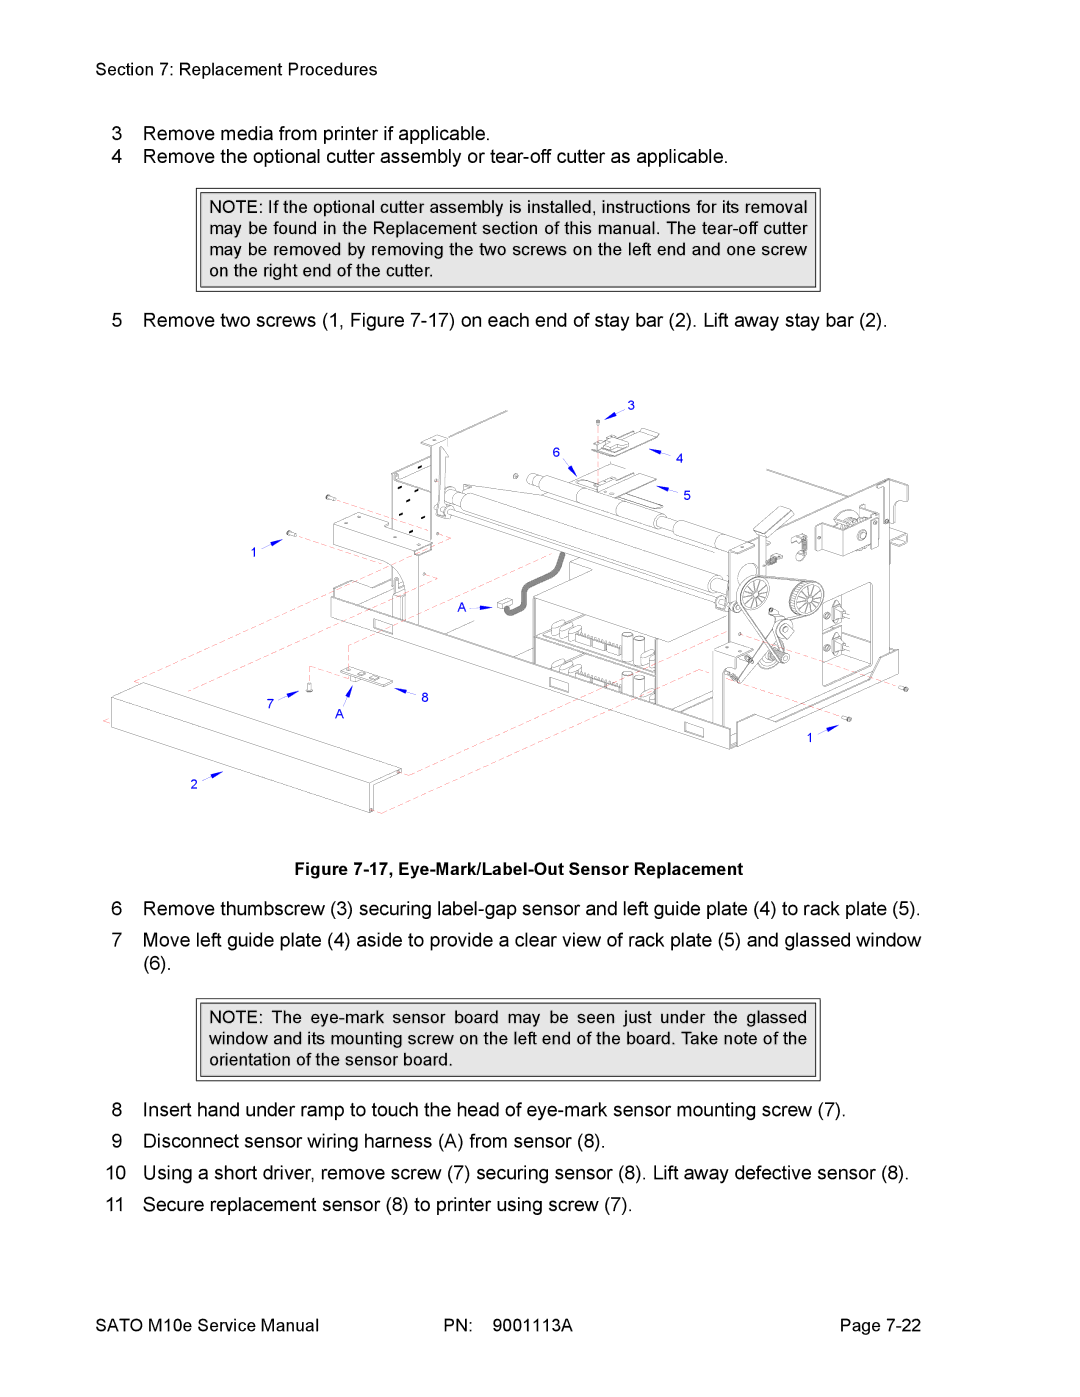
5 Remove two screws (1, Figure
3
6 ![]() 4
4
![]()
![]() 5
5
1
A |
7 | 8 | |
A | ||
|
1 ![]()
2
Figure 7-17, Eye-Mark/Label-Out Sensor Replacement
6Remove thumbscrew (3) securing
7Move left guide plate (4) aside to provide a clear view of rack plate (5) and glassed window
(6).
NOTE: The
8Insert hand under ramp to touch the head of
9Disconnect sensor wiring harness (A) from sensor (8).
10Using a short driver, remove screw (7) securing sensor (8). Lift away defective sensor (8).
11Secure replacement sensor (8) to printer using screw (7).
SATO M10e Service Manual | PN: 9001113A | Page |