Section 5: Printer Configuration
LCD DISPLAY |
| DEFINITION | |
|
| ||
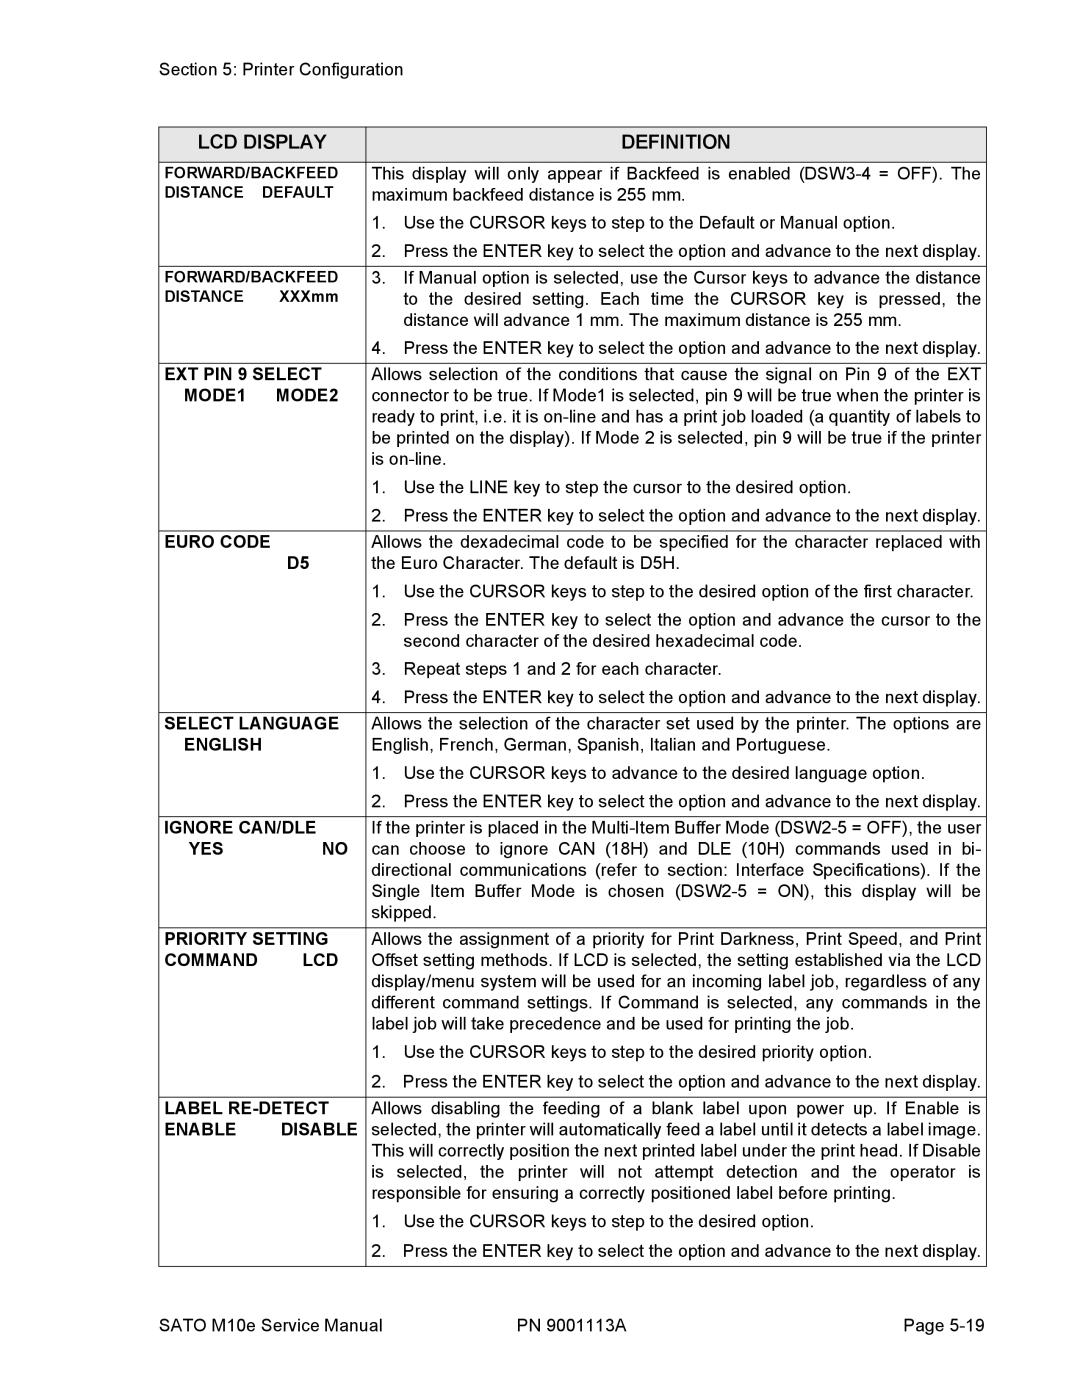
FORWARD/BACKFEED | This display will only appear if Backfeed is enabled | ||
DISTANCE | DEFAULT | maximum backfeed distance is 255 mm. | |
|
| 1. | Use the CURSOR keys to step to the Default or Manual option. |
|
| 2. | Press the ENTER key to select the option and advance to the next display. |
|
|
| |
FORWARD/BACKFEED | 3. | If Manual option is selected, use the Cursor keys to advance the distance | |
DISTANCE | XXXmm |
| to the desired setting. Each time the CURSOR key is pressed, the |
|
|
| distance will advance 1 mm. The maximum distance is 255 mm. |
|
| 4. | Press the ENTER key to select the option and advance to the next display. |
|
| ||
EXT PIN 9 SELECT | Allows selection of the conditions that cause the signal on Pin 9 of the EXT | ||
MODE1 | MODE2 | connector to be true. If Mode1 is selected, pin 9 will be true when the printer is | |
|
| ready to print, i.e. it is | |
|
| be printed on the display). If Mode 2 is selected, pin 9 will be true if the printer | |
|
| is | |
|
| 1. | Use the LINE key to step the cursor to the desired option. |
|
| 2. | Press the ENTER key to select the option and advance to the next display. |
|
| ||
EURO CODE | Allows the dexadecimal code to be specified for the character replaced with | ||
| D5 | the Euro Character. The default is D5H. | |
|
| 1. | Use the CURSOR keys to step to the desired option of the first character. |
|
| 2. | Press the ENTER key to select the option and advance the cursor to the |
|
|
| second character of the desired hexadecimal code. |
|
| 3. | Repeat steps 1 and 2 for each character. |
|
| 4. | Press the ENTER key to select the option and advance to the next display. |
|
| ||
SELECT LANGUAGE | Allows the selection of the character set used by the printer. The options are | ||
ENGLISH | English, French, German, Spanish, Italian and Portuguese. | ||
|
| 1. | Use the CURSOR keys to advance to the desired language option. |
|
| 2. | Press the ENTER key to select the option and advance to the next display. |
|
| ||
IGNORE CAN/DLE | If the printer is placed in the | ||
YES | NO | can choose to ignore CAN (18H) and DLE (10H) commands used in bi- | |
|
| directional communications (refer to section: Interface Specifications). If the | |
|
| Single Item Buffer Mode is chosen | |
|
| skipped. | |
|
| ||
PRIORITY SETTING | Allows the assignment of a priority for Print Darkness, Print Speed, and Print | ||
COMMAND | LCD | Offset setting methods. If LCD is selected, the setting established via the LCD | |
|
| display/menu system will be used for an incoming label job, regardless of any | |
|
| different command settings. If Command is selected, any commands in the | |
|
| label job will take precedence and be used for printing the job. | |
|
| 1. | Use the CURSOR keys to step to the desired priority option. |
|
| 2. | Press the ENTER key to select the option and advance to the next display. |
|
| ||
LABEL | Allows disabling the feeding of a blank label upon power up. If Enable is | ||
ENABLE | DISABLE | selected, the printer will automatically feed a label until it detects a label image. | |
|
| This will correctly position the next printed label under the print head. If Disable | |
|
| is selected, the printer will not attempt detection and the operator is | |
|
| responsible for ensuring a correctly positioned label before printing. | |
|
| 1. | Use the CURSOR keys to step to the desired option. |
|
| 2. | Press the ENTER key to select the option and advance to the next display. |
|
|
|
|
SATO M10e Service Manual | PN 9001113A | Page |
