Section 7: Replacement Procedures
NOTE: If the bracket doesn’t rest against the ribbon frame, one or more of the components are not properly nested. Check and adjust accordingly.
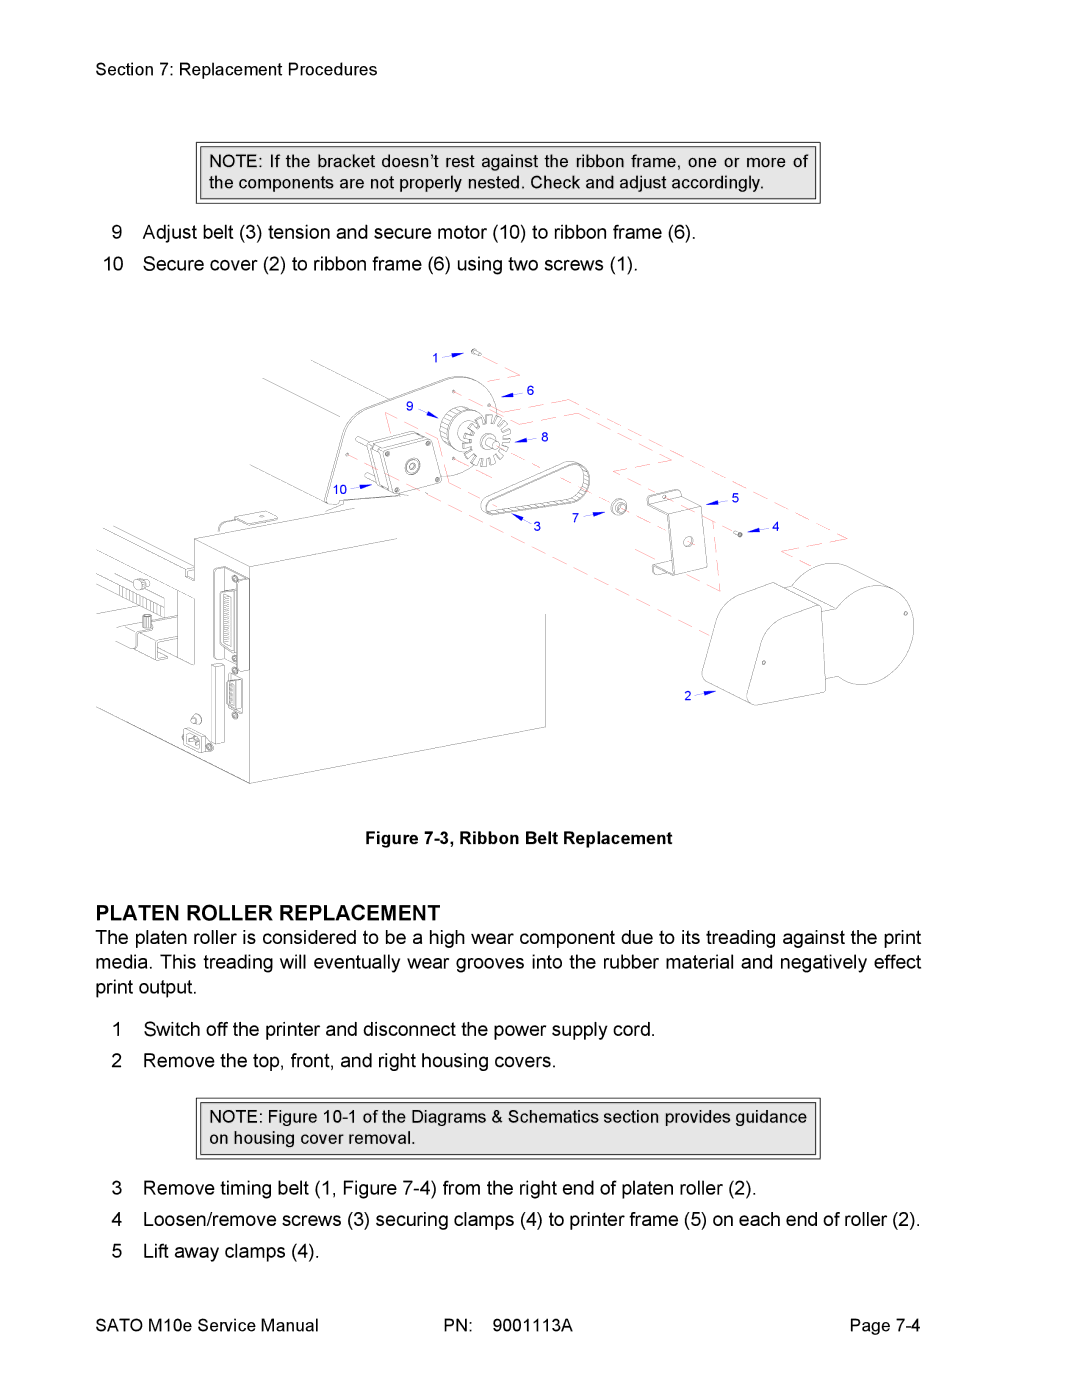
9Adjust belt (3) tension and secure motor (10) to ribbon frame (6).
10 Secure cover (2) to ribbon frame (6) using two screws (1).
1 ![]()
![]()
6
9
| 8 |
|
10 |
| 5 |
|
| |
3 | 7 | 4 |
|
2
Figure 7-3, Ribbon Belt Replacement
PLATEN ROLLER REPLACEMENT
The platen roller is considered to be a high wear component due to its treading against the print media. This treading will eventually wear grooves into the rubber material and negatively effect print output.
1Switch off the printer and disconnect the power supply cord.
2Remove the top, front, and right housing covers.
NOTE: Figure
3Remove timing belt (1, Figure
4Loosen/remove screws (3) securing clamps (4) to printer frame (5) on each end of roller (2).
5Lift away clamps (4).
SATO M10e Service Manual | PN: 9001113A | Page |