SATO 10e service manual 15, Auto-Load Sensor Replacement

Models: 10e

1 126
Download 126 pages 27.74 Kb
Page 87
Image 87
AUTO-LOAD SENSOR REPLACEMENT

Section 7: Replacement Procedures

AUTO-LOAD SENSOR REPLACEMENT

The auto-load sensor locates the top of the form (label) for positioning. The sensor is centrally located on the underside of the label ramp between the feed and platen rollers. Refer to FIgure 10-4 of the Diagrams & Schematics section for sensor location assistance if necessary.

A green LED located just above the power supply receptacle on the rear of the printer indicates when auto-loading is on-line.

1Switch off the printer and disconnect the power supply cord.

2 Remove the top, front, left, and right housing covers.

NOTE: Figure 10-1 of the Diagrams & Schematics section provides guidance on housing cover removal.

3 Remove the optional cutter assembly or tear-off cutter as applicable.

NOTE: If the optional cutter assembly is installed, instructions for its removal may be found in the Replacement section of this manual. The tear-off cutter may be removed by removing the two screws on the left end and one screw on the right end of the cutter.

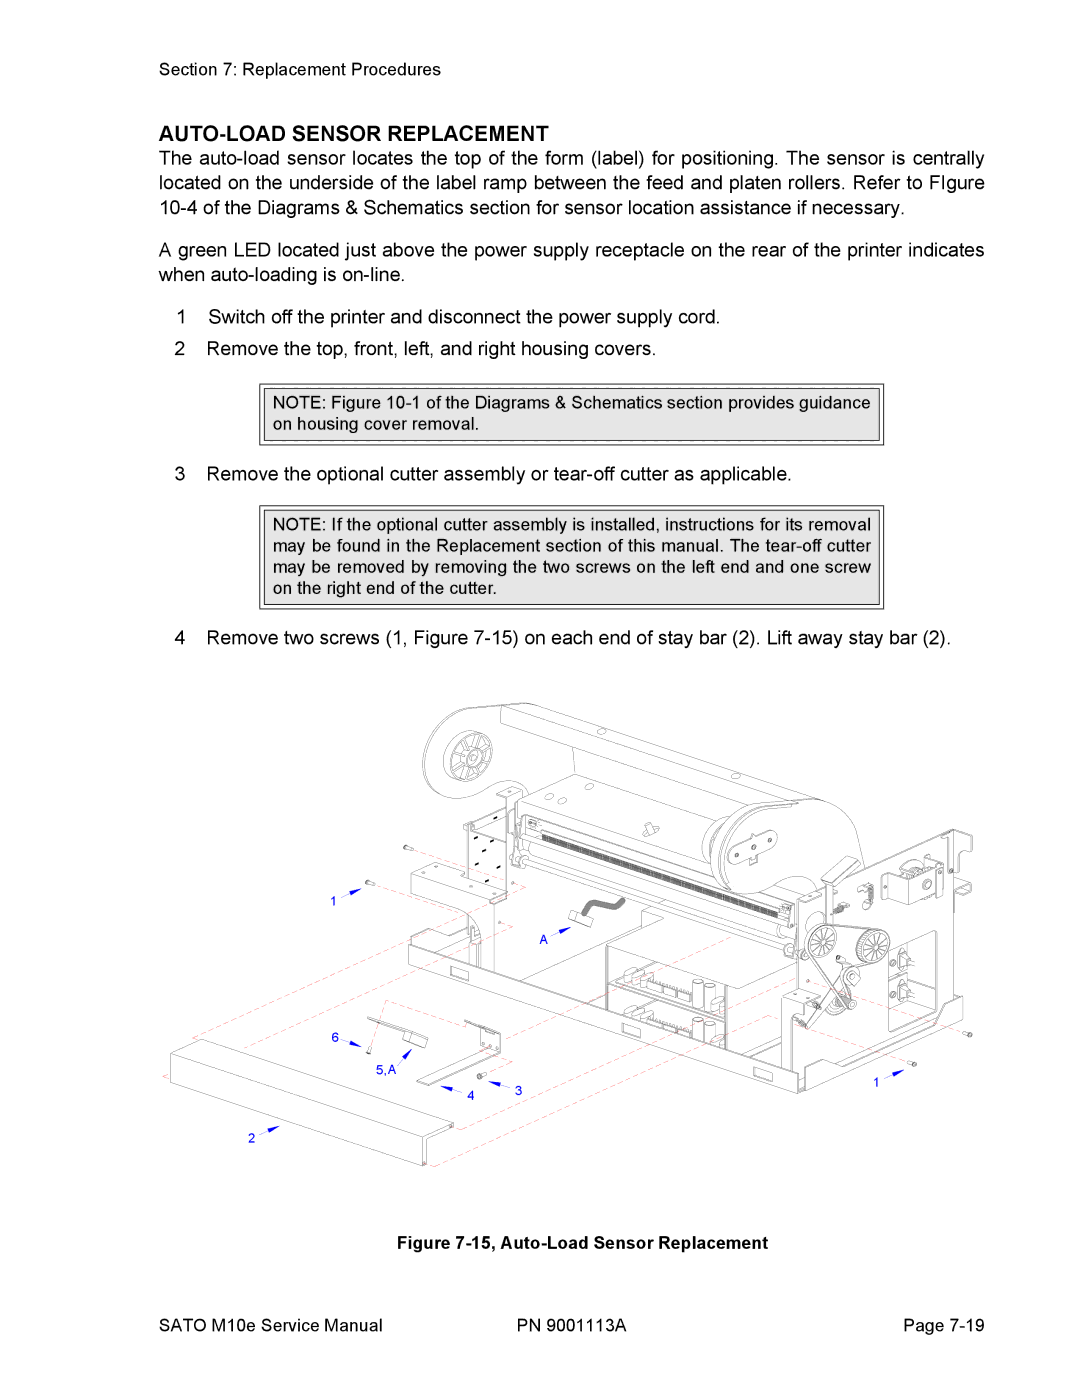
4 Remove two screws (1, Figure 7-15) on each end of stay bar (2). Lift away stay bar (2).

1

A Figure 7-15, Auto-Load Sensor Replacement

6

5,A


1

4

3


2

Figure 7-15, Auto-Load Sensor Replacement

SATO M10e Service Manual

PN 9001113A

Page 7-19

Page 87
Image 87
SATO 10e service manual 15, Auto-Load Sensor Replacement