TeamPoS 3000 XL and XL2 | Maintenance |
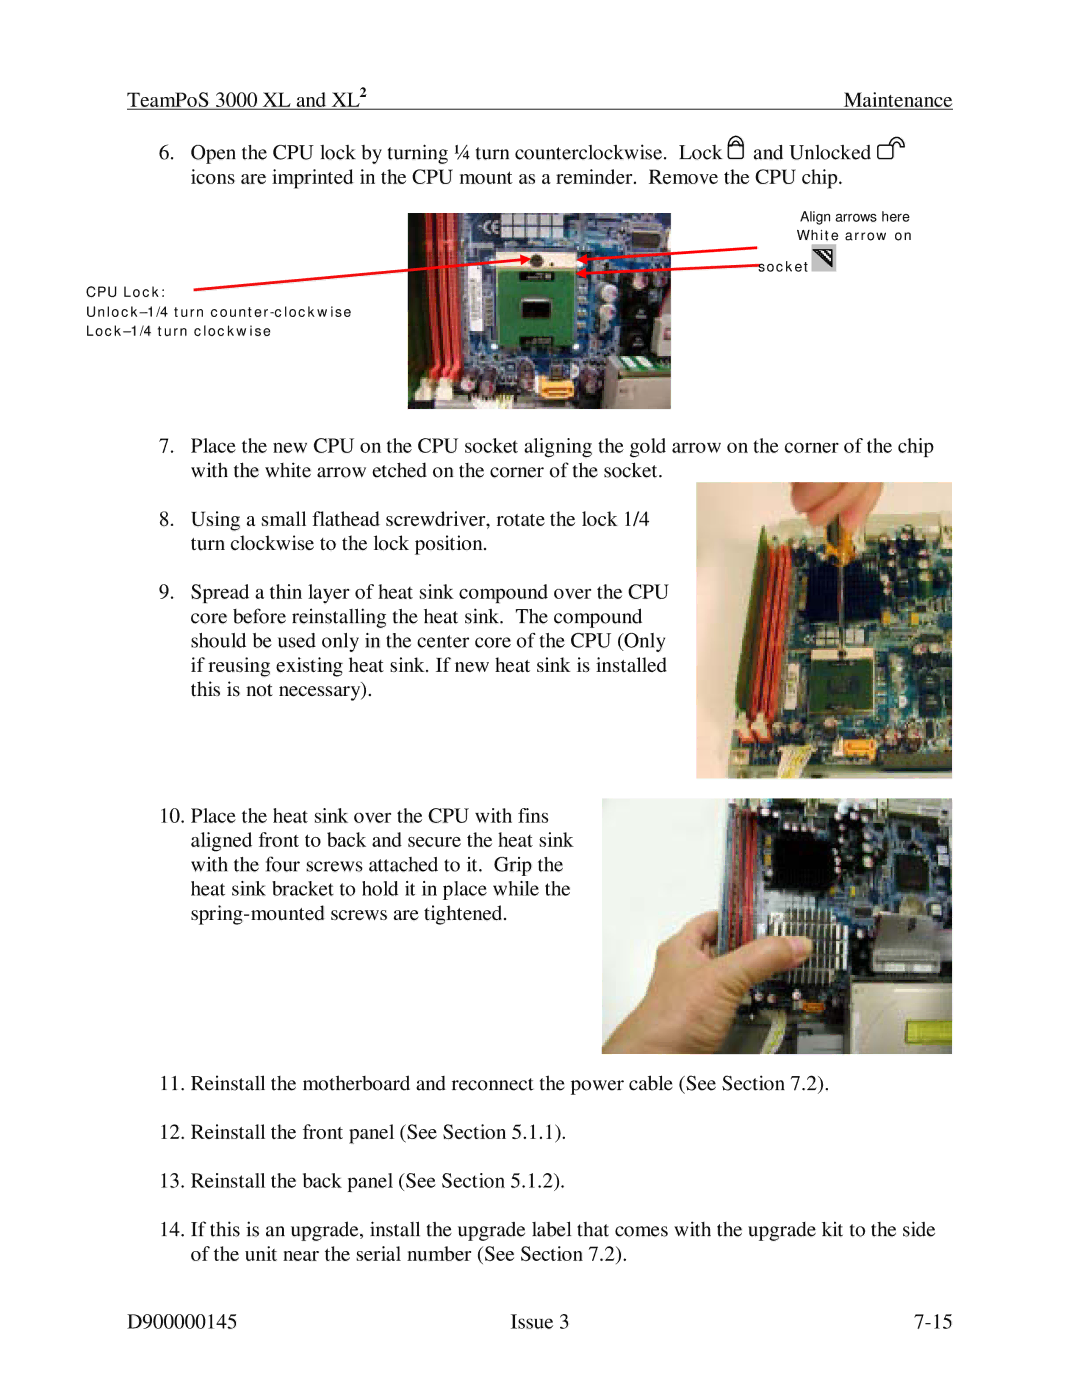
6.Open the CPU lock by turning ¼ turn counterclockwise. Lock ![]() and Unlocked
and Unlocked ![]() icons are imprinted in the CPU mount as a reminder. Remove the CPU chip.
icons are imprinted in the CPU mount as a reminder. Remove the CPU chip.
Align arrows here
White arrow on
![]() socket
socket![]()
CPU Lock:
7.Place the new CPU on the CPU socket aligning the gold arrow on the corner of the chip with the white arrow etched on the corner of the socket.
8.Using a small flathead screwdriver, rotate the lock 1/4 turn clockwise to the lock position.
9.Spread a thin layer of heat sink compound over the CPU core before reinstalling the heat sink. The compound should be used only in the center core of the CPU (Only if reusing existing heat sink. If new heat sink is installed this is not necessary).
10.Place the heat sink over the CPU with fins aligned front to back and secure the heat sink with the four screws attached to it. Grip the heat sink bracket to hold it in place while the
11.Reinstall the motherboard and reconnect the power cable (See Section 7.2).
12.Reinstall the front panel (See Section 5.1.1).
13.Reinstall the back panel (See Section 5.1.2).
14.If this is an upgrade, install the upgrade label that comes with the upgrade kit to the side of the unit near the serial number (See Section 7.2).
D900000145 | Issue 3 |