TeamPoS 3000 XL and XL2 | Installation |
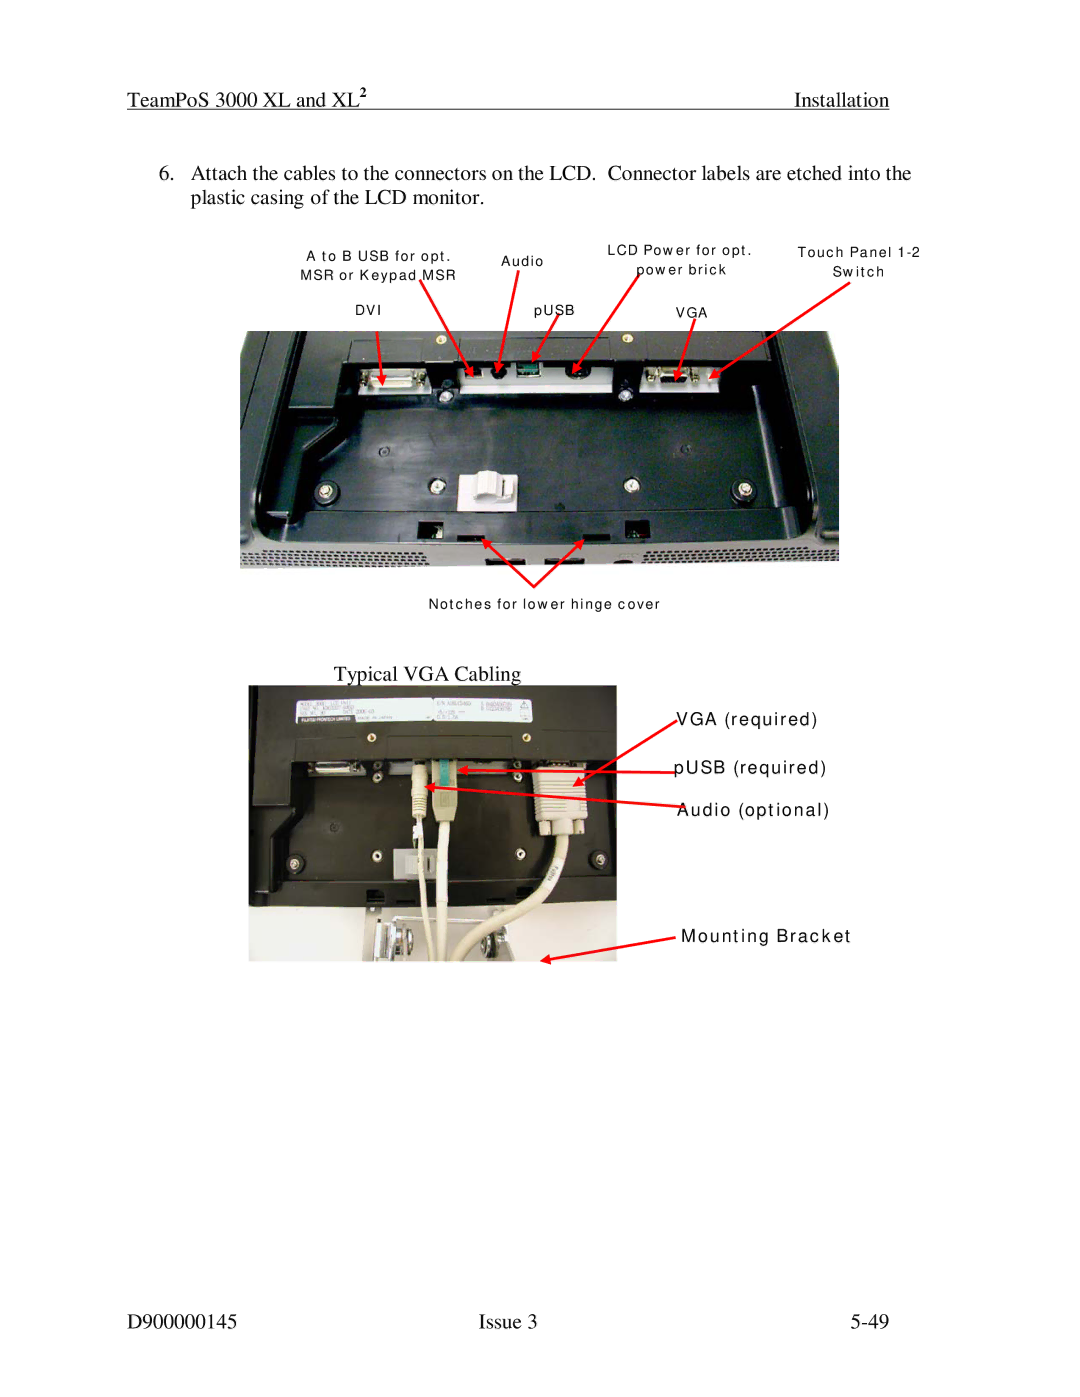
6.Attach the cables to the connectors on the LCD. Connector labels are etched into the plastic casing of the LCD monitor.
A to B USB for opt. | Audio | LCD Power for opt. | Touch Panel | |
MSR or Keypad MSR | power brick | Switch | ||
| ||||
DVI | pUSB | VGA |
|
Notches for lower hinge cover
Typical VGA Cabling
VGA (required) pUSB (required) Audio (optional)
Mounting Bracket
D900000145 | Issue 3 |
