TeamPoS 3000 XL and XL2 | Installation |
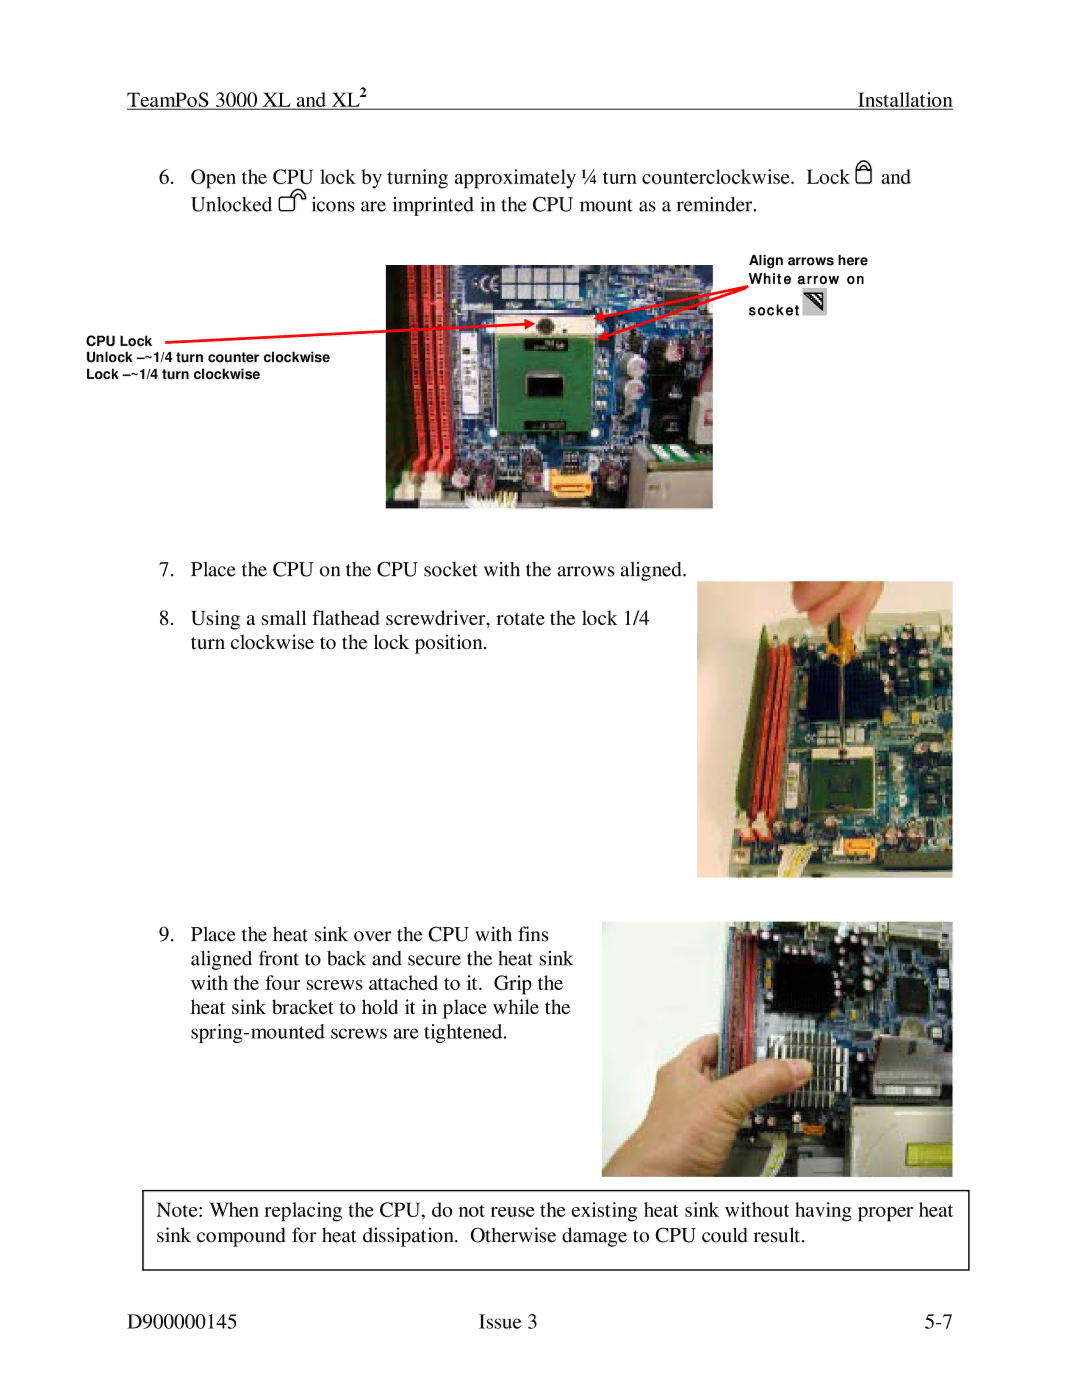
6.Open the CPU lock by turning approximately ¼ turn counterclockwise. Lock ![]() and Unlocked
and Unlocked ![]() icons are imprinted in the CPU mount as a reminder.
icons are imprinted in the CPU mount as a reminder.
Align arrows here
White arrow on
![]() socket
socket![]()
CPU Lock
Unlock
Lock
7.Place the CPU on the CPU socket with the arrows aligned.
8.Using a small flathead screwdriver, rotate the lock 1/4 turn clockwise to the lock position.
9.Place the heat sink over the CPU with fins aligned front to back and secure the heat sink with the four screws attached to it. Grip the heat sink bracket to hold it in place while the
Note: When replacing the CPU, do not reuse the existing heat sink without having proper heat sink compound for heat dissipation. Otherwise damage to CPU could result.
D900000145 | Issue 3 |