US E R GU I D E (TR O U B L E S H O O T I N G )
Resolving Output Quality Problems Using Basic Copying, Added Features, and Image Quality Tabs
| For more information on the features on these tabs, refer to the | |
| section entitled Copier Features, in the User Guide (Copier). | |
|
| |
Problem | Suggested Solution | |
|
| |
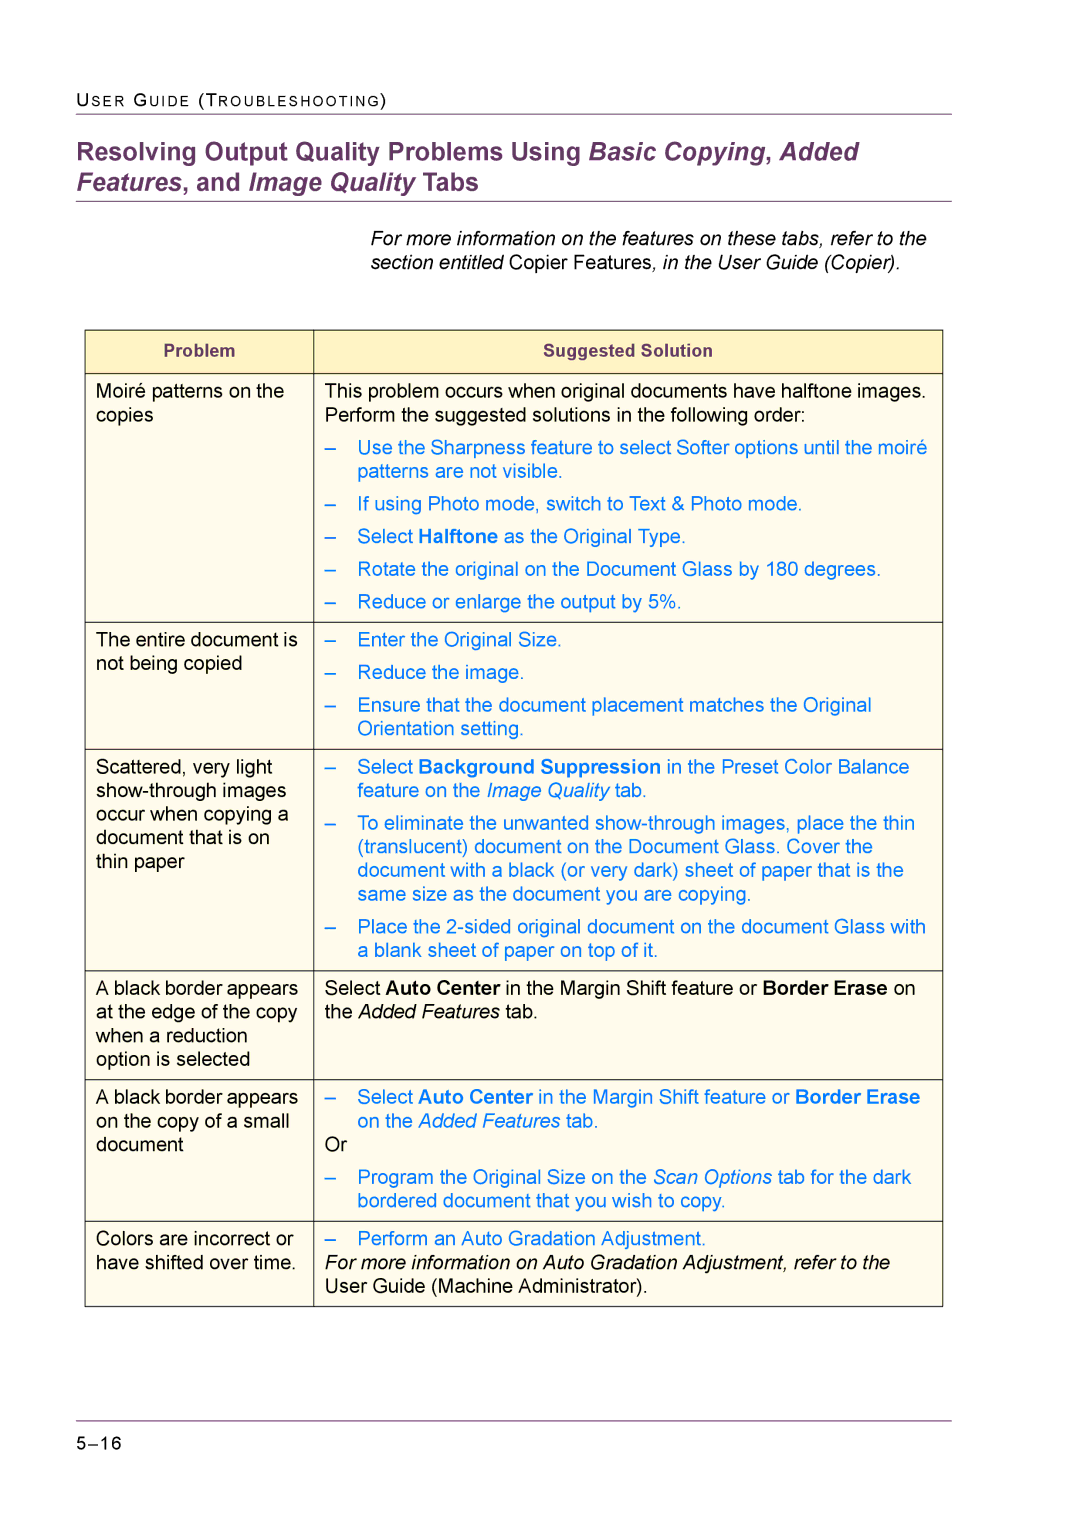
Moiré patterns on the | This problem occurs when original documents have halftone images. | |
copies | Perform the suggested solutions in the following order: | |
| – Use the Sharpness feature to select Softer options until the moiré | |
| patterns are not visible. | |
| – If using Photo mode, switch to Text & Photo mode. | |
| – Select Halftone as the Original Type. | |
| – Rotate the original on the Document Glass by 180 degrees. | |
| – Reduce or enlarge the output by 5%. | |
|
| |
The entire document is | – Enter the Original Size. | |
not being copied | – Reduce the image. | |
| ||
| – Ensure that the document placement matches the Original | |
| Orientation setting. | |
|
| |
Scattered, very light | – Select Background Suppression in the Preset Color Balance | |
feature on the Image Quality tab. | ||
occur when copying a | – To eliminate the unwanted | |
document that is on | ||
(translucent) document on the Document Glass. Cover the | ||
thin paper | ||
document with a black (or very dark) sheet of paper that is the | ||
| ||
| same size as the document you are copying. | |
| – Place the | |
| a blank sheet of paper on top of it. | |
|
| |
A black border appears | Select Auto Center in the Margin Shift feature or Border Erase on | |
at the edge of the copy | the Added Features tab. | |
when a reduction |
| |
option is selected |
| |
|
| |
A black border appears | – Select Auto Center in the Margin Shift feature or Border Erase | |
on the copy of a small | on the Added Features tab. | |
document | Or | |
| – Program the Original Size on the Scan Options tab for the dark | |
| bordered document that you wish to copy. | |
|
| |
Colors are incorrect or | – Perform an Auto Gradation Adjustment. | |
have shifted over time. | For more information on Auto Gradation Adjustment, refer to the | |
| User Guide (Machine Administrator). | |
|
|
