Chapter 6 Installing the Cisco CSR 1000V in KVM Environments
Creating the Cisco CSR 1000V KVM Instance on OpenStack Using the .qcow2 File
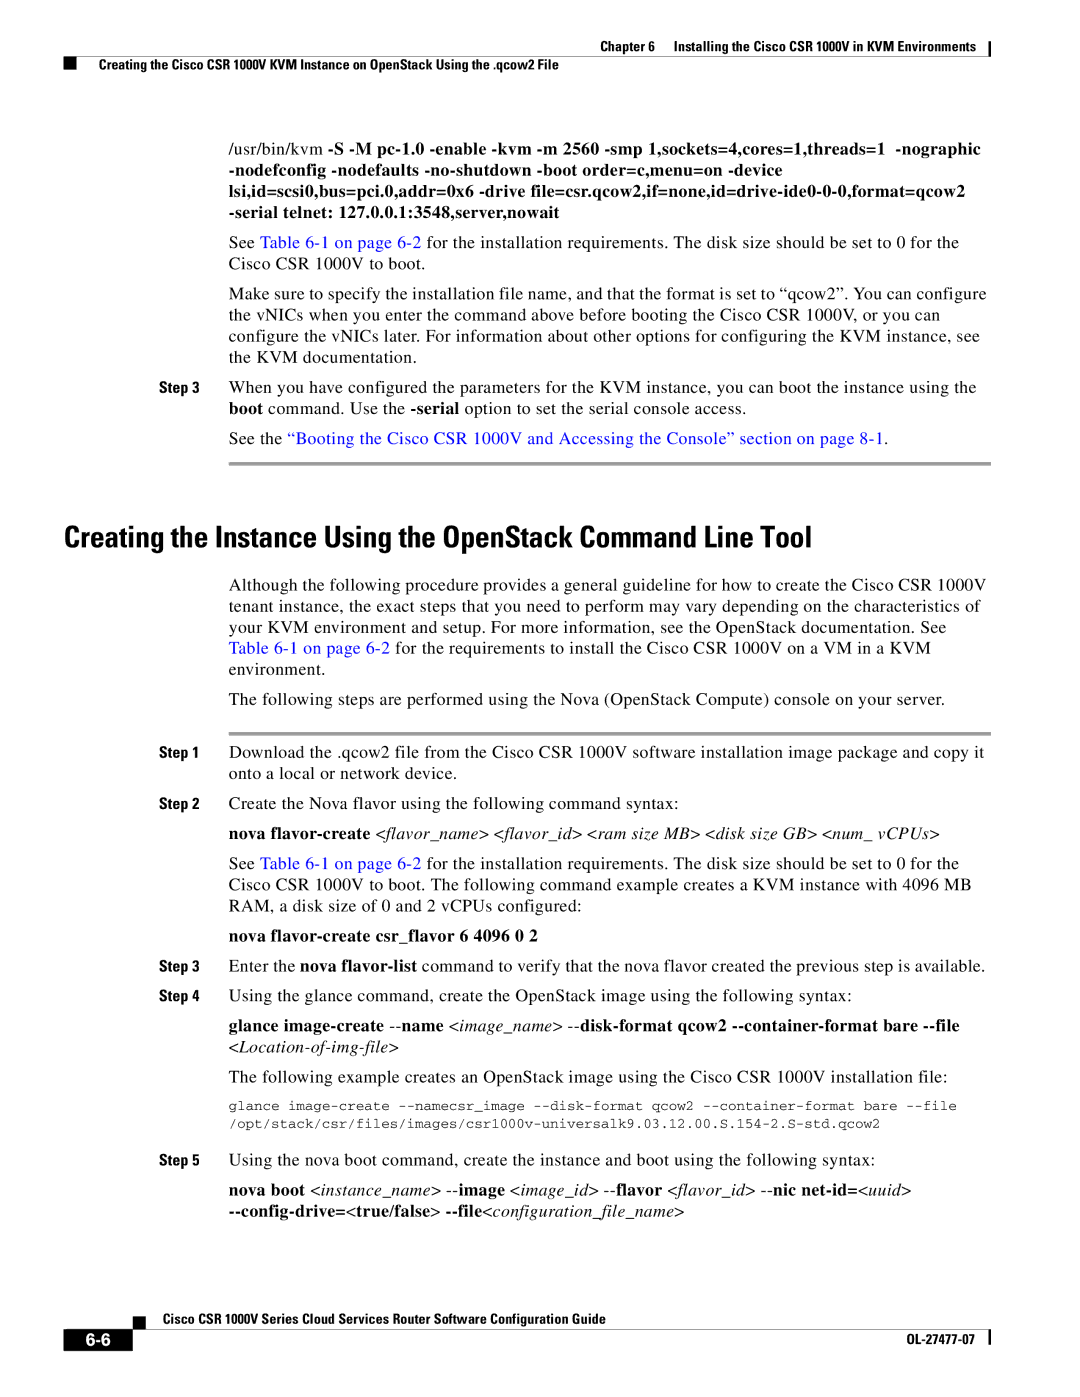
/usr/bin/kvm
See Table
Make sure to specify the installation file name, and that the format is set to “qcow2”. You can configure the vNICs when you enter the command above before booting the Cisco CSR 1000V, or you can configure the vNICs later. For information about other options for configuring the KVM instance, see the KVM documentation.
Step 3 When you have configured the parameters for the KVM instance, you can boot the instance using the boot command. Use the
See the “Booting the Cisco CSR 1000V and Accessing the Console” section on page
Creating the Instance Using the OpenStack Command Line Tool
Although the following procedure provides a general guideline for how to create the Cisco CSR 1000V tenant instance, the exact steps that you need to perform may vary depending on the characteristics of your KVM environment and setup. For more information, see the OpenStack documentation. See Table
The following steps are performed using the Nova (OpenStack Compute) console on your server.
Step 1 Download the .qcow2 file from the Cisco CSR 1000V software installation image package and copy it onto a local or network device.
Step 2 Create the Nova flavor using the following command syntax:
nova
See Table
nova flavor-create csr_flavor 6 4096 0 2
Step 3 Enter the nova
glance
The following example creates an OpenStack image using the Cisco CSR 1000V installation file:
glance
Step 5 Using the nova boot command, create the instance and boot using the following syntax:
nova boot <instance_name>
Cisco CSR 1000V Series Cloud Services Router Software Configuration Guide
|
| |
|