Installing the Rack Model in a Rack Enclosure
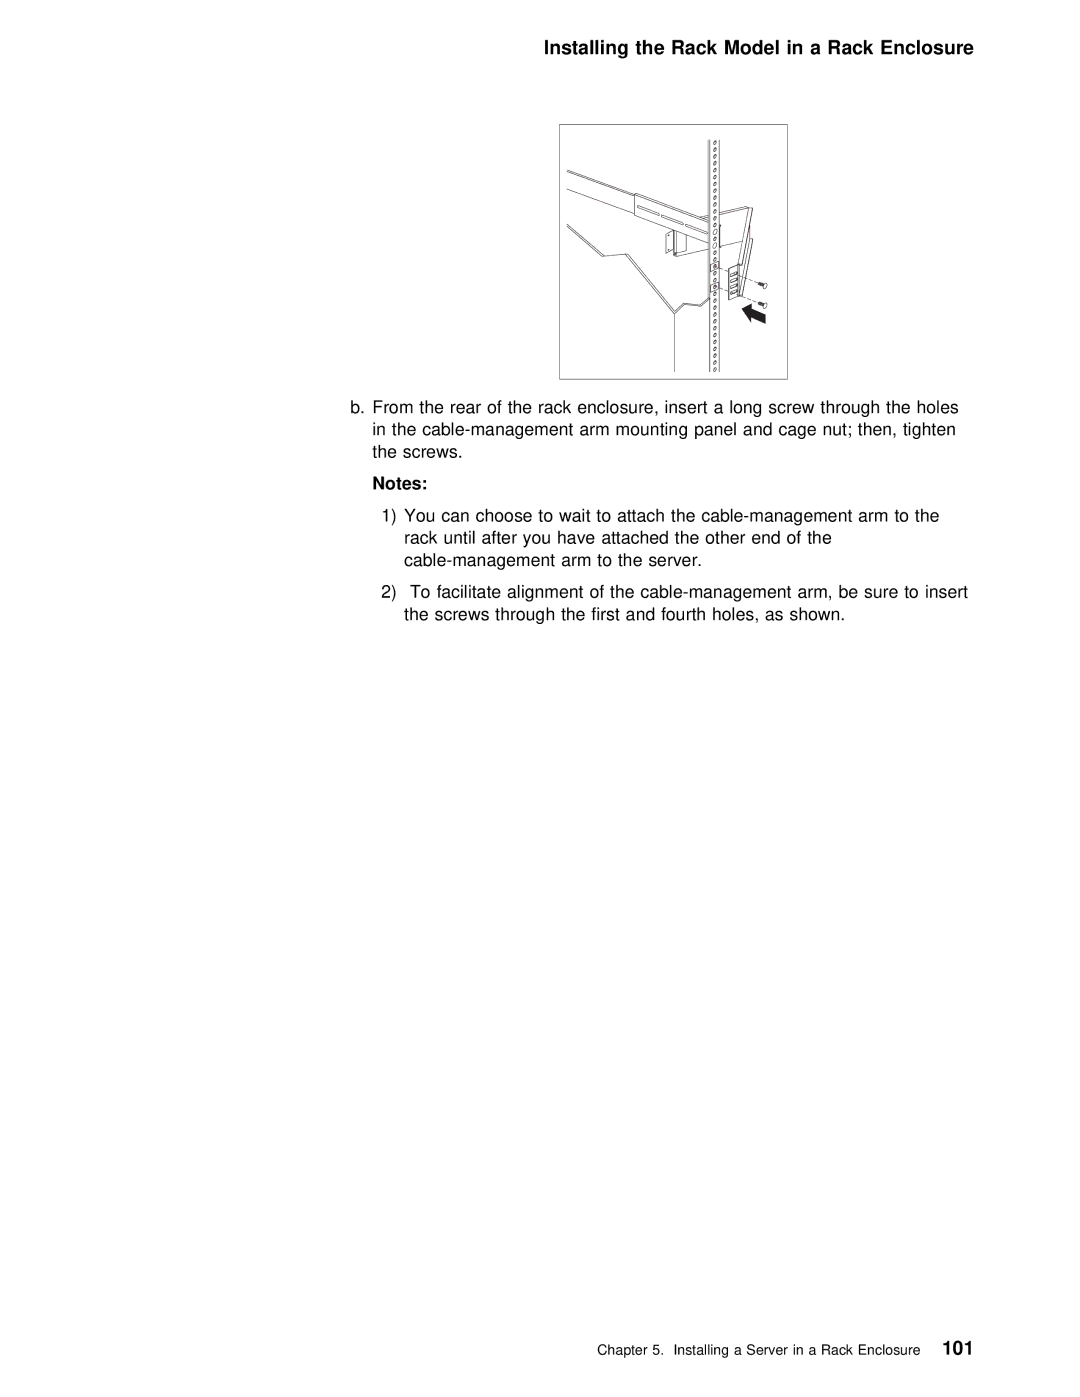
b. From | the rear | of | the | rack | enclosure, | insert a long | screw | thro | ||||||
in the | and | cage | nut; | then, | tig | |||||||||
the | screws. |
|
|
|
|
|
|
|
|
|
|
|
| |
Notes: |
|
|
|
|
|
|
|
|
|
|
|
|
|
|
1) You | can choose | to | wait | to | attach | the | ||||||||
rack | until after you have attached | the | other | end | of | the | ||||||||
arm | to | the | server. |
|
|
|
|
|
| |||||
2) | To | facilitate alignment of the | ||||||||||||
the | screws | through | the | first and fourth | holes, | as | shown. | |||||||