Installing or Removing Internal Drives
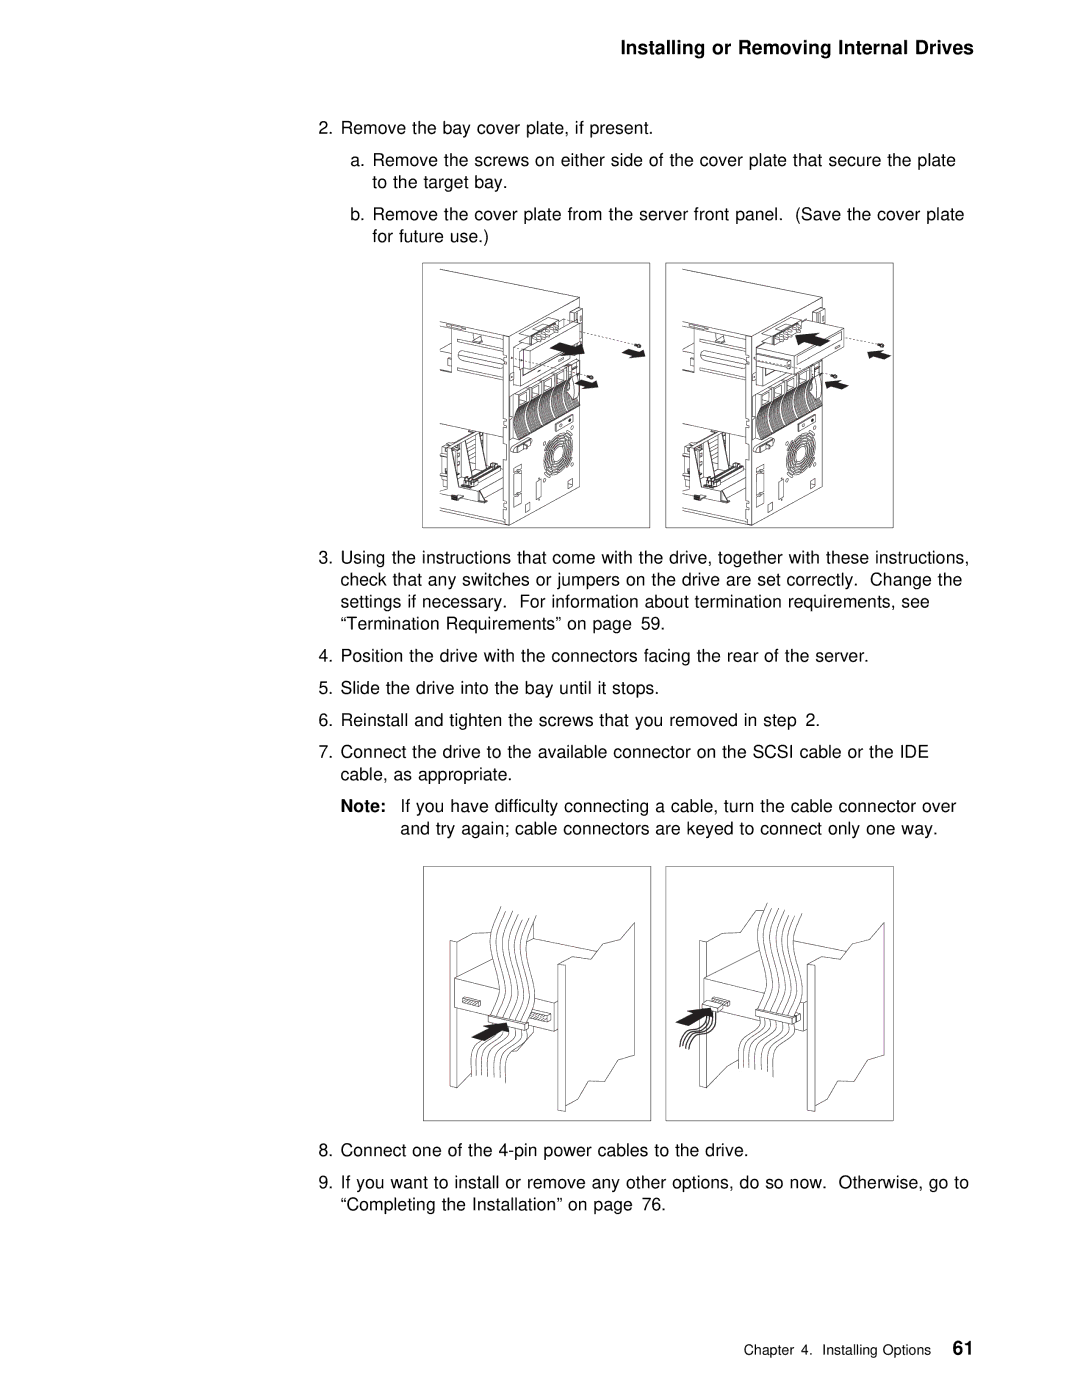
2. Remove the bay cover plate, if present.
a. Remove | the | screws | on either | side | of the cover plate that s | ||||||||
to | the | target bay. |
|
|
| ||||||||
b. Remove | the | cover | plate from | the | server front panel. (Save the | ||||||||
for |
| future | use.) |
|
|
|
|
|
|
| |||
|
|
|
|
|
|
|
|
|
|
|
|
|
|
|
|
|
|
|
|
|
|
|
|
|
|
|
|
|
|
|
|
|
|
|
|
|
|
|
|
|
|
3.Using the instructions that come with the drive, together with t check that any switches or jumpers on the drive are set correc settings if necessary. For information about termination requirements, “Termination Requirements” on page 59.
4. Position the drive with the connectors facing the rear of the s
5. Slide the drive into the bay until it stops.
6. Reinstall and tighten the screws that you removed in step 2.
7.Connect the drive to the available connector on the SCSI cable or cable, as appropriate.
Note: If | you | have | difficulty connecting a cable, turn the cable | ||||
and | try | again; | cable connectors are keyed to connect only o | ||||
|
|
|
|
|
|
|
|
|
|
|
|
|
|
|
|
8. Connect one of the
9.If you want to install or remove any other options, do so now. Ot “Completing the Installation” on page 76.