Administration Guide
Published 2012-09-24 SWD-20120924140022907
Contents
Configuring security options
101
111
136
168
206
217
247
266
292
328
337
369
392
423
493
498
Overview BlackBerry Enterprise Server
Document revision history
Date Description
Device before assigning the device to a new user
Troubleshooting IT policies
Task Chapter Create administrator accounts
User account
On BlackBerry devices
Task Chapter
Task Chapter
Optional tasks Task Chapter
Components and for the BlackBerry Configuration
Database
Server
Files
There is a problem with this websites security certificate
Click Log
Related information
This connection is untrusted
Click View certificates
Click Trusted Root Certification Authorities. d Click OK
Close and reopen the browser
Close and reopen the browser
Creating administrator Accounts
Administrative roles and permissions
Preconfigured administrative roles
Administration GuideCreating administrator accounts
Administration GuideCreating administrator accounts
Administration GuideCreating administrator accounts
Administration GuideCreating administrator accounts
Creating roles
Create a role
Create an administrator account
Create a role based on an existing role
Add an administrator account to a group
Click Create an administrator user
Click Manage users
Click Edit user
Create a group to manage similar user accounts
Assign a BlackBerry device to an administrator account
Administration Guide
Preconfigured IT policies
Preconfigured IT policy Description
Default values for preconfigured IT policies
From downloading third-party applications
Advanced Security
Requires devices to encrypt external file systems
Password policy group
Maximum Password History
RIM Value-Added Applications policy group
Security policy group
Allow Other Yes Calendar Services Message
Bluetooth policy group
Disable Address Yes Book Transfer Discoverable Mode
Wireless Software Upgrades policy group
Creating and importing IT policies
Create an IT policy
Click Create an IT policy
Create an IT policy based on an existing IT policy
Import IT policy data
Click Edit IT policy
Click Manage IT policies
Change the value for an IT policy rule
Import IT policy rules from an IT policy pack
Click Add all IT policies Related information
Assign an IT policy to a group
Assign an IT policy to a user account
Click Manage groups
Click Save all Related information
Sending an IT policy over the wireless network
Resend an IT policy to a BlackBerry device manually
Resend an IT policy to a BlackBerry device automatically
Assigning IT policies and resolving IT policy conflicts
Expand BlackBerry Domain Component view
Click Edit instance
Method Description
Option 1 Applying one IT policy to each user account
Scenario Rule
Option 2 Applying multiple IT policies to each user account
Rank IT policies
Click Manage IT policies Click Set priority of IT policies
Highest in the BlackBerry Administration Service
Yes setting is applied for this rule
You add a new user account to a
Groups that the user account belongs
Default value of Yes. You assign
To No. You ranked IT policy a higher
Click Manage IT policies Click Preview resolved IT policies
Select two or more IT policies Click Preview
Create an IT policy rule for a third-party application
Click Create an IT policy rule
Export all IT policy data to a data file
Click Manage IT policy rules
Click Export
Click Download file
Delete an IT policy
List of IT policies, click an IT policy
Configuring security options
Managing device access to the BlackBerry Enterprise Server
Turn on the Enterprise Service Policy
Configure the Enterprise Service Policy
Click BlackBerry Enterprise Server Click Edit component
Permit a user to override the Enterprise Service Policy
Extending messaging security using PGP encryption
Extending messaging security to a BlackBerry device
Extending messaging security using S/MIME encryption
Configure encryption options for S/MIME-protected messages
Click Restart instance Related information
Enforcing secure messaging using classifications
Create a message classification
Order message classifications
Delete a message classification
Generate a PIN encryption key
Click BlackBerry Domain
External services turned on drop-down list, click No
Restart the BlackBerry Enterprise Server
Administration Guide
Remove decrypted content from BlackBerry device
Scenario Recommendation
Has elapsed To the desired time for example, 10 minutes
Configuring the BlackBerry Enterprise Server environment
Best practice Running the BlackBerry Enterprise Server
Best practice Description
Click Edit instance
Click Save all
Click Save all Related information
Administration Guide
Turn off Web Proxy Autodiscovery Protocol
Before you begin
Address field, type the URL for the PAC file Click OK
Delete credentials for Http basic authentication
Task Steps
Type traittool -global -trait BASProxyBasicAuthUID -erase
Type traittool -BASServer name -trait BASProxyBasicAuthUID
Click Save all Related information
Configuring support for Unicode languages
Configure support for Unicode languages
Type regedit
Click OK Perform one of the following actions
Restarting BlackBerry Enterprise Server components
Related information
Type regedit
Configuring user accounts
Creating user groups
Create a group to manage similar user accounts
Add user accounts to a group
Add to user configuration list, click Add group
Adding a user account to the BlackBerry Enterprise Server
Add a user account
Click Create a user
Click Create a user with activation password
Click Create a user with generated activation password
Click Create a user without activation password
Option Step
Export a list of user accounts
Save the .csv file
Fields in a .csv file that contain user account information
Field Description
Import multiple user accounts from a .csv file
Elapses
Click Continue
Assigning BlackBerry devices To users
Preparing to distribute a BlackBerry device
BlackBerry Administration Service
Assigning BlackBerry devices to user accounts
Method
Wi-Fi network
Click Associate user Click Assign current device
Wireless activation
Click Default
Save bandwidth by synchronizing organizer data over the LAN
Activation passwords
Password expire earlier than the default value of 48 hours
Intended user
Cannot reuse it to activate another BlackBerry device
Customize the activation password
Send an activation password to a user
Customize the activation message
Send an activation password to multiple users
Click Specify an activation password
Option 3 Activating BlackBerry devices over the LAN
Administration Guide
Administration Guide
Activate a Wi-Fi enabled BlackBerry device
Click Enterprise Activation
100
Configuring BlackBerry Enterprise Server high Availability
Check the health of a BlackBerry Enterprise Server
Click High availablity summary
101
Defining when failover occurs
How the BlackBerry Enterprise Server uses health parameters
Administration Guide
Changing the promotion threshold and failover threshold
Click Edit Automatic Failover settings
Health parameter Description
Provide services for attachment viewing
Attachment viewing
This health parameter
Threshold so that they are below this health parameter
107
108
Administration Guide
Click Manual Failover
Click Yes Failover to standby instance
Verify that the failover event occured
111
Click Turn on automatic connections failover
112
113
Click Edit instance
Click Save all
Create a BlackBerry Router pool for high availability
Related information
118
Restart the BlackBerry Administration Service instances
119
Related information
Availability state for the instances changes automatically
122
Remove a BlackBerry Attachment Service instance from a pool
Remove a BlackBerry Router instance from a pool
Click Edit instance or Edit host instance
124
Verify that the DNS server is running 125
Configuring database mirroring
Stop the BlackBerry Enterprise Server instances
Start the BlackBerry Enterprise Server instances
128
Click Resend database mirroring parameters
129
Stop the BlackBerry Enterprise Server instances
Select Overwrite the existing database
Click Replication
131
Accept or change the default schedule. Click Next
Right-clickLocal Publications. Click New Publication
Select By impersonating the process account
Click OK. Click Next
Right-click the server. Click Properties
Click Finish 133
Start the BlackBerry Enterprise Server instances
Configuring a new mirror BlackBerry Configuration Database
135
136
Preparing to distribute BlackBerry Java Applications
137
Click BlackBerry Administration Service Click Edit component
138
Click Add or update applications
Add a collaboration client to the application repository
Click Add application
Click Publish application
Configuring application control policies
Specify keywords for a BlackBerry Java Application
Standard application control policies
Click Manage applications
Click Manage default application control policies
Change a standard application control policy
Application control policy Description
Click Edit application control policy
Perform any of the following tasks
Create an application control policy
For required BlackBerry Java Control policy Applications
Policy
Application control policies for unlisted applications
IT policy rules take precedence on smartphones
Click the application control policy that you created
144
Creating software configurations
145
Create a software configuration
Click Create a software configuration
Click Manage software configurations
Assign a software configuration to a group
Click Add to software configuration Click Save all
Click a group
147
Assign a software configuration to multiple user accounts
Assign a software configuration to a user account
148
Complete the instructions on the screen 149
Error messages BlackBerry Java Application tasks
View the status of a job
View the status of a task
Click Manage deployment jobs
QueueModule failed, processing stopped
Device timed out waiting for module
Device reported insufficient memory to install module
Device reported insufficient privileges to install module
Incomplete ACK data for Appd request
152
Error messages BlackBerry Device Software tasks
Available upgrade rejected
Available upgrade deferred by user
Upgrade prompt deferred
Upgrade rejected
Upgrade failed, rollback complete
Error messages Standard application settings tasks
Restore failed -- error getting value
Failed to backup data to database
Failed to set properties for item
Error messages IT policy tasks
Reject Security Violation Reject Authentication Failed
Invalid password Set Password Failed
Stopping a job that is running
158
Stop a job that is running
Click View users with application
Administration Guide
Reconciliation rules BlackBerry Java Applications
On the BlackBerry device
Scenario Rule
Reconciliation rules BlackBerry Device Software
Reconciliation rules Standard application settings
Reconciliation rules Application control policies
Scenario
You ranked highest in the BlackBerry Administration
If unlisted applications are defined as disallowed in a
As disallowed is assigned to a user account. a software
Unlisted applications are not permitted on the BlackBerry
168
Loader
Device to the computer
Loader tool
Desktop Software
BlackBerry device
170
BlackBerry APIs and Java ME standard on BlackBerry devices
User’s computer
BlackBerry Java Application
171
Windows 2000 or later, Windows XP, or Windows Vista 172
Enable the BlackBerry Application Web Loader on a web server
Web server
Administration Guide
175
Before you begin
Administration Guide
BlackBerry device
Install the BlackBerry Java Application on a web server
Click Download
179
180
Click Save all After you finish
181
Click Save all
183
Administration Guide
Related information
Click Save all Related information
187
Administration Guide
Add a certificate for the BlackBerry MDS Connection Service
Task Steps
Administration Guide
Click MDS Connection Service Click Edit component
193
Click MDS Connection Service
Click the Edit icon beside the Ldap server
194
Default base query for some Ldap servers
Service URL
Base Query
Each query
Use to authenticate with the Dsml certificate server
Authenticate with the Dsml certificate server
Change a configuration for an
Click Save all
Type the CRL server name and the web address for the server
199
200
Configure global login information for intranet site access
On the Http tab, click Edit component
201
Click Edit instance
Specify the maximum number of scalable socket connections
203
204
205
Setting up the messaging Environment
Creating email message filters
Click Save all
Click Continue to user information edit Click Save all
Enabled drop-down list, click Yes
Save the .xml file
209
Copying existing email message filters to user accounts
Export email message filters for a user account
Import email message filters for a user account
Click Import email message filters Click Save all
Install an extension plug-in application
Extension plug-ins for processing messages
Click OK Perform one of the following actions 211
Add an extension plug-in to a BlackBerry Messaging Agent
212
213
Search for a user account 214
215
216
Configure the certificate information using IT policies
Click an IT policy
218
Click Save all After you finish
Click Save all After you finish
Add certificate information to a Wi-Fi profile
Click Manage Wi-Fi profiles
Click the name of the Wi-Fi profile that you want to change
Managing an enrolled certificate
222
Properties in the rimpublic.properties file
Property Description
Making the BlackBerry Web Desktop Manager available to Users
224
Deploy Software window, click Advanced
Click Include OLE class and product information
Click OK 225
Click Add Click OK
Expand Group Policy Management Forest Domains
Click Create a GPO in this domain, and link it here
226
Configure the Microsoft ActiveX Installer on Windows Vista
Enter the value of the item to be added field, type 2,2,1,0
Each dialogue box, click OK
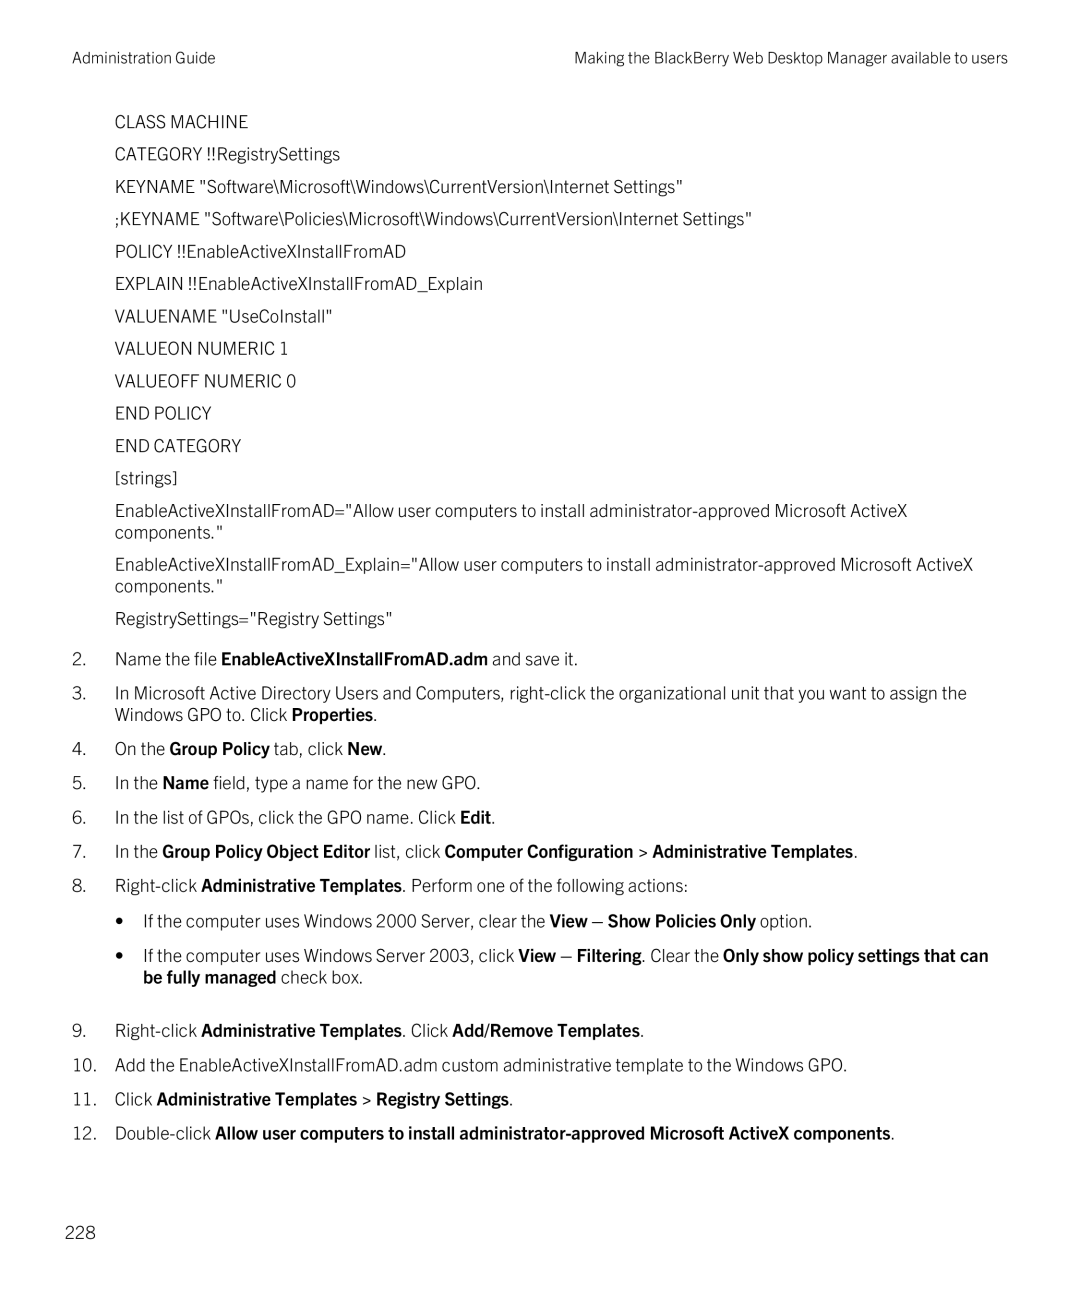
Name the file EnableActiveXInstallFromAD.adm and save it
228
Click Enabled Click OK
Make the BlackBerry Web Desktop Manager available to users
Configuring the BlackBerry Web Desktop Manager
230
231
Change the text colors in the BlackBerry Web Desktop Manager
Parameter Description Default
BlackBerry Web Desktop Manager text colors
Display a custom image in the BlackBerry Web Desktop Manager
234
Creating and configuring Wi-Fi 19 profiles and VPN profiles
Creating and configuring Wi-Fi profiles
Prerequisites Creating Wi-Fi profiles and VPN profiles
Connection types and port numbers for a Wi-Fi network
Port assignments might vary by mobile network provider 236
Create a Wi-Fi profile
Create a Wi-Fi profile based on an existing Wi-Fi profile
Connection type Default port number Where to configure
Click Create Wi-Fi profile
Configure a Wi-Fi profile on a BlackBerry device
Assign a Wi-Fi profile to a group
Assign a Wi-Fi profile to a user account
Click Set Up Wi-Fi Network
Creating and configuring VPN profiles
Configure a Wi-Fi profile
Click the name of a Wi-Fi profile
Click Edit profile
Configure a VPN profile
Create a VPN profile
Create a VPN profile based on an existing VPN profile
Click Create VPN profile
Assign a VPN profile to a group
Assign a VPN profile to a user account
On the VPN profiles tab, click Edit group
Delete a Wi-Fi profile
Associate a VPN profile with a Wi-Fi profile
Click the name of the Wi-Fi profile
Click Delete profile Click Yes Delete the profile
Delete a VPN profile
Importing profile information from a .csv file
Click the name of a VPN profile
Example Adding profile information to user accounts
244
Fields in the .csv file that contains profile information
Example Removing profile information from user accounts
Enterprise Wi-Fi network or VPN, if a user name is required
Quotation marks in the password
Import profile information from a .csv file
Configuring WEP encryption
BlackBerry devices do not support a WEP passphrase
Configuring PSK encryption
Configuring Leap authentication
Configuring Peap authentication
251
Click Place all certificates in the following store
Possible cause
Select the Inner link security type
Configuring EAP-TLS authentication
255
Configuring EAP-TTLS authentication
257
Security Type list, select EAP-TTLS
Inner link security type list, select EAP-MS-CHAPv2
258
Configuring EAP-FAST authentication
Configure EAP-FAST authentication
259
Click Manage Wi-Fi profiles
Security Type list, select EAP-FAST
Configuring software tokens for 21 BlackBerry devices
Configure BlackBerry devices for RSA authentication
Click the name of the VPN profile that you want to change
Assign software tokens to a user account
265
266
267
Before you begin
269
270
Click Save all
272
273
Protecting and redistributing Devices
Preparing a device for redistribution to a new user
274
Deleting only work data from a device
Click Associate user
On the Devices menu, click Attached devices Device software
275
Are deleted when you delete work data
Deleted when you delete work data
Device permanently deletes the following work data
Call logs
Delete only work data from a device
277
IT administration command Description
Protection, you cannot use this command
Delete only the organization data
Protect a stolen device
Protect a lost device
Application data
Protect a lost device that a user might not recover
Click Specify new device password and lock device
281
Managing administrator Accounts
Change the roles for an administrator account
Change role permissions
Delete an administrator account
Delete a role
Click Delete role Click Yes Delete the role
Status list, click Delete user
Click Yes Delete the user
284
Managing groups and user Accounts
Managing groups
285
Default group Description of the default group
Remove a user account from a group
Click Remove from group membership
Change the properties of a group
Rename a group
Delete a group
Click Edit group
Managing user accounts
Move a user account to a different group
288
Delete a user account from the BlackBerry Enterprise Server
Update a user account manually
Add an administrator role to a user account
Update the contact list manually
Click Back to search
Resend service books to a BlackBerry device
Communications list, click Resend service books to a device
Click Refresh available user list from company directory
291
Managing the default distribution settings for jobs
Change default settings for a job schedule
292
Change how IT policies are sent to BlackBerry devices
Start time drop-down list, click the appropriate option. If
Necessary, set the start time and end time
293
Default value is
Perform any of the following tasks 294
295
BlackBerry Device Software
Recurrence days cannot overlap
296
If necessary, change the start time and end time
297
Managing the distribution settings for a specific job
Specify the start time and priority for a job
Change how a job sends IT policies to BlackBerry devices
Click Edit job
Scheduled deployment days drop-down list, click
301
302
303
Managing BlackBerry Java Applications on BlackBerry devices
304
Click a software configuration
Click Edit software configuration
Click Add applications to software configuration
305
Managing software configurations
Remove a software configuration from a group
Remove a software configuration from multiple user accounts
Remove a software configuration from a user account
Delete a software configuration
307
Restricting user access to content on web servers
Specify web address patterns
Create a pull rule
Control type drop-down list, click Pull Click the Add icon
Assign a pull rule to the members of a group
Assign a pull rule to user accounts
Click Manage users Click View more criteria
Search for a group
Prevent users from accessing specific media types
Configure download limits for media content types
Click Add Click Save
Default download limits for media content types
Mime type Maximum number of bytes per connection KB
313
Configure download limits for media content types
Administration Guide
After you finish
317
318
Click a BlackBerry MDS Connection Service instance
Pull Authorization drop-down list, click Yes
319
Create push initiators for push applications
320
Turn on push authorization
After you finish Create a push rule
321
Create a push rule
Assign push initiators to a push rule
After you finish Assign push initiators to the push rule
322
Assign a push rule to the members of a group
Assign a push rule to user accounts
Managing push application requests
Specify device ports for application-reliable push requests
Click Save all Click Restart instance Related information
325
326
327
Managing the wireless backup and recovery of organizer data
Managing organizer data Synchronization
328
Turning off organizer data synchronization
329
330
Changing how organizer data synchronizes
331
Click Continue to user information edit Click Save all
Synchronizing contact pictures
333
334
Managing message forwarding
335
Click Continue to user information edit Click Save all
Turn off email message forwarding to a user account
337
338
Managing the incoming message queue
339
Managing wireless message reconciliation
Managing access to remote message data
Click Edit instance
Managing email messages that contain Html and rich content
343
Click Save All
Resend the updated IT policy to the BlackBerry devices
Click the name of the IT policy that you want to change
345
Synchronizing folders on the BlackBerry device
346
Click Continue to user information edit Click Save all
Configuring access to documents on remote file systems
348
Click Save all Examples for step
Click the instance that you want to change 350
Managing signatures and disclaimers in email messages
351
Click Edit instance
Specify conflict rules for disclaimers
Turn off disclaimers for email messages
353
Sending notification messages to users
Click Select from mail address list
354
Send a notification message to group members
Type the message that you want to send
Click Send message
Click Send message to users in group
Change the size of the message state database
Send a notification message to a user
Click Send message to user
356
Related information
358
Limitations for supported attachment file formats
Format Extension
Format and extension Limitations
Table of contents
Connector shape route that connects to shapes
OpenOffice Format version 1.1 .odp
Files IBM Lotus Symphony only
Charts
Style effects for cells shadow, borders
Headers and footers
Drawing objects and Fontwork objects
BlackBerry Attachment Service optimization settings
Setting Description Range
Default value is Server busy time
Suggested file sizes for attachments
File format Suggested size
ZIP archives Less than 2000 KB
365
Administration Guide
Prevent users from sending large attachments
368
Managing calendars
369
Type the following command
Turn off client throttling in Microsoft Exchange
Type New-ThrottlingPolicy BESPolicy
370
After you finish
Example
372
373
Administration Guide
Correcting calendar synchronization errors on devices
Global Setting that you specify applies to all users
Setting that you specify applies to a specific user
Level Description
Turn off corrective calendar synchronization
Example Turning off the process for all users
Example Turning off the process for a specific user
Example Viewing the global calendar synchronization settings
Administration Guide
Configure when corrective calendar synchronization runs
379
Logging information for corrective calendar synchronization
Email application
380
Delete a setting for corrective calendar synchronization
Specifies that a calendar item is missing on the device
381
Communications list, click Synchronize calendar
Type regedit
Installing a collaboration client on BlackBerry devices
Managing instant messaging
Click Edit instance
Access server
Option Description
For Microsoft Office
386
Managing instant messaging sessions
387
Managing instant messaging features
388
Prevent users from saving instant messaging conversations
Back up the UserInfoConfig.xml file
Save the UserInfoConfig.xml file
Component Administration Service
Managing a BlackBerry Domain
Restarting BlackBerry Enterprise Server components
BlackBerry Enterprise Server
Administration GuideManaging a BlackBerry Domain
Using the BlackBerry Enterprise Trait Tool
Use the BlackBerry Enterprise Trait Tool
BlackBerry Enterprise Trait Tool traits
Trait Description
For proxy authentication
Calendar contents on the device. When the amount of time
Default value is false 0, the BlackBerry Messaging Agent
If you configure the EWSServiceAccount trait
EWSEnable
BlackBerry Messaging Agent, all BlackBerry Messaging Agent
SP1
Instances on all BlackBerry Enterprise Server instances
Users status using Microsoft Exchange Web Services or by
Users status using Microsoft Exchange public folders
ExchangeDisableConfirmEmailDelivery
ExchangeEnableMLangConversion
ExchangeSmartSyncEnable
For calendar errors on devices
Mailboxes, change the value to true
Might be an impact on the performance of your organizations
Default value is Daily
Default value is true 1, the BlackBerry Messaging Agent
Corrects calendar synchronization errors automatically
Calendar synchronization errors on devices at 1200 AM
Default value is true 1, the BlackBerry Mail Store Service
Function, you can access the BlackBerry Messaging Agent
Default value
Disabled on the device
Default value is true 1, the BlackBerry Enterprise Server
Service can synchronize at the same time during a full
Services that the device can connect to, type the SRP IDs
Services. Separate the SRP IDs with a comma
Change the default value of this trait
Policies and service books
Additional processes for IT policies or service books
Books, change the value to false
Uses to update the list of BlackBerry Router instances
Default value is 75%
Processes for PIN encryption keys
RouterAutoDiscoveryMethod
UserHealthPercentage
BlackBerry Dispatcher uses this trait to change the User
Environment
Managing BlackBerry CAL keys
Add or delete a BlackBerry CAL key
407
Copy a BlackBerry CAL key to a text file
408
Configuring a Hosted BlackBerry services environment
409
Related information
411
Before you begin
Configuring a Hosted BlackBerry services environment
Restarting BlackBerry Enterprise Server components
Before you begin
Configuring BlackBerry Policy Service throttling
Type traittool -global -list
417
Administration Guide
Trait PolicyThrottlingP2PKeyRate -set
Delete a BlackBerry Policy Service throttling setting
420
421
422
Administration Guide
Click Controller
MaxUserDumpPerDay value field to
Click BlackBerry Collaboration Service
Change how the BlackBerry
Click BBAttachServer
Click BlackBerry Mobile Data Server
Click BlackBerryRouter
Click MailStore
Click PolicyServer
Change the default event monitoring level
BlackBerry Enterprise Server Alert Tool
Click SyncServer
Define a notification recipient
430
BlackBerry Enterprise Server Log files
Monitoring PIN messages, SMS text messages, and calls
Monitor PIN messages
Monitor SMS text messages
Turn off call logging
List of IT policies, click the appropriate IT policy
432
Log files for BlackBerry Enterprise Server components
433
434
On the Logging details tab, click Edit instance
Each section, in the Log auto-rolldrop-down list, click True
437
UTF-8 UTF-16LE Click Save all
438
Component identifiers for log files
Component identifier Logging component
BlackBerry MDS Connection Service log files
On the Logging tab, click Edit instance
Click Save all Related information
On the Logging tab, click Edit instance
Logging section, perform any of the following tasks
Trace how data packets travel inside the gateway
Click Yes
BlackBerry device retrieves from the PGP server 443
Connects using a proxy server
Attribute Description
BlackBerry device connections
Domain that requests the BlackBerry device connection
BlackBerry Collaboration Service log files
On the Instance information tab, click Edit instance
False
Trace how data packets travel inside the GME network
446
Configuration Database Windows
1433 Windows registry
On a 32-bit version
\BlackBerry
21099 BlackBerry Configuration Panel 448
Incoming data connections from, and outgoing data
Data connections between BlackBerry Administration
Connection Default port
2000 BlackBerry Administration Attachment Service 449
Type Number Connection
Outgoing conversion results of large attachments to
On a 64-bit version of Windows
1433 for
Outgoing syslog connections to the Snmp agent
4071 Windows registry On a 32-bit version
451
1433 for BlackBerry Configuration
\Research In Motion\
\BlackBerrySNMPAgent
\Parameters\UDPPort
BlackBerry Controller connection types and port numbers
BlackBerry Dispatcher connection types and port numbers
Port number Agent That BlackBerry Messaging Provides
5096 Windows registry Agent On a 32-bit version
\TcpPortDispatcher
Microsoft SQL Server hosts Windows
Server\Database\Port
Incoming data connection from the BlackBerry database
\SOFTWARE\Research Motion 455
Outgoing data connections to the BlackBerry Dispatcher
5096 Windows registry On a 32-bit version
456
4070 Windows registry On a 32-bit version
457
\UDPPort
Server\Agents\UDPPort
Incoming data connections from the BlackBerry database
If access control for push applications is turned on
459
7874 BlackBerry Administration Service
Incoming data connections for reliable pushes
Database Incoming data connections from, and outgoing data
BlackBerry Policy Service connection types and port numbers
55503 BlackBerry Configuration Service console Panel
3200 Connections to, the BlackBerry Dispatcher
\ServicePort
BlackBerry Router connection types and port numbers
\BlackBerryRouter
462
463
\DevicePort
464
CalHelper connection type and port number
Port number Agent That BlackBerry Messaging Provides 465
IBM Lotus Sametime connection type and port number
Microsoft Exchange connection types and port numbers
TLS
Connections to, the BlackBerry Collaboration Service
Novell GroupWise Messenger connection type and port number
Snmp agent connection types and port numbers
8300
Syslog connection type and port number
Troubleshooting36
Possible cause Possible solution
470
Troubleshooting BlackBerry Enterprise Server Performance
Press Enter 471
Troubleshooting Setting up user accounts
Troubleshooting Messaging
Messages are not delivered to BlackBerry devices
Troubleshooting Instant messaging
Text does not appear correctly in Unicode email messages
475
476
Troubleshooting BlackBerry Web Desktop Manager
Does not support the version
Troubleshooting Connections to the Wi-Fi network
BlackBerry device cannot connect to a Wi-Fi network
Click Wi-Fi Options
BlackBerry device is not assigned
Click Wi-Fi Tools Wi-Fi Diagnostics
Status fields for Wi-Fi connections
Indicator Description
Device is associated with the access point
Status indicators are the following icons
To a specific access point
Connection to an access point
Group Cipher
Cipher
Group ciphers have one of the following values
None
Status fields for VPN connections
Status fields for UMA or GAN connections
Status fields for BlackBerry Infrastructure connections
Arfcn
BlackBerry device cannot open a VPN connection
Status fields for Enterprise connections
Correctly Verify that Wi-Fi Preferred is selected
BlackBerry device is connected to a Wi-Fi network
Issue on the Wi-Fi network
Is displayed
Verify whether a BlackBerry device can resolve an IP address
Look up a computer name to resolve an IP address
Troubleshooting BlackBerry Administration Service pools
Troubleshooting BlackBerry Monitoring Service connections
User cannot log in to the BlackBerry Monitoring Service
Troubleshooting IT policies
492
Glossary37
Content protection
DSML-enabled
Enterprise Service
Device transport key
IT administration
Command
IP address
IPsec
Messaging server
Mirror database
Principal database
Triple DES
VoIP
Witness
Legal notice
498
499
Administration Guide