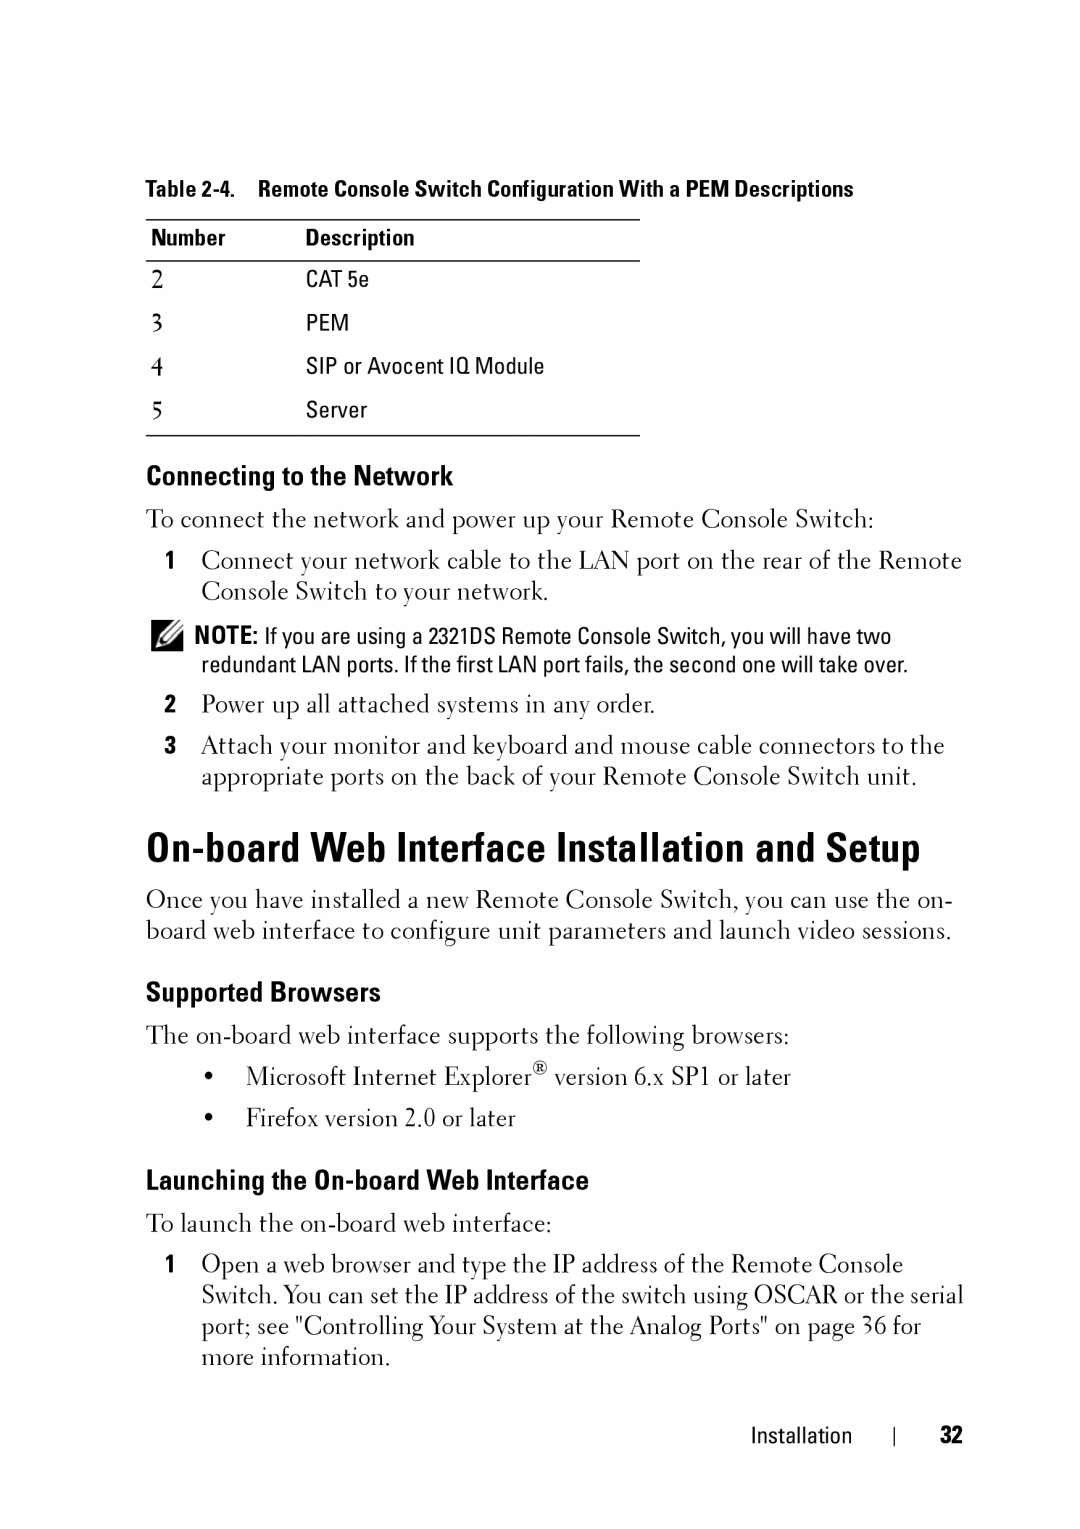
Table
Number Description
2CAT 5e
3PEM
4SIP or Avocent IQ Module
5Server
Connecting to the Network
To connect the network and power up your Remote Console Switch:
1Connect your network cable to the LAN port on the rear of the Remote Console Switch to your network.
![]() NOTE: If you are using a 2321DS Remote Console Switch, you will have two redundant LAN ports. If the first LAN port fails, the second one will take over.
NOTE: If you are using a 2321DS Remote Console Switch, you will have two redundant LAN ports. If the first LAN port fails, the second one will take over.
2Power up all attached systems in any order.
3Attach your monitor and keyboard and mouse cable connectors to the appropriate ports on the back of your Remote Console Switch unit.
On-board Web Interface Installation and Setup
Once you have installed a new Remote Console Switch, you can use the on- board web interface to configure unit parameters and launch video sessions.
Supported Browsers
The
•Microsoft Internet Explorer® version 6.x SP1 or later
•Firefox version 2.0 or later
Launching the On-board Web Interface
To launch the
1Open a web browser and type the IP address of the Remote Console Switch. You can set the IP address of the switch using OSCAR or the serial port; see "Controlling Your System at the Analog Ports" on page 36 for more information.
Installation
32